
Selecting the Right Indoor Plants for Propagation: A Step-by-Step Guide
Indoor plants not only bring a touch of nature into our homes but also provide numerous benefits, including improved air quality and a calming ambiance. If you’re looking to expand your indoor plant collection without breaking the bank, propagating plants from cuttings is a cost-effective and rewarding method. In this step-by-step guide, we will walk you through the process of selecting the right indoor plants for propagation and help you create a thriving indoor garden.
1. Assess the Health of Your Existing Plants
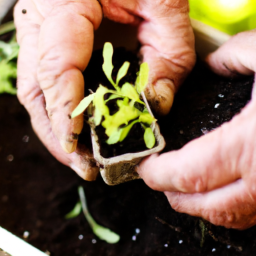
Before you start selecting plants for propagation, it’s essential to assess the health of your existing indoor plants. Look for plants that are thriving, disease-free, and have strong growth. These healthy plants will provide you with the best chance of successful propagation.
Inspect the foliage for any signs of pests or diseases. Avoid selecting plants with yellowing leaves, brown spots, or wilting foliage, as these may indicate underlying health issues. Remember, you want to propagate plants that are in their prime condition to ensure the best chance of success.
Additionally, consider the size and maturity of the plant. While smaller cuttings can be propagated, larger and more mature plants tend to have a higher success rate. Keep this in mind when selecting your plants for propagation.
2. Choose Plants Suitable for Propagation
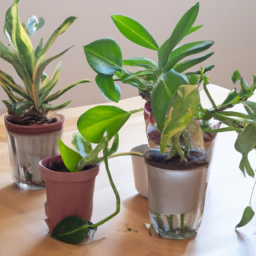
Not all indoor plants can be easily propagated from cuttings, so it’s important to choose plants that are known for their successful propagation rates. Here are a few popular indoor plants that are commonly propagated:
Pothos (Epipremnum aureum): Pothos is a versatile and hardy plant that can be propagated in water or soil. Look for healthy vines with several leaf nodes, as these are the areas where roots will develop.
Spider Plant (Chlorophytum comosum): Spider plants are known for their long, arching leaves and spider-like plantlets that dangle from the mother plant. These plantlets can be easily propagated by gently detaching them from the parent plant and placing them in water or soil.
Snake Plant (Sansevieria trifasciata): Snake plants are popular for their striking upright leaves and low maintenance requirements. They can be propagated by dividing the rhizomes or by rooting leaf cuttings in water or soil.
ZZ Plant (Zamioculcas zamiifolia): ZZ plants are known for their glossy, dark green leaves and ability to thrive in low-light conditions. Propagation can be done by dividing the rhizomes or by rooting leaf cuttings.
These are just a few examples, but there are many other indoor plants that can be successfully propagated from cuttings. Research the specific propagation methods for the plants you’re interested in to ensure you follow the correct techniques.
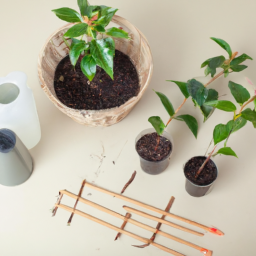
3. Prepare the Propagation Materials
Once you have selected the indoor plants you wish to propagate, it’s time to gather the necessary materials. Here’s what you’ll need:
Sharp Pruning Shears: A pair of sharp pruning shears will allow you to make clean and precise cuts, promoting successful root development.
Rooting Hormone (optional): Rooting hormone can enhance the chances of successful propagation by stimulating root growth. While not always necessary, it can be beneficial for certain plants.
Potting Mix or Water: Depending on the propagation method you choose, you will need either a well-draining potting mix or clean water for rooting the cuttings.
Pots or Containers: Select small pots or containers that are suitable for the size of the cuttings. Ensure they have drainage holes to prevent waterlogging.
Misting Bottle: A misting bottle filled with water will help maintain the humidity levels around the cuttings, promoting successful root development.
Labels: It’s important to label your pots or containers with the name of the plant and the date of propagation. This will help you keep track of your progress and ensure proper care.
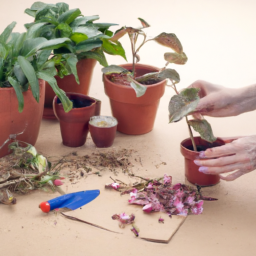
4. Take the Cuttings
Now that you have everything prepared, it’s time to take the cuttings from your selected indoor plants. Follow these steps for successful cutting propagation:
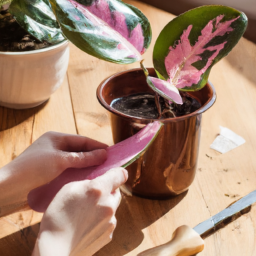
Step 1: Using sharp pruning shears, make a clean cut just below a leaf node. Leaf nodes are the points where leaves emerge from the stem and are crucial for root development.
Step 2: Remove any lower leaves near the bottom of the cutting, leaving only a few leaves at the top. This will prevent excess moisture loss and allow the cutting to focus on root development.
Step 3: If using rooting hormone, dip the cut end of the stem into the hormone powder or solution. Gently tap off any excess hormone to avoid overdosing.
Step 4: Insert the cut end of the stem into the potting mix or place it in a container filled with water, ensuring that at least one leaf node is submerged. If using water, change it regularly to prevent stagnation.
Step 5: Mist the cuttings with water using a misting bottle to increase humidity levels and prevent excessive moisture loss.
5. Provide Optimal Growing Conditions
Once your cuttings are in place, it’s crucial to provide them with the optimal growing conditions to encourage root development. Here are a few key factors to consider:
Light: Most indoor plants require bright, indirect light for successful propagation. Place your cuttings in a location that receives bright but filtered light, away from direct sunlight.
Temperature: Maintain a consistent temperature between 65-75°F (18-24°C) for optimal root development. Avoid placing the cuttings near drafts or temperature extremes.
Humidity: Indoor environments are often dry, so it’s important to increase humidity levels around the cuttings. You can achieve this by covering them with a clear plastic bag or placing them in a mini greenhouse.
Watering: If using a potting mix, water the cuttings when the top inch of soil feels dry. Avoid overwatering, as it can lead to root rot. If using water for propagation, change it regularly to prevent bacterial growth.
Patience: Root development takes time, so be patient and resist the urge to disturb or check the progress too frequently. It can take several weeks to months for roots to form, depending on the plant species.
By providing the ideal growing conditions, you give your cuttings the best chance to develop strong and healthy roots, ensuring successful propagation.
Propagating indoor plants from cuttings is a rewarding and cost-effective way to expand your plant collection. By selecting healthy plants, choosing suitable species for propagation, preparing the necessary materials, taking the cuttings correctly, and providing optimal growing conditions, you can enjoy the satisfaction of watching your indoor garden flourish. Remember, each plant may have specific propagation requirements, so always research and adapt your approach accordingly. Happy propagating!
Essential Tools and Materials for Propagating Indoor Plants from Cuttings
Introduction
When it comes to propagating indoor plants from cuttings, having the right tools and materials is essential for success. This step-by-step guide will walk you through the process of gathering everything you need to ensure healthy and successful propagation. From basic tools to specialized materials, we’ll cover it all to help you become an expert in propagating indoor plants.
1. Pruning Shears or Scissors
Pruning shears or scissors are essential tools for taking cuttings from your indoor plants. These tools allow you to make clean and precise cuts, minimizing damage to the parent plant and ensuring the best chance of successful propagation. Look for shears or scissors with sharp blades that can easily cut through plant stems. It’s important to keep your pruning tools clean and sanitized to prevent the spread of diseases or pests.
When taking cuttings, make sure to choose a healthy and mature stem from the parent plant. Avoid using stems that are too young or too old, as they may not root successfully. Using your pruning shears or scissors, make a clean cut just below a node, which is where the leaves or buds emerge. This will promote the growth of new roots.
2. Rooting Hormone
Rooting hormone is a valuable tool for promoting root development in plant cuttings. It contains growth hormones that stimulate root growth, increasing the chances of successful propagation. There are different types of rooting hormones available, including powder, liquid, and gel forms. Choose the one that suits your preference and follow the instructions for proper application.
To apply rooting hormone, dip the cut end of the stem into the hormone, making sure to coat it evenly. Gently tap off any excess hormone before planting the cutting in the growing medium. Rooting hormone can significantly improve the success rate of your cuttings, especially for plants that are more difficult to propagate.
3. Growing Medium
A suitable growing medium is crucial for the successful propagation of indoor plants from cuttings. The ideal medium should be well-draining, provide adequate moisture retention, and offer good aeration for root development. There are various options to choose from, including perlite, vermiculite, peat moss, and a combination of these materials.
Fill a clean container with the chosen growing medium, ensuring it is moist but not waterlogged. Make a small hole in the medium using a pencil or your finger, and gently insert the cutting into the hole. Firmly press the medium around the stem to ensure good contact and stability. The growing medium should support the cutting while allowing the development of new roots.
4. Containers and Propagation Trays
Having suitable containers and propagation trays is essential for organizing and managing your plant cuttings. Choose containers that are clean, sterilized, and appropriately sized for the number of cuttings you plan to propagate. Plastic pots or trays with drainage holes are commonly used for this purpose.
Propagation trays with individual cells or compartments are particularly useful for keeping the cuttings separate and preventing them from tangling or competing for resources. These trays also make it easier to monitor the growth and progress of each cutting. Remember to label your containers or trays to keep track of the different plant species or varieties you are propagating.
5. Transparent Plastic Bags or Domes
Creating a humid environment around your cuttings is crucial for their successful propagation. Transparent plastic bags or domes can help retain moisture and create a mini greenhouse effect, promoting root development. These covers also help maintain a stable temperature and protect the cuttings from drafts or fluctuations in humidity.
Place the plastic bag or dome over the containers or trays, ensuring it doesn’t touch the leaves or cuttings directly. This will create a humid microclimate that encourages root growth. However, it’s important to periodically remove the cover to allow fresh air circulation and prevent the buildup of excess moisture, which can lead to fungal diseases.
Conclusion
Having the right tools and materials is essential for propagating indoor plants from cuttings successfully. Pruning shears or scissors, rooting hormone, a suitable growing medium, containers and propagation trays, and transparent plastic bags or domes are all key components of a well-equipped propagation setup. By gathering these essential tools and materials, you’ll be well-prepared to embark on your journey of propagating indoor plants from cuttings. Remember to follow the step-by-step guide provided in this article for the best results. Happy propagating!
Preparing the Cuttings: Techniques for Successful Propagation
Introduction
Propagating indoor plants from cuttings is an exciting and rewarding way to expand your plant collection. With the right techniques, you can easily create new plants from existing ones, allowing you to share your green thumb with friends and family. In this step-by-step guide, we will explore the essential techniques for preparing cuttings and ensuring successful propagation. So, roll up your sleeves and let’s get started!
Choosing the Right Plant
Before diving into the process of preparing cuttings, it’s crucial to select the right plant for propagation. Not all indoor plants are suitable for this method, so it’s essential to choose species that readily root from cuttings. Some popular choices include pothos, spider plants, philodendrons, and snake plants. These plants are known for their ability to root easily, making them perfect candidates for propagation.
When selecting a plant, ensure it is healthy and free from any diseases or pests. Look for vibrant foliage, sturdy stems, and overall vitality. Avoid plants that are stressed or struggling, as they may not root successfully. Remember, healthy parent plants often produce healthy offspring!
Gathering the Tools and Materials
Once you’ve chosen the perfect plant for propagation, it’s time to gather the necessary tools and materials. Here’s a list of what you’ll need:
1. Sharp and clean pruning shears: These are essential for taking clean and precise cuttings without damaging the parent plant.
2. Clean containers: Select small pots or containers with drainage holes to plant your cuttings. Ensure they are clean and sterilized to prevent any diseases.
3. Well-draining potting mix: Prepare a suitable potting mix that provides adequate drainage while retaining moisture. A mix of perlite, vermiculite, and peat moss works well for most indoor plants.
4. Rooting hormone (optional): Although not necessary, using a rooting hormone can increase the chances of successful rooting. It helps stimulate root development in the cuttings.
5. Spray bottle or mister: This will be used to maintain humidity around the cuttings, promoting root growth.
6. Clear plastic bags or a propagation dome: These will create a mini greenhouse effect, maintaining high humidity levels around the cuttings.
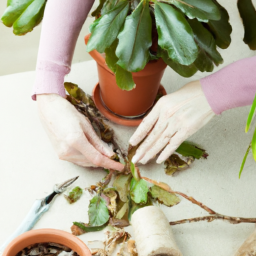
Taking the Cuttings
Now that you have all the necessary tools and materials, it’s time to take the cuttings. Follow these steps for successful cutting preparation:
1. Identify the right stem: Look for a healthy stem on the parent plant that is free from any flowers or buds. Select a stem that is neither too young nor too old. Ideally, choose a stem that is semi-hardwood, meaning it is neither soft and flexible nor woody and rigid.
2. Make a clean cut: Using sharp pruning shears, make a clean cut just below a node (the point where leaves emerge). Ensure the cutting is 3-6 inches long, with at least two sets of leaves.
3. Remove lower leaves: Carefully remove the lower leaves from the cutting, leaving only a few sets of leaves at the top. This reduces moisture loss and directs energy towards root development.
4. Optional: Apply rooting hormone: If using rooting hormone, dip the cut end of the stem into the hormone powder or gel. Gently tap off any excess hormone to avoid overdosing.
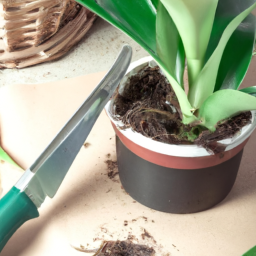
5. Plant the cutting: Fill a clean container with the prepared potting mix. Create a small hole in the center using a pencil or your finger. Insert the cutting into the hole, ensuring at least one set of leaves is above the soil surface.
6. Mist the cutting: Lightly mist the cutting and the surrounding soil with water to settle the potting mix and provide initial moisture.
Providing the Ideal Environment
To ensure successful propagation, it’s crucial to provide the cuttings with an ideal environment that promotes root development. Follow these steps to create the perfect conditions:
1. Maintain humidity: Place the containers with cuttings inside clear plastic bags or under a propagation dome to create a humid environment. Mist the cuttings and the inside of the bags or dome regularly to maintain moisture levels.
2. Provide indirect light: Place the cuttings in a location with bright, indirect light. Avoid direct sunlight, as it can scorch the delicate cuttings. A north-facing window or a few feet away from an east or west-facing window is ideal.
3. Avoid temperature extremes: Keep the cuttings away from drafts, extreme heat, or cold. Aim for a temperature range between 65-75°F (18-24°C) for optimal root development.
4. Monitor moisture levels: Check the moisture level of the potting mix regularly. It should be slightly moist but not waterlogged. Overwatering can lead to rot, while underwatering can cause the cuttings to dry out. Adjust watering accordingly.
Patience and Care
Propagation is a waiting game, and it requires patience and care. Here are some essential tips to ensure your cuttings thrive:
1. Be patient: Rooting can take anywhere from a few weeks to several months, depending on the plant species and environmental conditions. Avoid the temptation to disturb the cuttings or check for roots too frequently.
2. Monitor for root growth: After a few weeks, gently tug on the cutting to check for resistance. If you feel resistance, it indicates that roots have started to develop. However, if there is no resistance, give the cuttings more time to root.
3. Gradual acclimation: Once the cuttings have rooted, gradually acclimate them to normal indoor conditions by removing the plastic bags or propagation dome. Increase their exposure to light and decrease misting frequency over a week or two.
4. Transplanting: Once the roots have developed a healthy system, usually after a few months, transplant the cuttings into individual pots filled with regular potting mix. Continue caring for them as you would for mature plants.
Conclusion
Propagation through cuttings is a fascinating and rewarding process that allows you to create new indoor plants with ease. By following the step-by-step techniques outlined in this guide, you can successfully prepare cuttings and ensure their successful propagation. Remember to choose the right plant, gather the necessary tools, take clean cuttings, provide an ideal environment, and be patient and caring throughout the process. So, roll up your sleeves, get your hands dirty, and enjoy the journey of propagating indoor plants from cuttings!
Creating the Ideal Environment for Rooting Indoor Plant Cuttings
Introduction
When it comes to propagating indoor plants from cuttings, creating the ideal environment for rooting is crucial for the success of your new plants. Providing the right conditions will ensure that the cuttings develop strong roots and thrive in their new pots. In this step-by-step guide, we will walk you through the process of creating an optimal environment for rooting indoor plant cuttings.
Choosing the Right Containers
The first step in creating the ideal environment for rooting indoor plant cuttings is selecting the right containers. You will need small pots or containers that are suitable for holding the cuttings and promoting root growth. It is important to choose containers with drainage holes to prevent waterlogging, which can lead to root rot.
When it comes to container materials, options such as plastic, clay, or biodegradable pots are available. Plastic pots are lightweight, affordable, and retain moisture well. Clay pots, on the other hand, are porous and allow for better airflow, but they tend to dry out faster. Biodegradable pots are an eco-friendly option that can be planted directly into the soil once the roots have developed.
Preparing the Potting Mix
The next step is preparing the potting mix, which will provide the essential nutrients and support for the rooting process. A well-draining and nutrient-rich mix is crucial for successful root development. You can either purchase a pre-made potting mix or create your own.
If you decide to make your own potting mix, combine equal parts of peat moss, perlite, and vermiculite. Peat moss retains moisture, perlite improves drainage, and vermiculite helps with water retention. This mixture provides a balanced environment for the cuttings to establish roots.
Providing the Right Lighting
Lighting plays a vital role in the rooting process of indoor plant cuttings. While natural sunlight is ideal, it may not always be accessible or consistent. In such cases, artificial lighting can be used to provide the necessary light intensity and duration.
If you choose natural sunlight, place your cuttings in a bright location, but avoid direct sunlight, as it can scorch the delicate new growth. East or west-facing windows are usually the best options, as they provide bright, indirect light throughout the day.
If you opt for artificial lighting, use fluorescent grow lights or LED lights specifically designed for plants. Position the lights a few inches above the cuttings and keep them on for 12-16 hours a day. This will mimic the natural daylight cycle and promote healthy growth.
Maintaining the Right Temperature and Humidity
Temperature and humidity are important factors to consider when creating the ideal environment for rooting indoor plant cuttings. Most indoor plants prefer temperatures between 65-75°F (18-24°C) during the day and slightly cooler temperatures at night.
To maintain the desired temperature, you can use a heating mat specifically designed for plant propagation. Place the pots on the heating mat, set it to the appropriate temperature, and monitor it regularly to ensure it remains within the optimal range.
Humidity is equally important, as it prevents excessive moisture loss from the cuttings. You can increase humidity by placing a clear plastic bag or a propagation dome over the pots. This creates a mini greenhouse effect and helps retain moisture. However, it is crucial to periodically remove the covering to prevent fungal diseases caused by excessive humidity.
Watering and Care
Proper watering is essential for the success of rooting indoor plant cuttings. Overwatering can lead to root rot, while underwatering can cause the cuttings to dry out and fail to root. The key is to keep the potting mix consistently moist but not waterlogged.
Check the moisture level of the potting mix regularly by inserting your finger about an inch deep. If it feels dry, it’s time to water. Use a watering can with a fine nozzle to gently water the cuttings, ensuring that the water reaches the bottom of the pot. Allow any excess water to drain out through the drainage holes.
In addition to watering, it is important to monitor the overall health of the cuttings. Remove any yellowing or decaying leaves promptly to prevent the spread of diseases. Keep an eye out for pests and treat them immediately if detected. Regularly inspect the roots for signs of growth and ensure that the environment remains clean and free from debris.
Conclusion
Creating the ideal environment for rooting indoor plant cuttings is a crucial step in the propagation process. By selecting the right containers, preparing a suitable potting mix, providing adequate lighting, maintaining optimal temperature and humidity, and practicing proper watering and care, you can increase the chances of successful root development and the growth of healthy new plants. Remember to be patient and give your cuttings the time they need to establish strong roots before transplanting them into larger pots. With the right environment and care, you can enjoy the satisfaction of propagating your own indoor plants and expanding your green oasis.
Caring for Newly Propagated Indoor Plants: Tips and Tricks
Introduction
Indoor plants add a touch of greenery and freshness to any living space. Propagating indoor plants from cuttings is an excellent way to expand your collection without spending a fortune. Once you’ve successfully propagated your plants, it’s crucial to provide them with the proper care to ensure their healthy growth and development. In this step-by-step guide, we will explore the essential tips and tricks for caring for newly propagated indoor plants.
1. Providing the Right Environment
After propagating indoor plants from cuttings, it’s essential to create an environment that promotes their growth. Here are some key factors to consider:
Light: Most indoor plants require bright, indirect light. Place your newly propagated plants near a window where they can receive ample sunlight without being exposed to direct rays that may scorch their leaves. If your space lacks natural light, consider using artificial grow lights to provide the necessary illumination.
Temperature: Maintaining the right temperature is crucial for the healthy growth of your newly propagated plants. Most indoor plants thrive in temperatures between 60-75°F (15-24°C). Avoid exposing them to drafts or extreme temperature fluctuations, which can cause stress and hinder their development.
Humidity: Indoor environments often lack the humidity levels that many plants prefer. Increase humidity around your newly propagated plants by placing them on a tray filled with water and pebbles or by using a humidifier. Mist the leaves regularly to provide additional moisture.
2. Watering and Moisture Management
Proper watering is essential for the health of your newly propagated indoor plants. Here’s how to establish an effective watering routine:
Watering Frequency: The frequency of watering depends on various factors, such as the type of plant, potting mix, and environmental conditions. As a general rule, allow the top inch (2.5 cm) of the potting mix to dry out before watering again. Overwatering can lead to root rot, while underwatering can cause dehydration and stunted growth.
Watering Technique: When watering your newly propagated plants, aim to moisten the entire root ball evenly. Use a watering can with a narrow spout or a spray bottle to avoid excessive water pooling on the leaves, which can lead to fungal diseases. Ensure the water drains properly by using pots with drainage holes.
Moisture Management: In addition to regular watering, you can help maintain moisture levels by applying a layer of organic mulch on the potting mix surface. Mulch acts as a natural insulator, reducing water evaporation and providing a more stable environment for the roots.
3. Fertilizing for Optimal Growth
Newly propagated indoor plants require adequate nutrients to support their growth. Here’s how to fertilize them effectively:
Choosing the Right Fertilizer: Select a balanced, water-soluble fertilizer specifically formulated for indoor plants. Look for a fertilizer with equal ratios of nitrogen (N), phosphorus (P), and potassium (K), along with essential micronutrients. Avoid over-fertilizing, as it can lead to nutrient burn and damage the plants.
Fertilizing Schedule: Start fertilizing your newly propagated plants about a month after propagation, once they have established a root system. Follow the instructions on the fertilizer packaging for the recommended dosage and frequency. Generally, indoor plants benefit from monthly or bi-monthly fertilization during the growing season (spring and summer).
Application Method: Dilute the fertilizer in water according to the package instructions. Apply the solution to the soil around the base of the plant, avoiding direct contact with the leaves. Water the plant immediately after fertilizing to ensure proper nutrient absorption.
Conclusion
Caring for newly propagated indoor plants requires attention to detail and a nurturing approach. By providing the right environment, managing watering and moisture effectively, and fertilizing appropriately, you can ensure the healthy growth and development of your plants. Remember to monitor your plants closely, observe their response to care, and make adjustments accordingly. With time and dedication, your newly propagated indoor plants will thrive and bring beauty to your home or office space.
Frequently Asked Questions (FAQ)
1. How do I propagate indoor plants from cuttings?
Propagating indoor plants from cuttings involves taking a portion of a healthy plant and encouraging it to grow roots to form a new plant. Here is a step-by-step guide:
1.1. Step 1: Select a healthy plant
Choose a healthy plant with strong stems and vibrant foliage for the best chances of successful propagation.
1.2. Step 2: Prepare the cutting
Take a clean pair of pruning shears or a sharp knife and make a clean cut just below a node (where a leaf or bud emerges) on the stem. The cutting should be around 4-6 inches long.
1.3. Step 3: Remove lower leaves
Remove the lower leaves from the cutting, leaving only a few leaves at the top. This helps prevent excessive moisture loss and encourages root development.
1.4. Step 4: Dip in rooting hormone (optional)
Some gardeners like to dip the cut end of the stem in a rooting hormone powder or gel to promote faster root growth. This step is optional but can increase success rates.
1.5. Step 5: Plant the cutting
Insert the cut end of the stem into a well-draining potting mix or a mixture of perlite and peat moss. Ensure that at least one node is buried in the soil. Gently firm the soil around the cutting to provide stability.
1.6. Step 6: Provide appropriate care
Place the potted cutting in a warm and bright location, but avoid direct sunlight. Keep the soil moist but not waterlogged. Mist the cutting occasionally to maintain humidity.
1.7. Step 7: Monitor and wait
Regularly check the cutting for signs of root growth, such as new leaf development or resistance when gently tugged. Be patient, as it may take several weeks or even months for roots to form.
1.8. Step 8: Transplanting
Once the cutting has established roots, it can be transplanted into a larger pot with regular potting soil. Continue to provide proper care to help the new plant thrive.
2. Which indoor plants can be propagated from cuttings?
Many indoor plants can be propagated from cuttings, including but not limited to:
- Pothos
- Spider plant
- Snake plant
- English ivy
- Philodendron
- Jade plant
- ZZ plant
3. When is the best time to take cuttings for propagation?
The best time to take cuttings for propagation is during the plant’s active growth period, typically in spring or early summer. This is when the plant’s energy is focused on new growth, increasing the chances of successful rooting.
4. How long does it take for cuttings to root?
The time it takes for cuttings to root can vary depending on the plant species and environmental conditions. In general, it can take anywhere from a few weeks to several months for roots to develop. Patience is key during the propagation process.
5. Can I propagate indoor plants in water instead of soil?
Yes, many indoor plants can be propagated in water. Simply place the cuttings in a container with clean water, ensuring that the nodes are submerged. Change the water regularly to prevent stagnation and monitor the development of roots. Once roots have formed, the cutting can be transferred to soil.
6. How often should I water the cuttings?
It is important to keep the soil or water moist but not waterlogged. Water the cuttings when the top inch of soil feels dry or when the water level in the container decreases. Overwatering can lead to root rot, so it’s crucial to maintain proper moisture levels.
7. Should I use a rooting hormone for propagation?
Using a rooting hormone is optional but
Dr. Olivia Green is a botanist with over two decades of experience in indoor plant cultivation. She holds a Ph.D. in Plant Biology and has dedicated her career to researching plant behavior in controlled environments. Dr. Green is passionate about helping plant enthusiasts master the art of indoor gardening through her extensive knowledge and practical insights.