Welcome to our blog post on the art of nurturing tiny cuttings and achieving success with leaf propagation. In this guide, we will explore the fascinating world of plant propagation through leaf cuttings, sharing tips, techniques, and insights to help you master this rewarding gardening practice. Whether you are a seasoned plant enthusiast or a beginner looking to expand your green thumb, this article will provide you with the knowledge and tools to successfully propagate plants from leaves. So, let’s dive in and discover the wonders of nurturing tiny cuttings: success with leaf propagation.

The Basics of Leaf Propagation: A Guide to Nurturing Tiny Cuttings
Leaf propagation is a fascinating and rewarding method of plant propagation that allows you to create new plants from existing ones. It involves taking a leaf cutting from a healthy plant and encouraging it to grow roots and develop into a new plant. This technique is particularly useful for plants that are difficult to propagate through other methods, or for those plants that you simply want to propagate more of. In this guide, we will explore the step-by-step process of nurturing tiny cuttings through leaf propagation.
Choosing the Right Leaf
Before you begin the leaf propagation process, it is crucial to select the right leaf for propagation. Choose a healthy leaf from a mature plant that is free from any diseases or pests. Look for a leaf that is fully developed, with no signs of damage or discoloration. It is also important to choose a leaf that is not too old or too young, as this can affect its ability to root and grow into a new plant.
When selecting a leaf, make sure to choose one that is large enough to provide sufficient nutrients for the new plant to develop. Avoid selecting leaves that are too small or too fragile, as they may not have enough energy reserves to support the growth of new roots and shoots.
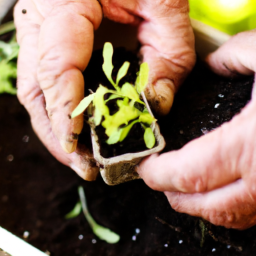
Once you have chosen the right leaf for propagation, gently remove it from the plant by making a clean cut at the base of the leaf stem. Be careful not to damage the leaf or the stem, as this can hinder the rooting process.
Preparing the Leaf Cutting
After you have selected a suitable leaf for propagation, it is time to prepare the leaf cutting for rooting. Start by removing any excess foliage from the leaf, leaving only a small portion of the stem attached to the leaf blade. This will help prevent excessive water loss and allow the cutting to focus its energy on root development.
Next, you can choose to apply a rooting hormone to the cut end of the leaf stem. Rooting hormones contain growth-promoting substances that can enhance the rooting process and increase the chances of successful propagation. While the use of rooting hormones is optional, it can significantly improve the success rate of leaf propagation.
Once you have prepared the leaf cutting, it is time to plant it in a suitable growing medium. Fill a small container with a well-draining soil mix or a propagation medium specifically designed for leaf propagation. Make a small hole in the soil and gently insert the leaf cutting, ensuring that the cut end is in contact with the soil. Firmly press the soil around the cutting to provide stability.
Nurturing the Leaf Cutting
Now that you have planted the leaf cutting, it is essential to provide the right conditions for its growth and development. Place the container in a warm and brightly lit location, but avoid direct sunlight, as it can scorch the delicate leaf cutting. A temperature range of 65-75°F (18-24°C) is ideal for most plants to encourage root formation.
Keep the soil consistently moist but not waterlogged. Overwatering can lead to root rot, while underwatering can cause the cutting to dry out and fail to root. Mist the cutting and the surrounding soil with water regularly to maintain the necessary humidity levels. You can also cover the container with a plastic bag or a clear plastic dome to create a mini greenhouse effect and retain moisture.
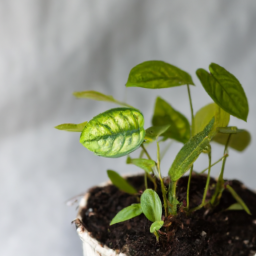
Monitor the leaf cutting regularly for signs of growth. After a few weeks, you may start to see small roots emerging from the cut end of the stem. This is a positive sign that the leaf cutting is successfully rooting. As the roots develop, you can gradually reduce the humidity levels by removing the plastic covering. This will help the new plant acclimate to normal environmental conditions.
Once the leaf cutting has developed a sufficient root system and started to produce new growth, you can consider transplanting it into a larger pot or directly into your garden. Be gentle when handling the new plant to avoid damaging the delicate roots. Provide the plant with proper care and maintenance, including regular watering, fertilizing, and protection from pests and diseases.
Leaf propagation can be a rewarding and enjoyable way to expand your plant collection or share your favorite plants with others. By following the steps outlined in this guide, you can increase your chances of success and nurture tiny cuttings into thriving new plants. Remember to be patient and attentive to the needs of your leaf cuttings, and soon you will be rewarded with a beautiful and flourishing plant.
Step-by-Step Instructions for Successful Leaf Propagation
Preparing the Cuttings
Leaf propagation is an exciting and rewarding method to propagate plants. It allows you to create new plants from a single leaf, giving you the opportunity to expand your garden or share your favorite plants with friends and family. To ensure successful leaf propagation, follow these step-by-step instructions:
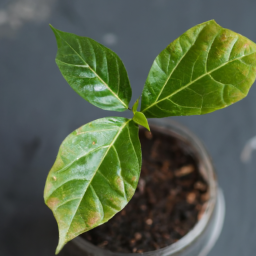
1. Select a healthy leaf: Choose a mature, healthy leaf from the parent plant. Look for leaves that are free from any signs of disease or damage. The leaf should be plump and vibrant in color.
2. Cut the leaf: Use a clean, sharp knife or scissors to make a clean cut just below the node. The node is the point where the leaf attaches to the stem. Make sure to include a small portion of the stem with the leaf.
3. Remove lower leaves: Gently remove any lower leaves from the stem, leaving only a few leaves at the top. This will help promote better air circulation and prevent the cutting from rotting.
Preparing the Potting Medium
The potting medium plays a crucial role in the success of leaf propagation. It provides the necessary support, moisture, and nutrients for the cutting to develop roots. Follow these steps to prepare the perfect potting medium:
1. Choose the right medium: Leaf cuttings can be propagated in various potting mediums such as perlite, vermiculite, or a mixture of peat moss and perlite. Select a medium that is well-draining and lightweight.
2. Sterilize the medium: To prevent the growth of harmful pathogens, sterilize the potting medium by baking it in the oven at 180°F (82°C) for 30 minutes. Allow it to cool completely before use.
3. Fill the container: Fill a small container or seed tray with the sterilized potting medium. Make sure the container has drainage holes to prevent waterlogging.
Planting and Nurturing the Cuttings
Now that you have prepared the cuttings and potting medium, it’s time to plant and nurture the cuttings for successful leaf propagation:
1. Plant the cuttings: Make a small hole in the potting medium using a pencil or your finger. Insert the stem of the leaf cutting into the hole, ensuring that the leaf is above the surface. Gently press the medium around the stem to secure it in place.
2. Mist the cuttings: Lightly mist the cuttings and the potting medium with water to provide moisture. Avoid overwatering, as excessive moisture can lead to rotting.
3. Create a mini greenhouse: Cover the container with a clear plastic bag or a plastic dome to create a mini greenhouse effect. This will help maintain humidity and create a favorable environment for root development.
4. Place in a bright location: Find a bright, indirect light location for the cuttings. Avoid direct sunlight, as it can scorch the delicate leaves. A north-facing window or a spot under grow lights can be ideal.
5. Maintain humidity: Check the cuttings regularly and mist them if the potting medium starts to dry out. The humidity inside the mini greenhouse should remain constant to support root growth.
6. Monitor for root development: After a few weeks, gently tug on the leaf to check for resistance. If you feel resistance, it indicates that roots have developed. At this stage, you can remove the plastic covering and continue to care for the young plant as it grows.
By following these step-by-step instructions, you can successfully nurture tiny cuttings through leaf propagation. Remember to be patient and provide the necessary care and attention to your cuttings. With time, you’ll witness the growth and development of new plants, adding beauty and diversity to your garden.
Best Practices for Nurturing Tiny Cuttings: Tips and Tricks for Success
When it comes to propagating plants through leaf cuttings, there are a few key practices that can greatly increase your chances of success. Nurturing tiny cuttings requires attention to detail and a bit of patience, but the rewards are well worth the effort. In this guide, we will walk you through the best practices for nurturing tiny cuttings, providing you with tips and tricks to ensure successful propagation.
1. Selecting the Right Leaf Cuttings
The first step in nurturing tiny cuttings is selecting the right leaves to propagate. Look for healthy, mature leaves that are free from any signs of disease or damage. Choose leaves that are not too young or too old, as they may not have the optimal amount of nutrients for successful propagation. Additionally, select leaves from plants that are actively growing, as they will have a higher chance of rooting successfully.
When taking leaf cuttings, make sure to use clean, sharp scissors or pruning shears to make a clean cut. Avoid tearing the leaves, as this can lead to damage and decrease the chances of successful rooting. Take care to select leaves with a short stem attached, as this will make it easier to plant them in the propagation medium.
Once you have selected the right leaf cuttings, it’s time to prepare them for propagation.
2. Preparing the Leaf Cuttings for Propagation
Before planting the leaf cuttings, it’s important to prepare them properly to ensure successful rooting. Start by removing any excess foliage from the stem, leaving only a few small leaves at the top. This will help the cutting focus its energy on root development rather than supporting excessive foliage.
Next, dip the cut end of the leaf cutting into a rooting hormone powder or gel. This will help stimulate root growth and increase the chances of successful propagation. Make sure to follow the instructions on the rooting hormone product for the correct application method.
After applying the rooting hormone, gently tap off any excess powder or gel and allow the cutting to dry for a few minutes. This will prevent the hormone from being washed away when the cutting is planted in the propagation medium.
3. Planting and Nurturing the Leaf Cuttings
Now that your leaf cuttings are prepared, it’s time to plant them in a suitable propagation medium. Choose a well-draining medium, such as a mix of perlite and peat moss or a specialized propagation mix. Fill a small tray or container with the propagation medium and make small holes using a pencil or your finger.
Gently insert the stem of each leaf cutting into a hole in the propagation medium, making sure the leaf is resting on the surface. Avoid burying the leaf too deep, as this can hinder root development. Space the cuttings apart to allow for proper air circulation and prevent the spread of diseases.
After planting the leaf cuttings, water the propagation medium lightly to ensure it is evenly moist. Avoid overwatering, as this can lead to rotting of the cuttings. Place the tray or container in a warm, well-lit area, but avoid direct sunlight, as it can scorch the delicate leaves.
Throughout the rooting process, it’s important to monitor the moisture levels of the propagation medium and adjust watering accordingly. Keep the medium slightly moist, but not soggy, to prevent rotting. Mist the leaves occasionally to maintain humidity around the cuttings.
Over time, you will start to see tiny roots emerging from the stem of the leaf cuttings. This is a sign of successful propagation. Once the roots have developed sufficiently, you can gently transplant the cuttings into individual pots filled with a well-draining potting mix.
Remember to provide the newly rooted plants with proper care, including regular watering, adequate sunlight, and appropriate fertilization. With time and care, your tiny cuttings will grow into healthy, thriving plants.
By following these best practices for nurturing tiny cuttings, you can increase your chances of success and enjoy the satisfaction of propagating plants from leaf cuttings. Remember to be patient and attentive, as each plant may have its own unique requirements. Happy propagating!
Common Mistakes to Avoid when Propagating Leaves for Success
Leaf propagation is an exciting and rewarding way to expand your plant collection. It allows you to create new plants from existing ones, giving you the opportunity to share your favorite specimens or grow plants that may be hard to find. While leaf propagation can be relatively simple, there are a few common mistakes that beginners often make. By avoiding these mistakes, you can increase your chances of success and enjoy the satisfaction of watching your tiny cuttings grow into thriving plants.
1. Choosing the Wrong Leaves
One of the most critical factors for successful leaf propagation is selecting the right leaves. Not all leaves are suitable for propagation, and choosing the wrong ones can lead to disappointment. When selecting leaves, look for healthy and mature specimens. Avoid leaves that are damaged, diseased, or infested with pests. Additionally, certain plants have specific requirements for leaf propagation. For example, some plants, like succulents, prefer leaves that are plump and fleshy, while others, like begonias, do better with semi-woody leaves. Research the specific requirements of the plant you wish to propagate and choose leaves accordingly.
Furthermore, it is essential to take leaf cuttings correctly. When removing a leaf from the parent plant, make sure to cut it cleanly and avoid tearing or damaging the leaf. A clean cut will promote faster healing and reduce the risk of infection. Remember, the quality of the leaf you choose will greatly impact the success of your propagation efforts.
2. Improper Preparation of Leaf Cuttings
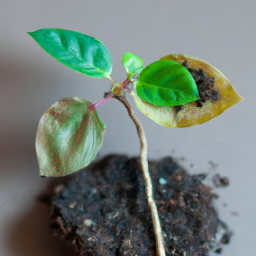
Once you have selected the right leaves, it is crucial to prepare them properly for propagation. One common mistake is failing to allow the cut end of the leaf to callus before planting. Callusing is the process of forming a protective layer over the cut end, which helps prevent rot and promotes root development. To allow the cut end to callus, place the leaf in a warm and dry location for a few days. Depending on the plant species, this may take anywhere from a few days to a couple of weeks. Patience is key during this stage, as rushing can lead to unsuccessful propagation.
Another mistake is planting the leaf too deep or too shallow. The ideal depth for planting leaf cuttings varies among different plants, so it is essential to research the specific requirements of the plant you are propagating. In general, aim to plant the leaf at a depth that allows the cut end to make contact with the growing medium while keeping the leaf upright. This will ensure proper root development and prevent the leaf from rotting.
Lastly, using the wrong type of growing medium can hinder successful propagation. Some plants prefer well-draining soil, while others thrive in a mixture of peat moss and perlite. Research the specific needs of your plant and choose a suitable growing medium accordingly. Providing the right environment for your leaf cuttings is crucial for their successful development.
3. Inadequate Care and Maintenance
Once your leaf cuttings are planted, it is important to provide them with adequate care and maintenance. One common mistake is overwatering. While it is essential to keep the growing medium moist, overwatering can lead to root rot and other issues. Allow the top layer of the soil to dry out slightly between waterings, and ensure that excess water can drain freely from the container.
Another mistake is exposing the leaf cuttings to direct sunlight too soon. While some plants may require direct sunlight, most leaf cuttings prefer indirect or filtered light during the initial stages of propagation. Gradually introduce the cuttings to brighter light over time to prevent sunburn and stress. Additionally, maintaining a consistent temperature and humidity level can greatly benefit the development of your leaf cuttings.
Regular monitoring is also crucial to identify and address any issues promptly. Look out for signs of pests, diseases, or nutrient deficiencies. Adjust your care routine as needed to provide optimal conditions for your leaf cuttings to thrive.
In conclusion, successful leaf propagation requires attention to detail and proper care. By avoiding common mistakes such as choosing the wrong leaves, improper preparation of leaf cuttings, and inadequate care and maintenance, you can greatly increase your chances of success. Remember to research the specific requirements of the plant you wish to propagate and provide the optimal conditions for their growth. With patience and dedication, you will be rewarded with new plants that bring joy and beauty to your indoor or outdoor space.
Success Stories: Inspiring Examples of Leaf Propagation Triumphs
Introduction
Leaf propagation is a fascinating and rewarding method of plant propagation that allows you to create new plants from just a single leaf. It’s an excellent way to expand your plant collection and share your favorite plants with friends and family. While the process may seem daunting at first, success stories from experienced gardeners can provide inspiration and guidance. In this article, we will explore some inspiring examples of leaf propagation triumphs to motivate and encourage you on your own leaf propagation journey.
1. The Resilient Succulent
One success story that never fails to impress is the resilient succulent leaf propagation. Succulents, with their fleshy leaves and ability to store water, are known for their adaptability and ease of propagation. Take the popular Echeveria, for example. By carefully removing a healthy leaf from the mother plant and allowing it to callus for a few days, you can place it on well-draining soil and watch the magic happen. Over time, tiny roots will emerge, followed by a cluster of new rosettes. With patience and proper care, you can witness the transformation of a single leaf into a thriving succulent plant.
One key tip for success with succulent leaf propagation is to provide the right environmental conditions. Succulents prefer bright, indirect light and well-draining soil. Avoid overwatering, as this can lead to rotting. Instead, mist the soil lightly when it feels dry to the touch. With a little attention and patience, you can achieve remarkable success with succulent leaf propagation.
Another exciting succulent success story is the propagation of the String of Pearls (Senecio rowleyanus). This unique trailing succulent is known for its bead-like leaves and is a favorite among plant enthusiasts. To propagate this beauty, simply take a healthy strand and cut it into several small sections, ensuring each section has at least one leaf. Allow the cut ends to callus for a day or two before placing them on well-draining soil. With regular misting and indirect light, these tiny cuttings will soon develop roots and grow into beautiful new plants.
2. The Leafy Wonder: Begonias
Begonias are another group of plants that lend themselves well to leaf propagation. With their stunning foliage and wide variety of colors and patterns, begonias are a popular choice for indoor gardens. Leaf propagation with begonias is relatively straightforward and can yield impressive results.
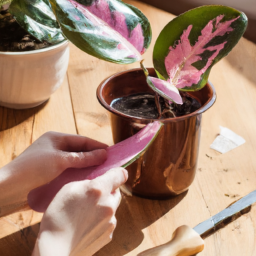
One remarkable success story is the propagation of the Angel Wing Begonia (Begonia coccinea). This begonia variety features large, wing-shaped leaves with beautiful silver markings. To propagate the Angel Wing Begonia, select a healthy leaf and make a clean cut close to the stem. Dip the cut end in a rooting hormone and place it in a container filled with moistened soil or water. Keep the container in a warm and humid environment, ensuring the soil remains consistently moist. Within a few weeks, you will notice tiny roots emerging from the cut end of the leaf. Once the roots are well-established, you can transplant the new plant into a pot and watch it flourish.
Another begonia success story is the propagation of the Rex Begonia (Begonia rex). Known for its vibrant and textured leaves, the Rex Begonia is a true showstopper. To propagate this beauty, select a healthy leaf and cut it into several smaller pieces, ensuring each piece has a visible vein. Place the leaf sections on a tray filled with moistened soil, ensuring the cut ends are in contact with the soil. Cover the tray with a plastic dome or wrap it in a plastic bag to create a humid environment. Keep the soil consistently moist and provide bright, indirect light. In a few weeks, you will witness new plantlets emerging from the leaf sections, ready to be potted up and nurtured into mature plants.
3. The Tenacious Herb: Mint
Mint is a versatile herb that not only adds a refreshing flavor to culinary dishes but also propagates easily from leaf cuttings. With its vigorous growth and ability to thrive in various conditions, mint is an excellent choice for beginner gardeners looking to experience the joy of leaf propagation.
One inspiring success story is the propagation of Peppermint (Mentha x piperita). To propagate peppermint, select a healthy stem with several leaves and remove the lower leaves, leaving a few at the top. Place the stem in a glass of water, ensuring the remaining leaves are above the waterline. Keep the glass in a bright location, but away from direct sunlight. Change the water every few days to prevent stagnation. Within a week or two, you will notice roots starting to develop from the submerged nodes. Once the roots are a few inches long, you can transplant the cutting into a pot filled with well-draining soil. With regular watering and sunlight, your peppermint plant will thrive and provide you with an abundance of aromatic leaves.
Another mint success story is the propagation of Spearmint (Mentha spicata). The process is similar to propagating peppermint, with the only difference being the specific mint variety. Spearmint is known for its refreshing scent and is a popular choice for teas and culinary uses. By following the same steps as with peppermint propagation, you can easily create new spearmint plants and enjoy the delightful aroma and flavor it offers.
Conclusion
These success stories of leaf propagation triumphs demonstrate the incredible potential and joy that can be found in nurturing tiny cuttings. Whether you choose to propagate succulents, begonias, or herbs like mint, the process can be both rewarding and educational. Remember to provide the right environmental conditions, including light, moisture, and temperature, and be patient as you wait for roots and new growth to emerge. By following these inspiring examples and experimenting with your favorite plants, you too can experience the satisfaction of successfully nurturing tiny cuttings and expanding your plant collection.
Highlights of this article
Nurturing tiny cuttings through leaf propagation is a rewarding and cost-effective way to expand your plant collection. Leaf propagation involves taking a leaf cutting from a parent plant and encouraging it to grow roots and eventually develop into a new plant. To successfully propagate plants from leaves, there are a few key steps to follow.
Firstly, choose a healthy leaf from a mature plant and remove it carefully, ensuring that a small portion of the stem is attached. Next, dip the cut end of the leaf in a rooting hormone to promote root growth. Plant the leaf in a well-draining potting mix, making sure to bury the stem end and leave the leaf exposed. Mist the leaf regularly to maintain humidity and keep the soil moist but not soggy. Finally, be patient and wait for roots to develop, which can take several weeks to a few months. Once roots have formed, you can transplant the cutting into a separate pot and continue to care for it as you would any other plant.
Leaf propagation is a versatile method that can be used for various types of plants, including succulents, herbs, and some houseplants. It is a great way to propagate plants that are difficult to grow from seeds or cuttings. With a little patience and care, you can enjoy the satisfaction of watching your tiny cuttings grow into thriving new plants.
FAQ Roundup:
Q1: What is leaf propagation?
A1: Leaf propagation is a method of plant propagation where a leaf or a portion of a leaf is used to grow a new plant. It involves taking a healthy leaf cutting and encouraging it to develop roots and eventually grow into a new plant.
Q2: Which plants can be propagated through leaf propagation?
A2: Leaf propagation can be used for a variety of plants, including succulents, certain houseplants, and some herbaceous perennials. Examples include jade plants, snake plants, pothos, and begonias.
Q3: How do I select a healthy leaf for propagation?
A3: When selecting a leaf for propagation, choose a healthy leaf that is free from any signs of disease or damage. Look for leaves that are fully grown, plump, and have vibrant colors. Avoid leaves that are wilted, discolored, or have spots.
Q4: What is the best time of year to propagate plants through leaf propagation?
A4: The best time to propagate plants through leaf propagation is during the spring or early summer when the plants are actively growing. This is when the plants have the highest chance of successfully developing roots and growing into new plants.
Q5: How do I propagate a leaf cutting?
A5: To propagate a leaf cutting, gently remove a healthy leaf from the parent plant, making sure to include a small portion of the stem attached to the leaf. Allow the leaf cutting to dry for a few days until a callus forms, then place it in a well-draining soil mix and keep it lightly moist until roots develop.
Q6: How long does it take for a leaf cutting to root?
A6: The time it takes for a leaf cutting to root can vary depending on the plant species and environmental conditions. In general, it can take anywhere from a few weeks to a few months for roots to develop. Patience is key during this process.
Q7: What care does a leaf cutting require after it has rooted?
A7: Once a leaf cutting has rooted, it is important to gradually acclimate it to normal growing conditions. This includes gradually increasing the amount of light it receives and transitioning it to a regular watering schedule. Provide proper care, such as regular watering and fertilizing, to ensure its healthy growth.
Q8: Can all leaf cuttings successfully grow into new plants?
A8: While leaf propagation can be a successful method for plant propagation, not all leaf cuttings will successfully grow into new plants. Some plants have a higher success rate than others, and factors such as environmental conditions, proper care, and the health of the parent plant can also influence the success of leaf propagation.
Q9: Are there any tips to improve success with leaf propagation?
A9: Yes, here are a few tips to improve success with leaf propagation:
– Use a well-draining soil mix to prevent waterlogged conditions.
– Provide the leaf cutting with bright, indirect light.
– Maintain a warm and humid environment, especially during the rooting stage.
– Avoid overwatering the leaf cutting to prevent rotting.
– Be patient and allow sufficient time for roots to develop.
Q10: Can I propagate multiple leaf cuttings in one container?
A10: It is generally not recommended to propagate multiple leaf cuttings in one container. Each leaf cutting requires its own space to develop roots and grow into a new plant. Planting multiple leaf cuttings in one container can lead to overcrowding, competition for resources, and increased risk of disease or rot. It is best to provide each leaf cutting with its own container or space for optimal growth.
Dr. Olivia Green is a botanist with over two decades of experience in indoor plant cultivation. She holds a Ph.D. in Plant Biology and has dedicated her career to researching plant behavior in controlled environments. Dr. Green is passionate about helping plant enthusiasts master the art of indoor gardening through her extensive knowledge and practical insights.