
Troubleshooting Common Issues for Beginner Gardeners
Common Pest Problems and How to Deal with Them in Your Garden
As a beginner gardener, you may encounter various pest problems that can cause damage to your plants. It’s essential to identify these pests and take necessary steps to control their population. In this guide, we will discuss some common pest problems and effective ways to deal with them in your garden.
1. Aphids
Aphids are tiny insects that can quickly multiply and infest your garden. They usually feed on the sap of plants, causing leaves to curl, turn yellow, and even die. To control aphids, you can try the following methods:
1.1 Natural Predators: Encourage the presence of natural predators like ladybugs, lacewings, and parasitic wasps in your garden. These insects feed on aphids and help control their population.
1.2 Homemade Remedies: Prepare a solution of water and dish soap or neem oil and spray it on the affected plants. This solution will suffocate and kill the aphids.
1.3 Companion Planting: Planting marigolds, chives, or garlic near susceptible plants can repel aphids due to their strong scent.
2. Slugs and Snails
Slugs and snails are common garden pests that can cause significant damage to your plants, especially seedlings and young foliage. These slimy creatures feed on leaves, stems, and flowers. To control slugs and snails, follow these steps:
2.1 Handpicking: Go out in the garden during the evening or early morning hours and manually remove slugs and snails. Place them in a bucket of soapy water to eliminate them.
2.2 Beer Traps: Bury a container, such as a yogurt cup, in the ground near the affected plants. Fill it with beer, which will attract slugs and snails. They will crawl into the container and drown.
2.3 Copper Barriers: Place copper tape or wire around your garden beds. Slugs and snails dislike the electric charge produced by copper, preventing them from crossing the barrier.
3. Caterpillars
Caterpillars can quickly defoliate plants and cause significant damage. It’s important to identify the specific caterpillar species to choose the appropriate control method. Here are some general approaches:
3.1 Handpicking: Inspect your plants regularly and remove caterpillars by hand. Drop them into a bucket of soapy water to prevent them from returning.
3.2 Bacillus thuringiensis (Bt): Bt is a natural bacteria that targets specific caterpillars without harming beneficial insects. Spray Bt on affected plants following the product instructions.
3.3 Floating Row Covers: Use lightweight fabric covers to physically block caterpillars from reaching your plants. Ensure the covers are secured tightly to prevent any gaps.
By implementing these strategies, you can effectively troubleshoot common pest problems in your garden. Remember to monitor your plants regularly and take prompt action to prevent pests from causing extensive damage. Happy gardening!
Troubleshooting Common Issues for Beginner Gardeners
2. Identifying and Treating Nutrient Deficiencies in Plants
As a beginner gardener, it is common to encounter nutrient deficiencies in your plants. These deficiencies can manifest in various ways, such as yellowing leaves, stunted growth, or poor fruit development. Identifying and treating nutrient deficiencies promptly is crucial to ensure the health and vitality of your plants. In this guide, we will explore the most common nutrient deficiencies and provide step-by-step solutions to address them.
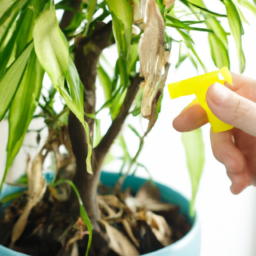
Iron Deficiency
Iron deficiency is a common issue in plants, often leading to yellowing leaves with green veins. This condition, known as chlorosis, can significantly impact plant growth and productivity. To treat iron deficiency, follow these steps:
Step 1: Test the soil pH to ensure it falls within the appropriate range for iron availability. Most plants prefer a slightly acidic to neutral pH.
Step 2: Apply iron chelates or iron sulfate to the soil. These products are readily available at garden centers and can be applied according to the package instructions.
Step 3: Consider foliar spraying with an iron-rich fertilizer. This method provides a quick boost of iron directly to the leaves, helping to alleviate the deficiency.
By addressing iron deficiency promptly, you can restore the vibrant green color to your plants’ leaves and promote healthy growth.
Nitrogen Deficiency
Nitrogen is an essential nutrient for plant growth, and its deficiency can lead to pale or yellowing leaves, stunted growth, and reduced fruit production. To tackle nitrogen deficiency, follow these steps:
Step 1: Assess the soil’s nitrogen levels using a soil test kit. This will help determine the severity of the deficiency.
Step 2: Apply a nitrogen-rich fertilizer, such as ammonium sulfate or blood meal, to the soil. Follow the recommended application rates based on your plants’ needs.
Step 3: Consider using organic matter, such as compost or well-rotted manure, to improve the soil’s nitrogen content and enhance long-term fertility.
Regularly monitoring and addressing nitrogen deficiencies will ensure your plants have the necessary nutrients for vigorous growth and development.
Phosphorus Deficiency
Phosphorus deficiency is characterized by stunted growth, weak root development, and purplish discoloration on leaves. To combat phosphorus deficiency, follow these steps:
Step 1: Test the soil’s phosphorus levels to confirm the deficiency. This can be done using a soil test kit or by sending a sample to a local agricultural extension office.
Step 2: Apply a phosphorus-rich fertilizer, such as bone meal or rock phosphate, to the soil. Incorporate it into the planting hole or spread it evenly around established plants.
Step 3: Ensure proper watering to facilitate nutrient uptake. Phosphorus is less mobile in the soil, so maintaining consistent moisture levels will aid in its absorption by plant roots.
By addressing phosphorus deficiency, you can promote robust root growth and overall plant vigor.
Potassium Deficiency
Potassium deficiency can result in weak stems, yellowing or browning leaf edges, and reduced fruit quality. To treat potassium deficiency, follow these steps:
Step 1: Test the soil’s potassium levels to confirm the deficiency. This can be done using a soil test kit or by consulting a local gardening expert.
Step 2: Apply a potassium-rich fertilizer, such as potassium sulfate or wood ash, to the soil. Follow the recommended application rates based on your plants’ requirements.
Step 3: Incorporate organic matter, like compost or seaweed extract, into the soil to improve potassium availability and enhance overall soil fertility.
Addressing potassium deficiency will help your plants develop stronger stems, healthier leaves, and more abundant fruits.
Remember, nutrient deficiencies can vary depending on the plant species and soil conditions. Regular soil testing and observation of plant symptoms are crucial for accurate diagnosis. By following these step-by-step solutions, you can effectively troubleshoot and treat nutrient deficiencies in your garden, ensuring optimal plant health and productivity.
Troubleshooting Common Issues for Beginner Gardeners
3. Understanding and Correcting Soil pH Imbalances in Your Garden
As a beginner gardener, one of the most important factors to consider for healthy plant growth is the pH level of your soil. Soil pH determines the availability of essential nutrients to plants, and imbalances can lead to stunted growth, nutrient deficiencies, and even plant death. In this guide, we will explore how to understand and correct soil pH imbalances in your garden.
What is Soil pH?
Soil pH is a measure of the acidity or alkalinity of your soil. It is measured on a scale from 0 to 14, with 7 being neutral. Values below 7 indicate acidic soil, while values above 7 indicate alkaline soil. Most plants prefer a slightly acidic to neutral pH range of 6 to 7.5, although some plants have specific pH requirements.
A pH imbalance can occur naturally or as a result of human activities such as excessive use of fertilizers or improper soil management. Understanding your soil’s pH is crucial because it affects the availability of nutrients to plants. When the pH is too high or too low, certain nutrients become less available, leading to deficiencies even if they are present in the soil.
Testing Your Soil pH
The first step in correcting soil pH imbalances is to determine the current pH level of your soil. There are several methods to test soil pH, including DIY kits and professional laboratory testing. DIY kits are affordable and easy to use, providing reasonably accurate results for most home gardeners.
To test your soil using a DIY kit, follow these steps:
- Collect soil samples from different areas of your garden. Ensure the samples are representative of the entire garden.
- Remove any debris or stones from the soil samples.
- Follow the instructions provided with the kit to mix the soil samples with the testing solution.
- Observe the color change in the solution and match it with the color chart provided. This will indicate the approximate pH level of your soil.
For a more accurate and detailed analysis, consider sending your soil samples to a professional laboratory. They can provide a comprehensive report on your soil’s pH and nutrient levels.
Correcting Acidic Soil
If your soil is too acidic (pH below 6), you can take several steps to raise the pH level and make it more suitable for most plants:
- Add agricultural lime or dolomite lime to your soil. These products are rich in calcium and magnesium, which help neutralize acidity over time. Follow the recommended application rates based on your soil type and the desired pH level.
- Incorporate organic matter such as compost, well-rotted manure, or leaf mold into the soil. Organic matter improves soil structure and helps buffer pH fluctuations.
- Avoid using acidic fertilizers and opt for balanced or alkaline fertilizers instead.
- Regularly monitor and adjust the pH levels as needed, as it may take time to achieve the desired balance.
Correcting Alkaline Soil
If your soil is too alkaline (pH above 7.5), you can take the following steps to lower the pH level:
- Apply elemental sulfur to your soil. This will gradually lower the pH over time. Follow the recommended application rates and avoid excessive use, as it can harm plants.
- Incorporate organic matter with a high acid content, such as pine needles or peat moss, into the soil. This helps to acidify the soil and maintain a lower pH.
- Use fertilizers specifically formulated for acid-loving plants, as they can help lower the pH.
- Regularly monitor the pH levels and make adjustments as necessary, as it may take time to achieve the desired balance.
Maintaining the Correct pH
Once you have corrected the soil pH imbalance, it is essential to maintain the correct pH level for optimal plant growth. Regularly test your soil pH at least once a year, preferably before each growing season. This will allow you to make any necessary adjustments in a timely manner.
Additionally, consider the pH requirements of the plants you are growing. Some plants thrive in slightly acidic soil, while others prefer a more alkaline environment. By selecting plants that are well-suited to your soil’s pH, you can minimize future pH-related issues.
In conclusion, understanding and correcting soil pH imbalances is crucial for beginner gardeners to ensure healthy plant growth. By testing your soil pH, making necessary adjustments, and maintaining the correct pH level, you can create an optimal environment for your plants to thrive.

Tips for Preventing and Treating Fungal Diseases in Plants
Gardening can be a rewarding and fulfilling hobby, but it can also be frustrating when your plants are affected by fungal diseases. Fungal diseases are common problems that many beginner gardeners face, but with the right knowledge and approach, you can prevent and treat these issues effectively. In this article, we will provide you with some valuable tips to help you troubleshoot and overcome fungal diseases in your garden.
Understanding Fungal Diseases
Before we dive into the prevention and treatment methods, it is important to have a basic understanding of fungal diseases. Fungi are microscopic organisms that can thrive in various environmental conditions. They reproduce through spores and can quickly spread from plant to plant, causing damage and even death if left untreated.
Some common fungal diseases that affect plants include powdery mildew, leaf spot, blight, and rust. These diseases can manifest as discolored spots, powdery growth, wilting, or distorted leaves. Fungi thrive in humid and moist conditions, so it is crucial to maintain proper plant hygiene and create an environment that discourages their growth.
Now, let’s move on to the tips for preventing and treating fungal diseases in plants.
1. Provide Proper Plant Spacing and Air Circulation
One of the essential steps in preventing fungal diseases is to provide adequate plant spacing and promote air circulation. Crowded plants create an environment that is favorable for fungal growth as it restricts air movement and increases humidity levels. When planting, ensure that there is enough space between each plant to allow for proper airflow.
Additionally, prune your plants regularly to remove any overcrowded or diseased branches. This will not only improve air circulation but also help prevent the spread of fungal spores. Remember to sanitize your pruning tools between each cut to avoid transferring any potential pathogens.
2. Water Plants Properly
Proper watering practices play a crucial role in preventing fungal diseases. Overwatering can lead to waterlogged soil, creating a favorable environment for fungal growth. On the other hand, underwatering can stress the plants, making them more susceptible to diseases.
It is important to water your plants at the base, near the soil, rather than overhead. This helps keep the foliage dry, reducing the chances of fungal spores finding a suitable surface to germinate. Additionally, water in the early morning to allow the leaves to dry quickly under the sunlight.
3. Mulch and Weed Control
Mulching is an effective technique to prevent fungal diseases. A layer of organic mulch, such as wood chips or straw, helps maintain soil moisture and temperature, preventing excessive drying or waterlogging. Mulch also acts as a barrier, preventing fungal spores from splashing onto the plant leaves during rainfall or irrigation.
However, it is important to avoid piling mulch against the plant stems, as this can create a moist environment that encourages fungal growth. Leave a small gap between the mulch and the stem to ensure proper airflow.
In addition to mulching, proper weed control is crucial for preventing fungal diseases. Weeds can compete with your plants for nutrients and water, weakening them and making them more susceptible to fungal infections. Regularly remove weeds from your garden to keep your plants healthy and disease-free.
4. Use Organic Fungicides
If preventive measures fail and your plants are already affected by fungal diseases, organic fungicides can be used to control the spread and minimize the damage. Organic fungicides are made from natural ingredients and are less harmful to the environment and beneficial insects.
Before applying any fungicide, identify the specific fungal disease affecting your plants. Different fungal diseases may require different treatments. Follow the instructions on the fungicide packaging carefully and apply it as directed. Remember to wear protective gear, such as gloves and a mask, when handling and applying fungicides.
It is important to note that fungicides are not a cure-all solution and should be used in conjunction with other preventive measures. Regularly monitor your plants for any signs of fungal diseases and take immediate action to prevent further spread.
In conclusion, fungal diseases can be a common challenge for beginner gardeners, but with proper knowledge and preventive measures, you can successfully troubleshoot and overcome these issues. Remember to provide adequate plant spacing, promote air circulation, water plants properly, mulch, control weeds, and use organic fungicides when necessary. By following these tips, you will be well on your way to maintaining a healthy and thriving garden.

Troubleshooting Common Issues for Beginner Gardeners
5. Overcoming Challenges of Overwatering or Underwatering Plants
Understanding the Importance of Proper Watering
Watering is a crucial aspect of gardening, and finding the right balance between overwatering and underwatering can be challenging for beginner gardeners. Both extremes can have detrimental effects on plant health and growth. Overwatering can lead to root rot, fungal diseases, and nutrient leaching, while underwatering can cause wilting, stunted growth, and even plant death.
By understanding the signs and symptoms of overwatering and underwatering, as well as implementing proper watering techniques, you can overcome these challenges and ensure the optimal health of your plants.
Let’s dive into some practical steps to troubleshoot and overcome the challenges of overwatering or underwatering plants:
1. Assessing Soil Moisture Levels
The first step in addressing watering issues is to assess the moisture levels in the soil. Stick your finger about an inch into the soil near the plant’s root zone. If it feels excessively wet and muddy, it indicates overwatering. Conversely, if the soil feels dry and crumbly, it suggests underwatering.
Additionally, you can use a moisture meter or probe to get a more accurate reading of the soil moisture content. These tools are readily available at garden centers and can help you monitor the moisture levels consistently.
Remember, different plants have different water requirements, so it’s important to research the specific needs of each plant in your garden.
2. Adjusting Watering Frequency
Once you’ve determined whether your plants are being overwatered or underwatered, you can adjust your watering frequency accordingly.
If you’re overwatering, reduce the frequency of watering sessions. Allow the soil to dry out slightly between waterings, ensuring that the top inch of soil is dry before watering again. This will prevent waterlogged conditions and promote healthy root development.
On the other hand, if you’re underwatering your plants, increase the frequency of watering. Monitor the soil moisture levels closely and water whenever the top inch of soil feels dry. However, avoid excessive watering as it can lead to other issues like root rot.
3. Improving Drainage
Poor drainage is a common cause of overwatering, as it prevents excess water from escaping the root zone. To improve drainage, consider amending the soil with organic matter such as compost or perlite. These amendments help create air pockets in the soil, allowing excess water to drain away.
Another effective method is to raise the planting area by creating a raised bed or using containers with drainage holes. Elevating the plants ensures that water doesn’t accumulate around the roots, reducing the risk of overwatering.
For underwatering issues, consider adding organic matter or moisture-retaining materials like peat moss to the soil. These amendments can help the soil retain moisture for longer periods, reducing the frequency of watering.
Conclusion
Proper watering is essential for the success of your garden. By understanding the signs of overwatering and underwatering, assessing soil moisture levels, adjusting watering frequency, and improving drainage, you can overcome the challenges associated with these issues.
Remember to always research the specific water requirements of your plants and monitor them closely. With time and experience, you’ll become more adept at finding the perfect balance and ensuring the optimal health and growth of your garden.
Frequently Asked Questions (FAQ)
1. How often should I water my plants?
It is important to water your plants regularly, especially during the growing season. Generally, most plants require watering once or twice a week, but it can vary depending on factors such as plant type, weather conditions, and soil moisture levels. Remember to check the soil moisture before watering to avoid overwatering.
2. Why are my plants turning yellow?
Yellowing of leaves can be a sign of various issues, including nutrient deficiencies, overwatering, underwatering, or pest infestation. Assess the overall health of the plant, check the soil moisture, and consider factors like sunlight exposure and fertilization. Identifying the specific cause will help determine the appropriate solution.
3. What can I do to prevent pests from damaging my garden?
Preventing pests in your garden involves several measures. Start by keeping your garden clean and free from debris, as pests often seek shelter in organic matter. Regularly inspect your plants for signs of infestation and take appropriate action, such as using organic pest control methods or introducing beneficial insects. Additionally, practicing crop rotation and companion planting can help deter pests.
4. How can I improve the quality of my soil?
To improve soil quality, consider adding organic matter like compost or well-rotted manure. This helps enhance soil structure, fertility, and water retention. Conduct a soil test to determine any nutrient deficiencies and amend accordingly. Additionally, practicing mulching can help regulate soil temperature, prevent weed growth, and retain moisture.
5. What are some common signs of plant diseases?
Common signs of plant diseases include wilting, yellowing or browning of leaves, spots or lesions on foliage, stunted growth, and abnormal discoloration. It is important to promptly identify and treat plant diseases to prevent further spread. Consult a local gardening expert or use online resources to diagnose the specific disease and follow appropriate treatment methods.
6. How do I know if my plants are getting enough sunlight?
Different plants have varying sunlight requirements. Generally, most plants thrive in full sun, which means they require at least six hours of direct sunlight per day. However, some plants prefer partial shade or full shade. Observe your plants throughout the day to determine the amount of sunlight they receive. If they appear weak, leggy, or fail to produce flowers, it may indicate insufficient sunlight.
7. Why are my plants not flowering?
Several factors can contribute to a lack of flowering in plants. Insufficient sunlight, improper pruning, nutrient deficiencies, or incorrect watering practices are common culprits. Additionally, some plants require a certain maturity level before they start flowering. Ensure your plants receive adequate care, including appropriate light, water, and nutrients, to encourage flowering.
8. How can I control weeds in my garden?
Weeds can be controlled through various methods. Regularly remove weeds manually by pulling them out, ensuring you remove the entire root system. Mulching can also help suppress weed growth by blocking sunlight. Additionally, using herbicides specifically designed for weed control can be an option, but it is important to follow the instructions carefully and avoid harming desirable plants.
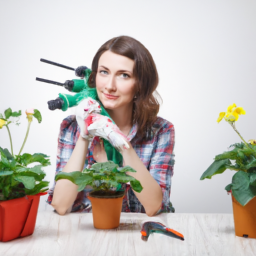
9. What are some common tools needed for gardening?
Common tools for gardening include a trowel, hand pruners, gardening gloves, a watering can or hose, a rake, a shovel, and a wheelbarrow. These tools are essential for tasks such as planting, pruning, watering, and soil preparation. Depending on the scale of your garden and specific needs, you may require additional tools like a hoe, a garden fork, or a spade.
10. How can I protect my plants from extreme weather conditions?
Extreme weather conditions like frost, heatwaves, or strong winds can be detrimental to plants. To protect them, consider using frost covers or blankets during cold spells. Providing shade cloth or using umbrellas can shield plants from excessive heat. Staking taller plants and using windbreaks can help protect against strong winds. Monitoring weather forecasts and taking proactive measures will help safeguard your plants.
Lisa Chen is a seasoned indoor gardening expert and the author of several bestselling books on the topic. With a background in horticulture and urban farming, Lisa is dedicated to helping urban dwellers embrace the joys of cultivating green spaces indoors. Her detailed guides and hands-on tips empower readers to transform their living spaces into thriving plant sanctuaries.