Hey there, fellow plant enthusiasts! Are you facing some hurdles in keeping your indoor plants happy and healthy? Well, fret not, because today we are diving into the world of indoor plant troubleshooting: common problems and solutions. Whether you’re a seasoned plant parent or just starting out on your green journey, we all encounter challenges along the way. From wilting leaves to pest infestations, our beloved indoor plants can sometimes give us a tough time. But fear not! In this blog post, we’ll explore some of the most common issues that indoor plants face and provide you with practical solutions to help you overcome them. So, grab your watering can and let’s get ready to troubleshoot those pesky plant problems together!

Indoor Plant Troubleshooting: Common Problems and Solutions
1. Overwatering: Signs, Causes, and Remedies
Hey there! Are you struggling with your indoor plants? Don’t worry, I’m here to help you troubleshoot and solve common problems you may encounter. In this article, we will focus on one of the most common issues faced by plant enthusiasts – overwatering. Let’s dive in and learn about the signs, causes, and remedies for overwatering your indoor plants.
Signs of Overwatering
Overwatering can be detrimental to the health of your indoor plants. It’s important to identify the signs early on to prevent further damage. Here are some common signs that your plant is being overwatered:
1. Wilting leaves: While it may seem counterintuitive, overwatering can cause your plant’s leaves to wilt. The excess water prevents the roots from absorbing oxygen, leading to root rot and wilting.
2. Yellowing leaves: Overwatering disrupts the balance of nutrients in the soil, causing the leaves to turn yellow. This is often accompanied by leaf drop and stunted growth.
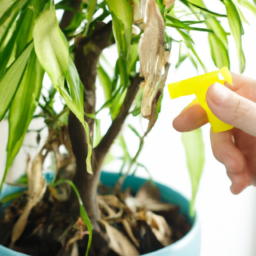
3. Mold or fungus: Excess moisture creates a perfect environment for mold and fungus to thrive. If you notice fuzzy growth on the soil surface or a musty smell, it’s a clear sign of overwatering.
4. Root rot: Overwatered plants are prone to root rot, which is characterized by a foul odor, mushy roots, and browning of the lower stem. If you gently tug on the plant and it easily comes out of the soil, it’s a clear indication of root rot.
Causes of Overwatering
Understanding the causes of overwatering is crucial to prevent it from happening in the first place. Here are some common causes:
1. Lack of drainage: Plant pots without drainage holes can trap excess water, leading to overwatering. Always choose pots with drainage holes to allow proper water drainage.
2. Overzealous watering: It’s easy to get carried away with watering, especially if you’re a new plant parent. Remember, most indoor plants prefer slightly moist soil, not soggy conditions. Stick your finger an inch into the soil to check if it’s dry before watering.
3. Incorrect watering schedule: Each plant has unique watering requirements. Overwatering can occur if you water your plants too frequently or on a fixed schedule without considering their individual needs.
Remedies for Overwatering
Now that we’ve identified the signs and causes of overwatering, let’s explore some remedies to save your overwatered plants:
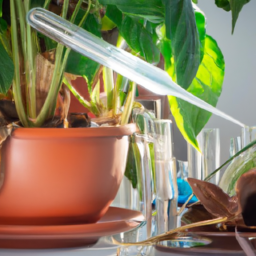
1. Adjust watering frequency: Allow the soil to dry out between watering sessions. Stick to a watering schedule that suits your plant’s specific needs. Remember, it’s better to underwater than to overwater.
2. Improve drainage: If your plant is in a pot without drainage holes, consider repotting it into a container with proper drainage. You can also add a layer of gravel or pebbles at the bottom of the pot to improve drainage.
3. Check root health: If you suspect root rot, carefully remove the plant from its pot and inspect the roots. Trim off any mushy or brown roots and replant the healthy ones in fresh, well-draining soil.
4. Adjust environmental conditions: Ensure your plant is placed in an area with adequate airflow and light. This helps the soil dry out more efficiently and prevents excess moisture buildup.
By following these steps, you can effectively address the issue of overwatering and help your indoor plants thrive. Remember, each plant is unique, so it’s essential to observe and understand their specific needs. Happy gardening!
Common Pests and Diseases Affecting Indoor Plants: Identification and Treatment
Introduction
Indoor plants bring beauty, freshness, and a touch of nature to our homes. However, just like outdoor plants, they can also be susceptible to various pests and diseases. In this guide, we will explore the most common problems that indoor plants face, how to identify them, and provide effective treatment options.
Pests
1. Aphids
Aphids are small, soft-bodied insects that suck the sap from plant leaves, causing them to curl and distort. They multiply rapidly and can quickly infest your indoor plants. To identify aphids, look for clusters of tiny, pear-shaped insects on the undersides of leaves.
To treat aphids, start by isolating the affected plant to prevent the infestation from spreading. Remove the aphids manually by gently wiping the leaves with a damp cloth or spraying them with a mixture of water and mild soap. You can also introduce natural predators like ladybugs or lacewings to control the aphid population.
Regularly inspect your plants and maintain good airflow to prevent aphids from returning. If the infestation persists, you can use organic insecticidal soap or neem oil as a last resort.
2. Spider Mites
Spider mites are tiny arachnids that feed on plant sap, causing yellowing leaves, webbing, and stunted growth. They are often found on the undersides of leaves and thrive in dry conditions. To identify spider mites, look for fine webbing and small, speck-like pests on your plants.
To treat spider mites, first, isolate the infested plant to prevent further spread. Increase humidity around the plant by misting it regularly or placing it on a tray filled with water and pebbles. Remove the mites by gently wiping the leaves with a damp cloth or spraying them with water. Introducing predatory insects like predatory mites or ladybugs can also help control the population.
If the infestation persists, you can use insecticidal soap or neem oil, following the instructions carefully. Repeat the treatment every few days until all the mites are gone.
3. Mealybugs
Mealybugs are small, soft-bodied insects covered in a white, waxy substance. They suck sap from plants, causing yellowing leaves, stunted growth, and a sticky residue on the leaves. To identify mealybugs, look for cotton-like masses in leaf axils or along stems.
To treat mealybugs, start by isolating the affected plant. Remove the bugs manually by using a cotton swab dipped in rubbing alcohol or by spraying them with a mixture of water and mild soap. You can also introduce natural predators like ladybugs or lacewings.
Regularly inspect your plants and maintain good hygiene to prevent mealybugs from returning. If the infestation persists, you can use neem oil or insecticidal soap, applying it thoroughly to all affected areas.
Diseases
1. Root Rot
Root rot is a common fungal disease that affects indoor plants, especially those that are overwatered or have poor drainage. It causes the roots to become mushy, discolored, and may emit a foul odor. To identify root rot, gently remove the plant from its pot and examine the roots.
To treat root rot, first, remove the affected plant from the pot and gently remove any infected roots. Trim the healthy roots and replant the plant in fresh, well-draining soil. Adjust your watering habits to prevent overwatering and ensure adequate drainage.
Improve the plant’s overall health by providing proper light, ventilation, and avoiding overcrowding. Fungicides can be used as a last resort if the infection is severe, but prevention and proper care are key to avoiding root rot.
2. Powdery Mildew
Powdery mildew is a fungal disease that appears as a white, powdery coating on leaves, stems, and flowers. It thrives in high humidity and poor air circulation. To identify powdery mildew, look for the characteristic white patches on your plant’s foliage.
To treat powdery mildew, start by isolating the affected plant to prevent the spread of spores. Remove the infected leaves or plant parts and improve air circulation by placing a fan near the plant. Avoid overhead watering and water the plant at the base to keep the foliage dry.
Organic fungicides like neem oil or baking soda mixed with water can be used to control powdery mildew. Apply the solution to all affected areas, following the instructions on the product label. Repeat the treatment every 7-10 days until the mildew is gone.
3. Leaf Spot
Leaf spot is a common fungal disease characterized by dark, water-soaked spots on leaves. As the disease progresses, the spots may enlarge and turn brown or black. To identify leaf spot, inspect your plant’s leaves for irregularly shaped lesions.
To treat leaf spot, start by removing and destroying all infected leaves to prevent the spread of the disease. Improve air circulation and avoid overhead watering to reduce humidity. Ensure proper spacing between plants to prevent overcrowding.
If the infection is severe, you can use a copper-based fungicide or a systemic fungicide. Follow the instructions carefully and repeat the treatment as needed.
Conclusion
By being aware of the common pests and diseases that affect indoor plants, you can take proactive measures to prevent and treat these issues. Regularly inspect your plants, maintain good hygiene, and provide optimal growing conditions to keep your indoor plants healthy and thriving. Remember, prevention is always better than cure when it comes to indoor plant care.
Light and Temperature Issues: Troubleshooting Tips for Healthy Indoor Plants
Indoor plants can bring life and beauty to any space, but sometimes they encounter issues related to light and temperature. Understanding these problems and their solutions is crucial to maintaining healthy indoor plants. In this guide, we will explore common light and temperature issues that indoor plants face and provide step-by-step troubleshooting tips to help you keep your plants thriving.
Insufficient Light
One of the most common problems indoor plants face is insufficient light. Plants require light for photosynthesis, the process by which they convert light energy into chemical energy to fuel their growth. Without adequate light, plants may become weak, leggy, and have stunted growth. Here’s how you can troubleshoot and address this issue:
1. Assess the light conditions: Observe the location where your plant is placed. Is it receiving enough natural light? Most indoor plants thrive in bright, indirect light. If the plant is in a dark corner, consider moving it to a spot with better lighting.
2. Increase natural light: If your plant is not getting enough natural light, try placing it near a window that receives bright, indirect sunlight. Be cautious with direct sunlight as it can scorch the leaves of some plants. Alternatively, you can use artificial grow lights specifically designed for indoor plants. These lights provide the necessary spectrum and intensity for plant growth.
3. Rotate your plants: To ensure even exposure to light, rotate your plants every few weeks. This prevents one side of the plant from receiving more light than the other, leading to uneven growth.
Excessive Light
While insufficient light is a common issue, excessive light can also harm indoor plants. Too much direct sunlight can cause leaf burn and damage the plant’s overall health. Here’s how you can troubleshoot and address excessive light:
1. Assess the light intensity: Determine if your plant is receiving direct sunlight for extended periods. If so, it may be necessary to move the plant away from the window or provide a sheer curtain to filter the light.
2. Adjust the plant’s position: Find a spot with lower light intensity for your plant. Consider placing it a few feet away from the window or in a room with indirect light. Each plant has different light requirements, so research the specific needs of your plant to find the ideal location.
3. Monitor and observe: Keep a close eye on your plant’s leaves for any signs of sunburn or discoloration. If you notice any damage, act promptly by adjusting the light exposure to prevent further harm.
Temperature Extremes
Temperature plays a vital role in the health of indoor plants. Extreme temperatures, whether too hot or too cold, can stress plants and hinder their growth. Here’s how you can troubleshoot and address temperature-related issues:
1. Find the optimal temperature range: Research the ideal temperature range for your specific plant species. Most indoor plants thrive in temperatures between 60°F (15°C) and 75°F (24°C). However, some plants may have different temperature preferences, so it’s essential to know the requirements of your plant.
2. Avoid drafty areas: Keep your plants away from drafty windows, doors, or air conditioning vents. Sudden temperature fluctuations can shock the plants and lead to stress or damage.
3. Provide supplemental heating or cooling: If your indoor environment doesn’t meet the temperature requirements of your plants, consider using a heater or air conditioner to create a more suitable climate. However, be cautious not to place the plants too close to the heat source, as it can cause dehydration or leaf burn.
By following these troubleshooting tips, you can effectively address light and temperature issues that may arise with your indoor plants. Remember, each plant is unique, so understanding the specific needs of your plants is crucial for their overall well-being. With proper care and attention, your indoor plants will thrive and bring joy to your living space.
Let’s recap
Indoor plants are a great way to bring nature into your home, but sometimes they can encounter problems that leave you scratching your head. In this blog post, we will explore some common issues that indoor plants face and provide simple solutions to help you keep your greenery thriving.
One common problem that many indoor plant owners encounter is yellowing leaves. This can be caused by a variety of factors, such as overwatering, lack of sunlight, or nutrient deficiencies. To solve this issue, make sure you are watering your plants appropriately by checking the moisture level in the soil before watering. Additionally, ensure your plants are getting enough sunlight by placing them in a well-lit area or investing in artificial grow lights. If you suspect a nutrient deficiency, consider using a balanced fertilizer to provide your plants with the necessary nutrients.
Another issue that often arises is pests. Whether it’s tiny insects like aphids or pesky spider mites, these unwelcome guests can wreak havoc on your indoor plants. To combat pests, try using natural remedies like neem oil or insecticidal soap. These solutions are effective in eliminating pests without harming your plants or the environment. Regularly inspecting your plants for signs of infestation and taking prompt action can help prevent the spread of pests and keep your indoor garden thriving.
By troubleshooting common problems like yellowing leaves and pests, you can ensure that your indoor plants continue to add beauty and freshness to your living space. Remember, each plant is unique, so it’s important to observe and understand their specific needs. With a little care and attention, you can overcome these challenges and enjoy the benefits of a flourishing indoor garden.
Here are this week’s Top Questions and Answers
Q1: Why are the leaves on my indoor plant turning yellow?
A1: Yellow leaves on indoor plants can be caused by several factors. Overwatering is a common culprit, as it leads to root rot and nutrient deficiencies. Underwatering, on the other hand, can cause leaves to wilt and turn yellow. Additionally, insufficient light, improper temperature, or pest infestations can also contribute to yellowing leaves. To address this issue, make sure you are providing the right amount of water, light, and temperature for your specific plant. Check for signs of pests and treat accordingly.
Q2: How can I prevent my indoor plants from getting too leggy?
A2: Leggy plants occur when they don’t receive enough light. They stretch out in search of more light, resulting in long, weak stems and sparse foliage. To prevent this, ensure your indoor plants are placed in areas with adequate sunlight or provide supplementary artificial lighting. Rotate your plants regularly to promote even growth. Pruning can also help maintain a compact shape and encourage bushier growth. Remember to follow the specific care instructions for your plant species.
Q3: What should I do if my indoor plant is wilting?
A3: Wilting can be a sign of underwatering, overwatering, or root problems. First, check the moisture level of the soil by sticking your finger about an inch deep. If it feels dry, your plant likely needs water. If it feels wet or the pot feels heavy, it may be overwatered. Adjust your watering routine accordingly. If the roots appear mushy, brown, or have a foul odor, root rot may be the issue. In such cases, repotting the plant in fresh, well-draining soil can help save it.
Q4: How do I get rid of common indoor plant pests?
A4: Common indoor plant pests include aphids, mealybugs, spider mites, and fungus gnats. To combat these pests, start by isolating the affected plant to prevent infestation spread. Use a gentle spray of water or a mild soap solution to wash off the pests from the leaves. For more stubborn infestations, consider using organic insecticidal soap or neem oil. Remember to follow the instructions carefully and repeat the treatment if necessary. Maintaining good plant hygiene, such as regularly cleaning leaves and avoiding overwatering, can also help prevent pest problems.
Q5: What can cause the leaves of my indoor plant to develop brown spots?
A5: Brown spots on indoor plant leaves can be caused by various factors. One common cause is fungal or bacterial diseases, which thrive in humid conditions or when leaves are constantly wet. Another possibility is sunburn, especially if the plant has been recently moved to a spot with intense direct sunlight. Nutrient deficiencies, improper watering practices, or chemical residues can also lead to brown spots. To address this issue, ensure proper ventilation, avoid overwatering, provide adequate nutrients, and protect your plant from intense sunlight. If the problem persists, consult a plant specialist for a more accurate diagnosis.
Lisa Chen is a seasoned indoor gardening expert and the author of several bestselling books on the topic. With a background in horticulture and urban farming, Lisa is dedicated to helping urban dwellers embrace the joys of cultivating green spaces indoors. Her detailed guides and hands-on tips empower readers to transform their living spaces into thriving plant sanctuaries.