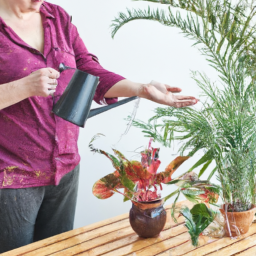
Welcome to our blog post on growing herbs indoors: from seed to harvest! If you’ve always wanted to have fresh herbs at your fingertips, regardless of the season or limited outdoor space, then this article is for you. Whether you’re a seasoned gardener looking to expand your skills or a beginner eager to embark on a new green adventure, we’ll guide you through the entire process of growing herbs indoors, from starting with seeds to enjoying a bountiful harvest. So, let’s roll up our sleeves and get ready to bring the beauty and fragrance of herbs into your home all year round.


Essential Tips for Starting Herbs from Seeds Indoors
Starting herbs from seeds indoors is a rewarding and cost-effective way to enjoy fresh herbs year-round. By following a few essential tips, you can successfully grow a variety of herbs in the comfort of your own home. In this guide, we will take you through the step-by-step process of starting herbs from seeds indoors and help you achieve a bountiful harvest.
1. Choosing the Right Seeds
When it comes to starting herbs from seeds indoors, selecting the right seeds is crucial. Opt for high-quality, organic seeds that are specifically labeled for indoor growing. This ensures that the seeds are free from harmful chemicals and have a higher chance of germination. Additionally, choose herbs that are well-suited for indoor cultivation, such as basil, parsley, chives, mint, and thyme.
Before planting, consider the space you have available for growing herbs indoors. If you have limited space, choose compact varieties that won’t overcrowd your growing area. Alternatively, if you have ample space, feel free to experiment with a variety of herbs to create a diverse indoor herb garden.
Lastly, check the seed packet for the recommended planting time. Some herbs may require an early start indoors, while others can be sown closer to the last frost date. Following these guidelines will give your herbs the best chance of success.
2. Preparing the Growing Medium
The next step in starting herbs from seeds indoors is preparing the right growing medium. A high-quality potting mix that is well-draining and nutrient-rich is essential for healthy herb growth. You can either purchase a pre-made potting mix or create your own by combining equal parts of compost, peat moss, and vermiculite.
Fill clean, shallow containers or seed trays with the potting mix, leaving about half an inch of space at the top. Gently firm down the soil to create a level surface for planting the seeds. Ensure that the containers have drainage holes to prevent waterlogging, which can lead to root rot.
Before sowing the seeds, it’s advisable to moisten the potting mix by lightly watering it. This provides a favorable environment for seed germination and helps prevent the seeds from being disturbed during watering.
3. Sowing the Seeds
Now that you have the right seeds and prepared the growing medium, it’s time to sow the seeds. Follow these steps for successful seed sowing:
Step 1: Gently sprinkle the seeds over the moistened potting mix, ensuring they are evenly distributed. For larger seeds, you can press them lightly into the soil, maintaining proper spacing between each seed.
Step 2: Once the seeds are sown, cover them with a thin layer of the potting mix or vermiculite. This helps retain moisture and provides a protective layer for the germinating seeds.
Step 3: Mist the surface of the soil with water using a spray bottle, being careful not to dislodge the seeds. Alternatively, you can water from the bottom by placing the containers in a tray filled with water and allowing the soil to soak up the moisture.
Step 4: Place a clear plastic cover or a plastic wrap over the containers to create a mini greenhouse effect. This helps maintain humidity and temperature, promoting faster germination. Once the seeds have sprouted, remove the plastic cover to prevent mold growth and allow air circulation.
Step 5: Position the containers in a warm location with indirect sunlight. Most herbs require temperatures between 60-70°F (15-21°C) for optimal germination. Using a heating mat or placing the containers near a heat source can help maintain the desired temperature.
Step 6: Regularly check the moisture level of the soil and water as needed. Avoid overwatering, as it can lead to damping-off disease. Aim to keep the soil consistently moist but not waterlogged.
By following these steps, your herb seeds will germinate and grow into healthy seedlings ready for transplanting.
Starting herbs from seeds indoors allows you to have a continuous supply of fresh herbs throughout the year. Whether you’re an experienced gardener or a novice, this step-by-step guide will help you successfully grow herbs indoors from seed to harvest. Remember to choose the right seeds, prepare the growing medium, and sow the seeds with care. With a little patience and dedication, you’ll be enjoying the flavors and aromas of your homegrown herbs in no time!

Creating an Ideal Indoor Herb Growing Environment
Introduction
Growing herbs indoors can be a rewarding and convenient way to have fresh herbs at your fingertips all year round. To ensure successful growth and a bountiful harvest, it is crucial to create an ideal indoor herb growing environment. In this guide, we will provide you with step-by-step instructions on how to create the perfect environment for your indoor herb garden.
Choosing the Right Location
The first step in creating an ideal indoor herb growing environment is to choose the right location for your herb garden. Herbs need a minimum of six hours of direct sunlight each day to thrive. Therefore, it is essential to place your indoor herb garden near a south-facing window or choose a location where you can provide supplemental lighting.
If you are unable to provide sufficient natural light, consider investing in artificial grow lights. LED grow lights are a popular choice as they are energy-efficient and provide the right spectrum of light for plant growth. Hang the lights approximately 6-12 inches above your herbs and adjust the height as they grow.
In addition to light, herbs also require good air circulation. Avoid placing your indoor herb garden in a stuffy or humid area. Ensure there is proper ventilation to prevent the growth of mold or mildew.
Choosing the Right Containers
The next step in creating an ideal indoor herb growing environment is to choose the right containers for your herbs. Herbs can be grown in a variety of containers, including pots, planters, or even repurposed containers such as mason jars or tin cans.
When selecting containers, ensure they have drainage holes to prevent waterlogging. Excess water can lead to root rot and other fungal diseases. If your chosen container does not have drainage holes, you can add a layer of gravel or pebbles at the bottom to improve drainage.
It is also important to choose the right size of containers. Most herbs have shallow root systems, so a container that is 6-8 inches deep should be sufficient. However, larger herbs like rosemary may require deeper containers.
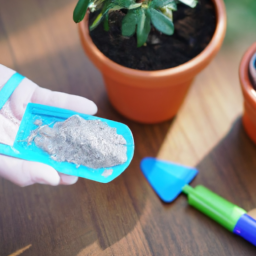
Providing the Right Soil and Fertilizer
Herbs thrive in well-draining soil that is rich in organic matter. Use a high-quality potting mix or create your own by combining equal parts of compost, perlite, and peat moss. Avoid using garden soil as it can be too heavy and may contain pests or diseases.
Before planting your herbs, moisten the soil to ensure it is evenly damp. Fill the containers with the soil mixture, leaving about an inch of space below the rim for watering.
While herbs do not require heavy fertilization, they will benefit from occasional feeding. Use a balanced organic fertilizer or a slow-release granular fertilizer according to the package instructions. Be careful not to over-fertilize as it can lead to excessive leaf growth and a decrease in flavor.
Watering and Humidity
Proper watering is crucial for the health and growth of your indoor herbs. Most herbs prefer slightly moist soil, so water them when the top inch of soil feels dry to the touch. Avoid overwatering as it can cause root rot.
Humidity is another important factor to consider. Most herbs prefer moderate humidity levels between 40-60%. If the air in your home is too dry, especially during winter months, you can increase humidity by placing a tray of water near your herb garden or using a humidifier.
It is also advisable to use a saucer or tray under your containers to catch excess water and prevent it from damaging your furniture or floors.
Conclusion
Creating an ideal indoor herb growing environment is essential for the success of your indoor herb garden. By choosing the right location, containers, soil, and providing adequate lighting, air circulation, and moisture, you can ensure healthy and thriving herbs from seed to harvest. Follow the step-by-step guide outlined in this article, and soon you’ll be enjoying the flavors and aromas of fresh herbs right in your own home.

Nurturing and Maintaining Healthy Herb Seedlings Indoors
Introduction
When it comes to growing herbs indoors, the journey from seed to harvest requires careful nurturing and maintenance of healthy seedlings. This critical stage sets the foundation for successful herb growth and ensures a bountiful harvest. In this guide, we will explore the key steps and techniques to help you nurture and maintain robust herb seedlings indoors.
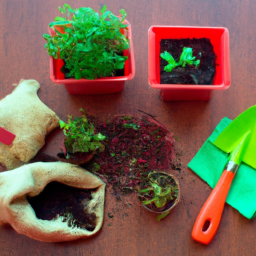
1. Choosing the Right Container
The first step in nurturing healthy herb seedlings is selecting the right container. Opt for containers that provide adequate drainage to prevent waterlogging. Consider using small pots or seed trays with drainage holes to allow excess water to escape. Additionally, ensure the containers are clean and sterilized to minimize the risk of diseases.
Fill the containers with a well-draining potting mix, specifically formulated for seed starting. This ensures proper aeration and moisture retention, creating an ideal environment for seedling development.
Place the containers in a location with sufficient sunlight or provide supplemental grow lights to ensure the seedlings receive at least 12-16 hours of light per day.
2. Sowing the Seeds
Once you have the containers ready, it’s time to sow the herb seeds. Follow these steps to ensure successful germination:
Step 1: Moisten the potting mix before sowing the seeds. This can be done by lightly misting the mix with water.
Step 2: Gently press the seeds into the soil, following the recommended planting depth mentioned on the seed packet. As a general rule, herb seeds are usually sown at a depth of 2-3 times their diameter.
Step 3: Cover the seeds with a thin layer of potting mix or vermiculite to provide insulation and retain moisture.
Step 4: Mist the soil surface with water to settle the seeds in place.
Step 5: Label each container with the herb variety and the sowing date for easy identification.
3. Providing Optimal Growing Conditions
Creating the right growing conditions for your herb seedlings is crucial for their healthy development. Follow these guidelines:
Temperature: Most herb seedlings thrive in temperatures ranging from 60°F to 70°F (15°C to 21°C). Maintain a consistent temperature by placing the containers in a warm spot or using a heating mat.
Humidity: To ensure adequate humidity levels, cover the containers with a plastic dome or use a plastic wrap. This helps retain moisture and creates a mini greenhouse effect. Once the seedlings emerge, remove the cover to prevent excessive moisture buildup.
Air Circulation: Good air circulation is essential to prevent fungal diseases. Use a small fan on the lowest setting or gently brush your hand over the seedlings a few times a day to simulate natural airflow.
Watering: Keep the potting mix consistently moist but not waterlogged. Use a spray bottle or a gentle watering can to avoid disturbing the delicate seedlings. Water from the bottom by placing the containers in a shallow tray filled with water, allowing the soil to absorb moisture through the drainage holes.
4. Thinning and Transplanting
As the seedlings grow, they will compete for resources and space. Thinning and transplanting are necessary steps to ensure each herb plant has enough room to thrive.
Thinning: Once the seedlings have developed their first set of true leaves, thin them out by removing the weaker ones, leaving only the strongest seedling in each container. This prevents overcrowding and promotes healthier growth.
Transplanting: When the seedlings have outgrown their containers and have at least two to three sets of true leaves, it’s time to transplant them into larger pots. Gently loosen the root ball and transplant each seedling into its new container, burying it up to the first set of leaves. This encourages strong root development and prevents leggy growth.
Remember to provide the transplanted seedlings with the same optimal growing conditions as before, ensuring they adjust well to their new homes.
Conclusion
Nurturing and maintaining healthy herb seedlings indoors is a rewarding experience that sets the stage for a thriving herb garden. By choosing the right containers, sowing the seeds correctly, providing optimal growing conditions, and thinning and transplanting when necessary, you can ensure robust and productive herb plants. With patience, care, and attention to detail, you’ll soon be enjoying the flavors and aromas of freshly harvested herbs, right from the comfort of your own home.

Harvesting and Preserving Fresh Herbs Grown Indoors
Introduction
Harvesting and preserving fresh herbs grown indoors can be a rewarding experience. Not only do you get to enjoy the flavors and aromas of your homegrown herbs, but you also have the convenience of having them readily available for your culinary adventures. In this guide, we will take you through the step-by-step process of harvesting and preserving your indoor herbs, ensuring that you can enjoy their freshness and flavors throughout the year.
1. Harvesting Herbs
When it comes to harvesting your indoor herbs, timing is crucial. The best time to harvest your herbs is in the morning, just after the dew has dried but before the sun is at its peak. This is when the essential oils in the herbs are at their highest concentration, resulting in the best flavor and aroma.
Start by identifying the mature leaves or stems that are ready for harvest. Gently pinch or cut them off just above a leaf node or stem junction, as this encourages new growth. Avoid removing more than one-third of the plant’s foliage at a time, as it can stress the plant and hinder its ability to regrow.
It’s important to note that different herbs have different harvesting techniques. For leafy herbs like basil, parsley, and cilantro, you can harvest individual leaves or cut the entire stem just above a leaf node. Woody herbs like rosemary and thyme, on the other hand, can be harvested by snipping off the top few inches of the stems.
2. Washing and Drying
Once you have harvested your herbs, it’s crucial to wash them thoroughly to remove any dirt, insects, or pesticides. Fill a bowl with cool water and gently swish the herbs around to loosen any debris. If needed, you can use a soft brush to lightly scrub the leaves.
After washing, pat the herbs dry with a clean towel or use a salad spinner to remove excess moisture. It’s essential to ensure that the herbs are completely dry before moving on to the next step, as moisture can lead to mold or spoilage during the preservation process.
3. Preservation Methods
There are several effective methods for preserving fresh herbs grown indoors, allowing you to enjoy their flavors even when they are out of season. Let’s explore three popular preservation methods:
A. Freezing
Freezing is one of the easiest and most versatile methods for preserving herbs. Start by chopping the herbs into small pieces and placing them in ice cube trays. Fill each compartment with water or olive oil, making sure the herbs are fully submerged. Once frozen, transfer the herb cubes into a freezer bag or airtight container for long-term storage. These herb cubes can be directly added to soups, stews, or sauces, providing a burst of fresh flavor.
B. Drying
Drying herbs is a traditional preservation method that concentrates their flavors and allows for long-term storage. Gather small bunches of herbs and tie them together with a string. Hang the bundles upside down in a warm, well-ventilated room away from direct sunlight. Once the herbs are dry and crumbly to the touch, remove the leaves from the stems and store them in airtight containers. Crush the dried herbs just before using them to release their full flavors.
C. Herb-infused Oils or Vinegars
Creating herb-infused oils or vinegars is a fantastic way to preserve the flavors of your indoor herbs while adding a unique twist to your culinary creations. Start by thoroughly washing and drying the herbs. Place the herbs in a clean glass jar and cover them with olive oil or vinegar. Ensure that the herbs are fully submerged. Seal the jar and let it sit in a cool, dark place for a few weeks, allowing the flavors to infuse. Strain the oil or vinegar, discarding the herbs, and transfer the infused liquid into sterilized bottles for storage.
Conclusion
Harvesting and preserving fresh herbs grown indoors is a wonderful way to enjoy their flavors and aromas throughout the year. By following the step-by-step guide outlined above, you can ensure that your herbs are harvested at the right time, washed and dried properly, and preserved using methods that best suit your needs. So, get ready to elevate your culinary creations with the freshness and convenience of homegrown herbs!
In a Nutshell
Growing herbs indoors is a convenient and rewarding way to have fresh, flavorful additions to your meals all year round. In this blog post, we will guide you through the process of growing herbs indoors, from seed to harvest.
To start, choose herbs that are well-suited for indoor cultivation, such as basil, mint, parsley, or thyme. Begin by planting the seeds in a seed tray or small pots filled with a well-draining potting mix. Keep the soil moist, but not overly wet, and place the containers in a warm spot with indirect sunlight. As the seeds germinate and sprout, provide them with adequate light by placing them near a sunny window or using artificial grow lights.
Once the seedlings have grown a few inches tall, it’s time to transplant them into larger pots. Choose containers with good drainage and fill them with a high-quality potting mix. Water the herbs regularly, allowing the soil to dry slightly between waterings. Fertilize them every couple of weeks with a balanced liquid fertilizer to ensure healthy growth.
As the herbs continue to grow, you can start harvesting them by snipping off a few leaves or sprigs as needed. Regular harvesting will encourage new growth and keep the plants compact and bushy. Enjoy the fresh flavors of your homegrown herbs in various culinary creations, and remember to adjust watering and lighting as needed to maintain their health and vitality.
In conclusion, growing herbs indoors from seed to harvest is a delightful and practical way to have a continuous supply of fresh herbs at your fingertips. With proper care and attention, you can enjoy the flavors and aromas of your favorite herbs throughout the year. So why not give it a try and bring the joy of gardening into your home?
Here are this week’s Top Questions and Answers
Q1: What are the benefits of growing herbs indoors?
A1: Growing herbs indoors allows you to have fresh herbs year-round, even in colder climates. It also saves money compared to buying herbs from the store and provides a convenient source of flavorful ingredients for your cooking.
Q2: What herbs can be grown indoors?
A2: Many herbs can be successfully grown indoors, including basil, mint, parsley, thyme, rosemary, chives, cilantro, and oregano, among others.
Q3: How do I choose the right container for growing herbs indoors?
A3: Select a container that has drainage holes to prevent waterlogging. It should be large enough to accommodate the herb’s root system and provide room for growth. Consider using pots made of terracotta or other breathable materials to allow proper airflow.
Q4: What type of soil should I use for growing herbs indoors?
A4: Use a well-draining potting mix that is specifically formulated for indoor plants. Avoid using garden soil, as it may contain pests, diseases, or weed seeds.
Q5: How much light do indoor herbs need?
A5: Most herbs require at least 6-8 hours of direct sunlight each day. If you don’t have access to sufficient natural light, you can use artificial grow lights to supplement the light requirements.
Q6: How often should I water my indoor herb garden?
A6: Water your herbs when the top inch of soil feels dry to the touch. Avoid overwatering, as it can lead to root rot. Ensure proper drainage by emptying excess water from saucers or trays.
Q7: Can I fertilize my indoor herbs?
A7: Yes, indoor herbs can benefit from regular fertilization. Use a balanced, water-soluble fertilizer and follow the instructions on the packaging. Be careful not to over-fertilize, as it can damage the plants.
Q8: How long does it take for herbs to grow from seeds?
A8: The time it takes for herbs to grow from seeds varies depending on the herb type. Generally, it can take anywhere from 2-8 weeks for the seeds to germinate, and another few weeks for the plants to reach a harvestable size.
Q9: Can I harvest herbs while they are growing?
A9: Yes, you can harvest herbs while they are growing. Regularly pruning the herbs encourages bushier growth and ensures a steady supply of fresh leaves for your culinary needs. However, avoid harvesting more than one-third of the plant at a time to maintain its health.
Q10: How do I store harvested herbs?
A10: To store harvested herbs, gently wash and dry them thoroughly. You can then store them in airtight containers or freeze them for later use. Another method is to dry the herbs by hanging them upside down in a cool, well-ventilated area until they are completely dry, then store them in airtight containers away from direct sunlight.

James Wong is a renowned ethnobotanist, plant scientist, and local television presenter. With a passion for demystifying plant science, he is known for translating complex botanical concepts into practical advice for everyday plant enthusiasts. James’s expertise spans from traditional gardening to cutting-edge plant technologies, making his insights accessible and informative.