So you’ve decided to try your hand at gardening and you’re ready to get started on growing your own plants from seeds. Starting seedlings is an exciting and rewarding process that can lead to a bountiful harvest of fruits, vegetables, and flowers. Whether you’re a seasoned gardener or a beginner with a green thumb, learning how to successfully start seedlings is an essential skill that will set you up for success in your garden. In this blog post, we’ll cover everything you need to know about starting seedlings, from choosing the right seeds to providing the proper care and environment for your young plants to thrive. Let’s dig in and get those seedlings growing!

Benefits of Starting Seedlings Indoors
Introduction
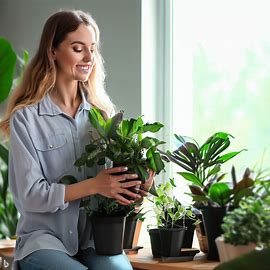
Starting seedlings indoors can be a rewarding and beneficial practice for any gardener. By growing your own seedlings indoors, you have more control over the growing conditions and can ensure that your plants get off to a healthy start. In this article, we will explore the many benefits of starting seedlings indoors and provide you with a step-by-step guide to help you get started.
Increased Success Rate
One of the main benefits of starting seedlings indoors is the increased success rate that comes with it. When you start your seedlings indoors, you can control the temperature, humidity, and light levels to create the ideal growing conditions for your plants. This can help your seedlings germinate faster and grow stronger, giving them a better chance of thriving once they are transplanted outdoors.
Additionally, starting seedlings indoors can help protect them from pests and diseases that may be present in your garden soil. By starting your seedlings in a clean and controlled environment, you can reduce the risk of your plants being attacked by pests or diseases, giving them a better chance of reaching maturity.
Another advantage of starting seedlings indoors is that you can extend the growing season for your plants. By starting your seedlings indoors in early spring, you can get a head start on the growing season and have larger, more established plants to transplant outdoors once the weather warms up. This can help you harvest your crops earlier and enjoy a longer growing season overall.
Cost Savings
Starting seedlings indoors can also help you save money in the long run. By growing your own seedlings from seeds, you can save on the cost of buying established plants from a nursery. Seeds are generally much cheaper than plants, so starting your own seedlings can be a cost-effective way to fill your garden with a variety of plants.
Additionally, starting seedlings indoors allows you to grow a wider variety of plants than you may find at your local nursery. When you start your seedlings from seeds, you have access to a much larger selection of plant varieties, giving you the opportunity to grow unique and interesting plants that may not be available commercially.
Starting seedlings indoors can also help you save money on water and other resources. By growing your seedlings in a controlled environment, you can more efficiently manage water usage and reduce the amount of water and other resources needed to grow your plants. This can help you save money on your water bill and reduce your overall environmental impact.
In conclusion, starting seedlings indoors can offer a range of benefits for gardeners of all experience levels. From increased success rates and cost savings to extended growing seasons and access to a wider variety of plants, starting seedlings indoors is a practice that can help you grow a healthy and bountiful garden. Follow the step-by-step guide provided in this article to get started on your indoor seedling journey today.
Essential Supplies for Starting Seedlings
Starting seedlings is a rewarding and cost-effective way to grow your own plants from scratch. However, in order to successfully start seedlings, you will need to have the right supplies on hand. In this guide, we will discuss the essential supplies you will need to start seedlings successfully.
1. Containers
Containers are essential for starting seedlings as they provide a controlled environment for the seeds to germinate and grow. There are a variety of containers you can use, including seed trays, cell packs, peat pots, and plastic cups. When choosing containers, make sure they have drainage holes to prevent waterlogging and allow for proper air circulation.
It is important to clean and sterilize your containers before use to prevent the spread of diseases and pests. You can do this by soaking them in a solution of one part bleach to nine parts water, and then rinsing them thoroughly with clean water.
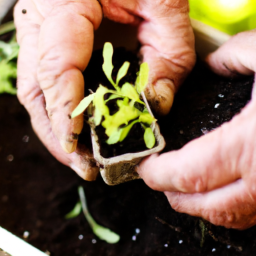
Additionally, consider using biodegradable containers that can be planted directly into the soil once the seedlings are ready to be transplanted. This will help reduce transplant shock and minimize root disturbance.
2. Seed Starting Mix
A high-quality seed starting mix is essential for starting seedlings as it provides the right balance of nutrients, moisture retention, and aeration for seed germination and root development. Avoid using regular garden soil, as it may contain pathogens and lack the proper texture for seedling growth.
When choosing a seed starting mix, look for one that is lightweight, well-draining, and sterile. You can also make your own seed starting mix by combining equal parts peat moss, vermiculite, and perlite. This will ensure that your seedlings have the best possible start.
Fill your containers with the seed starting mix, leaving a little space at the top for watering. Gently press down the mix to eliminate air pockets and create a level surface for planting your seeds.
3. Seeds
Of course, you will need seeds to start seedlings. When selecting seeds, choose varieties that are well-suited to your growing conditions and climate. Consider factors such as sunlight, temperature, and soil type to ensure the success of your seedlings.
Before planting your seeds, read the instructions on the seed packets for proper planting depth, spacing, and germination time. Some seeds may require special treatment, such as soaking or scarification, before planting to improve germination rates.
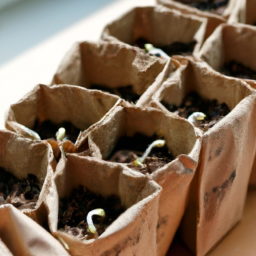
Plant your seeds according to the instructions on the seed packets, covering them with a thin layer of seed starting mix. Water your seeds gently to avoid displacing them, and place them in a warm, sunny location to encourage germination.
Tips for Successfully Starting Seedlings at Home
Starting seedlings at home can be a rewarding and cost-effective way to grow your own plants. Whether you’re a beginner or an experienced gardener, there are a few key tips to keep in mind to ensure your seedlings thrive. In this guide, we’ll walk you through the process of starting seedlings at home, from choosing the right seeds to caring for your young plants.
Choose the Right Seeds
When starting seedlings at home, it’s important to choose the right seeds for your growing conditions. Consider factors such as the amount of sunlight your space receives, the average temperature, and the type of soil you have. Some seeds may require specific conditions to germinate and grow, so it’s important to do your research before selecting your seeds.
Additionally, consider the time of year and the length of your growing season when choosing seeds. Some plants may take longer to mature than others, so make sure to select seeds that are appropriate for the time frame you have available.
Lastly, consider the types of plants you want to grow and your own gardening experience. If you’re a beginner, you may want to start with easy-to-grow plants such as herbs or leafy greens. More experienced gardeners may want to try their hand at more challenging plants such as tomatoes or peppers.
Prepare Your Growing Space
Before starting your seedlings, it’s important to prepare your growing space. Choose a location that receives plenty of sunlight and has good air circulation. Make sure your space is free from drafts and temperature fluctuations, as this can stress your young plants.
Next, gather your supplies. You’ll need containers for planting your seeds, potting soil, a watering can or spray bottle, and a light source if you’re growing indoors. Make sure your containers have drainage holes to prevent waterlogged soil, which can lead to root rot.
Once you have your supplies, fill your containers with potting soil and moisten it slightly. Plant your seeds according to the instructions on the seed packet, covering them with a thin layer of soil. Place your containers in a warm, sunny spot and water them gently to keep the soil moist but not waterlogged.
Care for Your Seedlings
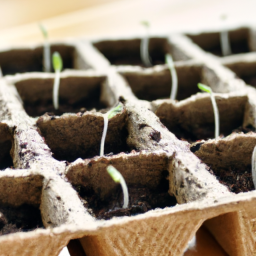
Once your seedlings have sprouted, it’s important to care for them properly to ensure they grow into healthy plants. Make sure your seedlings receive enough sunlight, at least 6-8 hours a day, to promote strong growth. If you’re growing indoors, consider using a grow light to supplement natural light.
Water your seedlings regularly, keeping the soil moist but not waterlogged. Avoid overhead watering, as this can lead to fungal diseases. Instead, water at the base of the plants to prevent water from splashing onto the leaves.
As your seedlings grow, you may need to thin them out to prevent overcrowding. This will allow your plants to have enough space to grow and access to sunlight and nutrients. You can also fertilize your seedlings with a diluted liquid fertilizer to promote healthy growth.
By following these tips for starting seedlings at home, you can ensure your young plants thrive and grow into healthy, productive plants. With a little care and attention, you’ll be able to enjoy the fruits of your labor in no time.
Let’s wrap up what we learned
Starting seedlings can be a fun and rewarding way to kickstart your gardening journey. Whether you’re a seasoned pro or a beginner, growing your own seedlings allows you to have control over the entire process from start to finish. To begin, you’ll need some basic supplies such as seeds, soil, containers, and a light source.
When starting your seedlings, it’s important to follow the instructions on the seed packet for optimal growth. Make sure to keep the soil consistently moist but not waterlogged, and provide adequate sunlight or artificial light for at least 12-16 hours a day. As your seedlings grow, be sure to gradually introduce them to outdoor conditions before transplanting them into the garden. With a little patience and care, you’ll soon have a beautiful garden filled with healthy, thriving plants that you started from seed.
Here are this week’s Top Questions and Answers
### Q1: What is the best way to start seedlings indoors?
A1: The best way to start seedlings indoors is to use seed starting trays or containers filled with a seed starting mix. Make sure to place the trays in a warm, sunny location or under grow lights to provide the seedlings with the light they need to grow.
### Q2: How often should I water my seedlings?
A2: It’s important to keep the soil moist but not waterlogged when starting seedlings. Check the soil daily and water when it feels dry to the touch. Be careful not to overwater, as this can lead to root rot.
### Q3: When should I transplant my seedlings outdoors?
A3: Seedlings should be transplanted outdoors once they have developed their first true leaves and are strong enough to withstand outdoor conditions. This typically occurs 4-6 weeks after germination, depending on the plant variety.
### Q4: Do seedlings need fertilizer?
A4: Seedlings do not typically need fertilizer until they have developed their first set of true leaves. At this point, you can start feeding them with a diluted liquid fertilizer to help promote healthy growth.
### Q5: How can I prevent leggy seedlings?
A5: To prevent leggy seedlings, make sure they are receiving enough light and are not overcrowded in their containers. You can also gently brush your hand over the tops of the seedlings a few times a day to help strengthen their stems.
Dr. Olivia Green is a botanist with over two decades of experience in indoor plant cultivation. She holds a Ph.D. in Plant Biology and has dedicated her career to researching plant behavior in controlled environments. Dr. Green is passionate about helping plant enthusiasts master the art of indoor gardening through her extensive knowledge and practical insights.