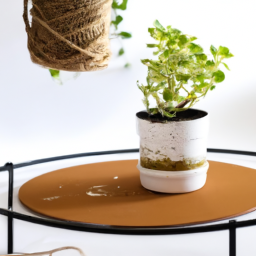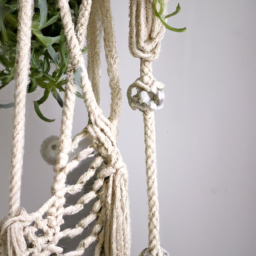
Are you looking for a stylish and unique way to display your plants? Look no further than macramé plant hangers! These trendy and boho-inspired creations are the perfect addition to any home or garden. With their intricate knots and beautiful designs, macramé plant hangers add a touch of boho flair to any space. Whether you have a green thumb or just want to add some visual interest to your decor, macramé plant hangers are a must-have. In this blog post, we will explore the world of macramé plant hangers, from their history and origins to different styles and techniques. So, grab a cup of tea and get ready to learn all about macramé plant hangers and how they can transform your space into a boho paradise.
The History and Origins of Macramé Plant Hangers: Exploring the Bohemian Influence
Welcome to the fascinating world of macramé plant hangers! In this article, we will delve into the rich history and origins of this beautiful craft, exploring its deep-rooted connection to the bohemian lifestyle. Get ready to add a touch of boho flair to your home with these step-by-step instructions on creating your very own macramé plant hangers.
1. The Ancient Art of Macramé
Macramé, derived from the Arabic word “migramah,” meaning fringe, has a long and storied history dating back thousands of years. This intricate form of textile-making involves knotting rather than weaving or knitting, resulting in stunning patterns and designs.
The origins of macramé can be traced back to the 13th-century Arabic weavers who used intricate knotting techniques to create decorative fringes on their textiles. This art form then spread to Spain during the Moorish conquest, where it gained popularity among sailors who used macramé to pass the time during long voyages.
Fast forward to the 19th century, and macramé experienced a resurgence in Europe, particularly in Victorian England. It became a popular pastime for ladies of leisure who created intricate lace-like patterns using cotton or silk threads. Macramé was also used to adorn clothing, curtains, and home decor, adding a touch of elegance to the Victorian era.
2. The Bohemian Influence
Macramé truly found its place in the world during the bohemian movement of the 1960s and 1970s. The boho lifestyle, characterized by a free-spirited and unconventional approach, embraced macramé as a way to add a natural and earthy touch to living spaces.
Bohemian artists and hippies adorned their homes, gardens, and even themselves with macramé creations. Plant hangers, in particular, became a popular way to showcase indoor plants, bringing nature indoors and creating a cozy and bohemian atmosphere.
The bohemian influence on macramé plant hangers is evident in the choice of materials and designs. Natural fibers such as cotton, hemp, or jute are commonly used, giving the hangers a rustic and organic feel. Intricate knot patterns, often incorporating beads or feathers, further enhance the boho aesthetic.
3. Creating Your Own Macramé Plant Hanger
Now that you have a better understanding of the history and bohemian influence behind macramé plant hangers, it’s time to get creative and make your own! Follow these step-by-step instructions to add a touch of boho flair to your home:
Step 1: Gather your materials
Start by gathering all the necessary materials. You will need a sturdy plant pot, natural fiber cord or rope, scissors, and optional embellishments such as beads or feathers.
Step 2: Measure and cut the cord
Measure the desired length for your macramé plant hanger, keeping in mind that it will need to accommodate the height of your plant pot. Cut several lengths of cord, ensuring they are all the same length.
Step 3: Create the base
Tie the cords together at one end, leaving a loop at the top for hanging. This will serve as the base of your plant hanger. You can secure the loop by tying an additional knot or using a metal ring.
Step 4: Start knotting
Divide the cords into groups of two or four, depending on the knotting pattern you choose. Start knotting by crossing the cords over each other and pulling them through the loop. Repeat this process until you reach the desired length for your hanger.
Step 5: Finishing touches
Once you’ve reached the desired length, tie a knot at the bottom to secure the cords. You can also add beads or feathers to give your macramé plant hanger a unique and personalized touch.
Voila! You’ve successfully created your very own macramé plant hanger. Hang it near a window, in a cozy corner, or even on your porch to add a boho vibe to your living space.
In conclusion, macramé plant hangers have a fascinating history deeply rooted in the bohemian lifestyle. From its ancient origins to its resurgence during the Victorian era and its ultimate association with the free-spirited boho movement, macramé has stood the test of time as a versatile and beautiful art form. Now that you have the knowledge and step-by-step instructions, it’s time to unleash your creativity and add some boho flair to your home with your own macramé plant hangers.
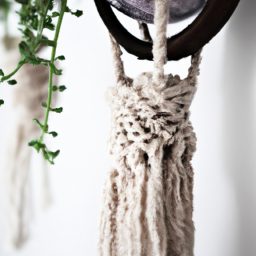
Step-by-Step Guide to Creating Macramé Plant Hangers: Embrace the Boho Flair
Are you looking to add a touch of boho flair to your home decor? Macramé plant hangers are the perfect way to do just that. These beautiful, handcrafted hangers not only elevate your plants but also add a stylish and unique element to any space. In this step-by-step guide, we will walk you through the process of creating your very own macramé plant hangers. So grab your supplies and let’s get started!
Materials You’ll Need
Before diving into the creation process, make sure you have all the necessary materials. Here’s what you’ll need:
- Cotton rope or macramé cord
- Scissors
- Wooden ring or metal hoop
- Measuring tape
- Pot or container for your plant
- Optional: beads or other decorative elements
Step 1: Measure and Cut Your Rope
Start by measuring the desired length for your plant hanger. Consider the height at which you want your plant to hang and the length of the container. Add a few extra inches to account for knots and the gathering of the rope. Once you have your measurement, cut several pieces of rope at that length. The number of ropes you’ll need depends on the complexity of your macramé design.
Step 2: Attach the Ropes to the Ring
Take all the cut pieces of rope and fold them in half. This will create a loop at one end. Place the folded end of the ropes through the wooden ring or metal hoop. Pull the loose ends of the ropes through the loop and tighten. This will create a secure attachment to the ring.
Step 3: Create the Macramé Knots
Now it’s time to start creating the macramé knots that will form the body of your plant hanger. There are various knots you can use, but we’ll focus on the basic ones: the square knot and the half square knot.
Square Knot
To create a square knot, follow these steps:
- Take two adjacent ropes and cross the left one over the right one.
- Pass the left rope under the right one and through the loop created on the right side.
- Pull both ropes to tighten the knot.
- Repeat the same steps with the next set of adjacent ropes.
Continue creating square knots until you reach your desired length for the body of the plant hanger.
Half Square Knot
The half square knot is created as follows:
- Take the left rope and cross it over the center ropes, forming a loop on the left side.
- Take the right rope and pass it over the left rope, under the center ropes, and through the loop on the left side.
- Pull both ropes to tighten the knot.
- Repeat the same steps with the right rope, creating a loop on the right side.
- Pass the left rope over the right rope, under the center ropes, and through the loop on the right side.
- Pull both ropes to tighten the knot.
Alternate between square knots and half square knots to create an intricate and visually appealing pattern for your plant hanger.
Step 4: Finish and Hang Your Plant Hanger
Once you’ve reached the desired length for your plant hanger, it’s time to finish it off. Gather all the ropes together and tie a knot at the bottom, leaving a small loop for the pot to sit in. Trim any excess rope below the knot.
Now, all that’s left to do is find the perfect spot to hang your macramé plant hanger. Choose a sturdy hook or nail on the ceiling or wall, and hang your creation with pride. Make sure to adjust the height to accommodate the size of your plant and the space it needs to grow.
If you want to add an extra touch of boho flair, consider incorporating beads or other decorative elements into your macramé design. You can thread them onto the ropes as you create the knots or attach them separately using smaller pieces of string.
Now that you’ve mastered the art of creating macramé plant hangers, you can let your creativity soar. Experiment with different knot patterns, rope colors, and plant combinations to add a personal touch to your home decor. Enjoy the process and embrace the boho flair!

Decorating with Macramé Plant Hangers: Infuse Your Space with Bohemian Vibes
Introduction
Welcome to the wonderful world of macramé plant hangers! If you’re looking to add a touch of bohemian flair to your space, look no further. Macramé plant hangers are not only a beautiful way to display your favorite plants, but they also bring a sense of warmth and coziness to any room. In this guide, we will walk you through the steps of creating your own macramé plant hanger and offer some tips on how to incorporate them into your home decor.
Choosing the Right Materials
Before you dive into macramé, it’s important to gather all the necessary materials. Here’s what you’ll need:
Cotton Cord
When it comes to macramé, cotton cord is your best friend. It’s strong, durable, and easy to work with. Look for a cord that is at least 4mm thick for a sturdy hanger. You can choose a natural, unbleached cotton cord for a more rustic look or opt for a dyed cord to add a pop of color to your space.
Wooden Ring or Metal Hoop
A wooden ring or metal hoop will serve as the anchor for your macramé plant hanger. This is what you’ll attach your cords to and hang your plant from. Choose a ring or hoop that is large enough to accommodate your pot and sturdy enough to hold the weight of your plant.
Scissors
A good pair of scissors is essential for cutting your cord and trimming any excess. Make sure they are sharp and comfortable to hold.
Optional: Beads or Charms
If you want to add some extra flair to your plant hanger, consider incorporating beads or charms into your design. These can be threaded onto the cords to create a unique and personalized look.
Step-by-Step Guide
Step 1: Prepare Your Cord
Start by cutting eight equal lengths of cord, each measuring around 8 feet long. You can adjust the length depending on how long you want your plant hanger to be. Fold each cord in half and attach them to the wooden ring or metal hoop using a lark’s head knot. This will create 16 individual cords hanging down.
Pro tip: To ensure a balanced look, divide the cords into four groups of four.
Step 2: Create the Square Knots
Take the cords from the first group and create a square knot by crossing the left cord over the center cords and then passing the right cord over the left one and through the loop created on the left side. Repeat this process with the same group of cords, but this time start with the right cord. This will create a square knot. Repeat this step with the remaining three groups of cords.
Pro tip: To achieve a more intricate design, you can experiment with different knot variations such as the half square knot or the diagonal clove hitch knot.
Step 3: Form the Basket
Once you’ve created the square knots, it’s time to form the basket for your plant. Take one cord from each adjacent group and tie them together using a double half hitch knot. Repeat this process with the remaining cords until you have a sturdy basket shape.
Pro tip: If you want to add beads or charms to your design, thread them onto the cords before tying the double half hitch knots.
Incorporating Macramé Plant Hangers into Your Home Decor
1. Living Room
The living room is the perfect place to showcase your macramé plant hangers. Hang them near windows or in empty corners to add a touch of greenery and bohemian charm. Mix and match different sizes and styles of plant hangers to create a visually interesting display.
Consider pairing your macramé plant hangers with other boho-inspired elements such as rattan furniture, colorful textiles, and natural materials like jute or bamboo. This will create a cohesive and inviting space that exudes bohemian vibes.
2. Bedroom
Your bedroom should be a sanctuary, and macramé plant hangers can help create a calming and peaceful atmosphere. Hang a few plant hangers near your bed or by the window to bring nature indoors and promote relaxation.
Choose plants that have air-purifying qualities, such as snake plants or peace lilies, to enhance the air quality in your bedroom. The combination of greenery and macramé will create a soothing and serene environment, perfect for a good night’s sleep.
3. Outdoor Spaces
Don’t limit your macramé plant hangers to indoor spaces! They can also be a beautiful addition to your outdoor areas. Hang them from pergolas, porches, or balcony railings to create a boho oasis in your backyard.
Opt for weather-resistant materials such as nylon cord or synthetic fibers to ensure your plant hangers can withstand the elements. Fill them with colorful flowers or trailing vines to add a burst of color and life to your outdoor space.
Conclusion
Macramé plant hangers are a fantastic way to infuse your space with bohemian vibes. By following the steps outlined in this guide, you can create your own unique plant hangers that will add a touch of warmth and personality to any room. Whether you choose to hang them in your living room, bedroom, or outdoor spaces, macramé plant hangers are sure to bring a sense of beauty and tranquility to your home.
Essential Points
Macramé plant hangers have become increasingly popular in recent years, and it’s not hard to see why. These beautiful, handmade creations add a touch of boho flair to any space, instantly transforming it into a cozy and stylish sanctuary. Whether you’re a plant lover looking for a unique way to display your greenery or simply want to add some texture and visual interest to your home, macramé plant hangers are the perfect solution.
One of the great things about macramé plant hangers is their versatility. They come in various sizes and styles, allowing you to find the perfect fit for your plants and personal aesthetic. From simple and minimalist designs to intricate patterns and vibrant colors, there’s a macramé plant hanger out there for everyone. Plus, they can be hung from ceilings, hooks, or even mounted on walls, giving you endless possibilities for creating your own indoor jungle. So, if you’re looking to add a touch of boho flair to your space and elevate your plant game, macramé plant hangers are definitely worth considering.
Let me leave you with some FAQs:
Q1: What is macramé and how is it used in plant hangers?
A1: Macramé is a form of textile art that involves knotting cords together to create decorative patterns. In the context of plant hangers, macramé techniques are used to create intricate designs that hold potted plants, adding a boho flair to any space.
Q2: How do I choose the right macramé plant hanger for my space?
A2: When choosing a macramé plant hanger, consider the size and weight of your plant. Some hangers are designed for smaller pots, while others can accommodate larger ones. Additionally, think about the style and color that will best complement your space’s aesthetic. Whether you prefer a minimalist or more elaborate design, there are plenty of options to choose from.
Q3: Can macramé plant hangers be used outdoors?
A3: Absolutely! Macramé plant hangers can be used both indoors and outdoors. However, it’s important to choose a hanger made from weather-resistant materials such as synthetic fibers or treated cotton. These materials are more durable and can withstand the elements, ensuring that your hanger remains intact and beautiful even when exposed to outdoor conditions.
Q4: How do I hang a macramé plant hanger?
A4: Hanging a macramé plant hanger is relatively simple. First, find a sturdy hook or anchor point on your ceiling, wall, or beam. Then, use a strong rope or chain to attach the hanger securely. Make sure to check the weight capacity of the hook or anchor point to ensure it can support the weight of your plant. Once everything is properly secured, you can hang your plant and enjoy the boho vibes it brings to your space.
Q5: How do I care for macramé plant hangers?
A5: To keep your macramé plant hangers looking their best, it’s important to dust them regularly to prevent dirt and debris from accumulating in the fibers. If your hanger gets stained, gently spot clean it using mild soap and water. Avoid using harsh chemicals or bleach, as they can damage the fibers. Additionally, if you have an outdoor hanger, consider bringing it indoors during extreme weather conditions to prolong its lifespan.

Lisa Chen is a seasoned indoor gardening expert and the author of several bestselling books on the topic. With a background in horticulture and urban farming, Lisa is dedicated to helping urban dwellers embrace the joys of cultivating green spaces indoors. Her detailed guides and hands-on tips empower readers to transform their living spaces into thriving plant sanctuaries.

