Are you looking to add a touch of green to your living space? If so, you’re in the right place! In this blog post, we’ll be diving into the world of hanging garden DIY projects that will truly elevate your space. Whether you have a small apartment balcony or a spacious backyard, creating a hanging garden is a fantastic way to bring life and freshness to any area. So, let’s roll up our sleeves and explore the wonderful world of hanging gardens, as we discover how to transform your space with this creative and beautiful DIY project.

Building a Hanging Garden: Step-by-Step Guide for Beginners
Introduction
Welcome to the ultimate guide on building your very own hanging garden! Whether you have limited space or simply want to add a touch of greenery to your living area, creating a hanging garden is a fantastic way to elevate your space. In this step-by-step guide, we will walk you through the process of building a hanging garden, from selecting the right plants to designing and maintaining your beautiful vertical oasis. So, let’s get started!
Choosing the Right Plants
When it comes to building a hanging garden, selecting the right plants is crucial for ensuring their health and longevity. Here are a few factors to consider:
1. Light Requirements
Before choosing your plants, assess the amount of sunlight your hanging garden will receive. Some plants thrive in full sun, while others prefer shade or partial shade. Ensure that the plants you select can adapt to the light conditions in your chosen location.
For example, if your hanging garden will be placed in a sunny spot, consider plants like petunias, geraniums, or herbs like thyme and rosemary. On the other hand, if your garden will be in a shaded area, ferns, begonias, or ivy would be excellent choices.
2. Watering Needs
Another important factor to consider is the watering needs of your chosen plants. Some plants require frequent watering, while others can tolerate periods of drought. Make sure to select plants that have similar water requirements to simplify your maintenance routine.
For instance, if you have a busy schedule and may forget to water your hanging garden regularly, opt for succulents or cacti that can store water in their leaves. On the other hand, if you enjoy tending to your plants and have time for regular care, flowering plants like fuchsias or impatiens would thrive.
3. Size and Growth Habit
Consider the mature size and growth habit of the plants you choose for your hanging garden. Some plants may grow tall and require ample vertical space, while others have a trailing habit and are perfect for cascading down from hanging baskets.
If you have limited vertical space, opt for compact varieties or plants that can be easily pruned and trained to maintain their shape. Plants like pothos, spider plants, or trailing petunias are excellent choices for hanging gardens with limited space.
Designing Your Hanging Garden
Now that you have selected the perfect plants for your hanging garden, it’s time to design a visually appealing arrangement. Here are some tips to consider:
1. Choosing Containers
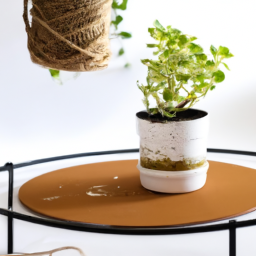
Selecting the right containers is essential for both the aesthetics and functionality of your hanging garden. You can choose from a variety of options such as hanging baskets, wall-mounted planters, or even repurposed items like old teapots or wooden crates.
Ensure that your chosen containers have drainage holes to prevent waterlogging and root rot. Additionally, consider the weight of the containers and the strength of the hanging mechanism to ensure they can support the weight of the plants.
2. Arranging the Plants
When arranging your plants, consider their growth habits and aesthetic appeal. Place taller plants towards the back or center of your hanging garden, with trailing or cascading plants towards the front or edges to create depth and visual interest.
Experiment with different combinations of colors, textures, and foliage shapes to create a visually pleasing arrangement. You can also mix flowering plants with foliage plants to add variety and create a vibrant display.
3. Hanging Your Garden
Once you have arranged your plants, it’s time to hang your garden. Ensure that the hanging mechanism you choose is secure and can support the weight of your plants. Consider the height at which you want your garden to hang and adjust accordingly.
Hang your garden in a location that receives the appropriate amount of light for your chosen plants. Additionally, make sure the area is easily accessible for watering and maintenance.
Maintaining Your Hanging Garden
Now that your hanging garden is complete, it’s important to maintain its health and beauty. Here are some essential maintenance tips:
1. Watering
Regular watering is crucial for the well-being of your hanging garden. Check the moisture level of the soil regularly and water when it feels dry to the touch. Avoid overwatering, as it can lead to root rot and other plant diseases.
Consider using a watering can with a narrow spout or a hose attachment with a gentle spray to ensure even watering without damaging the plants or causing soil erosion.
2. Fertilizing
Provide your hanging garden with the necessary nutrients by fertilizing regularly. Choose a balanced, water-soluble fertilizer and follow the instructions on the packaging for proper dilution and application.
Apply the fertilizer to the soil or mix it with water and use it for regular watering. Be cautious not to over-fertilize, as it can lead to excessive foliage growth at the expense of flowers or fruits.
3. Pruning and Trimming
Maintain the shape and size of your plants by pruning and trimming as needed. Remove any dead or yellowing leaves, spent flowers, or overgrown branches to promote healthy growth and prevent diseases.
Regular pruning and trimming also help maintain the overall aesthetics of your hanging garden, ensuring it remains visually appealing and well-balanced.
Conclusion
Congratulations! You have now mastered the art of building and maintaining a hanging garden. By carefully selecting the right plants, designing a visually pleasing arrangement, and providing proper care, you can create a stunning vertical oasis that will elevate your space and bring joy to your life. So, go ahead and get started on your hanging garden DIY project today!
Creative Ideas for DIY Hanging Gardens: Transforming Your Space
Welcome to our guide on how to create stunning DIY hanging gardens to elevate your space! Whether you have a small balcony, a cozy backyard, or even a limited indoor area, hanging gardens are a fantastic way to bring life and beauty to any space. In this article, we will explore creative ideas and provide you with a step-by-step guide to help you create your own hanging garden masterpiece.
Choosing the Perfect Location
The first step in creating your DIY hanging garden is to carefully choose the ideal location. Consider the amount of sunlight, wind exposure, and the overall aesthetic of the area. Hanging gardens can be placed outdoors, indoors, or even suspended from ceilings, so the possibilities are endless.
If you have limited outdoor space, a balcony or patio can be transformed into a lush oasis with hanging gardens. For indoor spaces, hanging gardens can be a great way to add a touch of nature to your home, especially in rooms with limited floor space.
Once you have chosen the location, it’s time to move on to selecting the right plants for your hanging garden.
Choosing the Perfect Plants
When it comes to selecting plants for your hanging garden, you have a wide range of options. Consider the lighting conditions and the amount of care you are willing to provide. Here are a few popular choices:
1. Succulents: These low-maintenance plants are perfect for hanging gardens. They come in various shapes, sizes, and colors, and thrive in bright, indirect light.
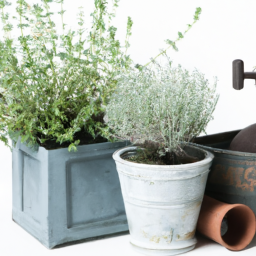
2. Herbs: If you love cooking, why not have your own herb garden hanging nearby? Herbs like basil, rosemary, and mint can be grown in hanging pots and provide fresh flavors all year round.
3. Trailing Plants: Plants like ivy, pothos, and spider plants are great for creating a cascading effect in your hanging garden. They are easy to care for and add a touch of elegance to any space.
Remember to choose plants that complement each other in terms of their sunlight and watering needs. This will ensure that your hanging garden thrives and remains visually appealing.
Creating Your DIY Hanging Garden
Now that you have chosen the perfect location and plants, it’s time to get your hands dirty and start creating your DIY hanging garden. Here’s a step-by-step guide to help you:
1. Select Hanging Containers: Choose containers that are suitable for your chosen plants and the overall aesthetic you want to achieve. Hanging baskets, terracotta pots, or even repurposed containers can all work well.
2. Prepare the Containers: Ensure that your containers have proper drainage holes to prevent waterlogging. You can add a layer of pebbles or broken pottery at the bottom of the container to improve drainage.
3. Potting Mix: Use a well-draining potting mix that is suitable for the plants you have chosen. This will provide the necessary nutrients and help retain moisture without becoming waterlogged.
4. Planting: Carefully plant your chosen plants in the containers, ensuring that they are positioned securely and have enough space to grow. Add more potting mix if needed, and gently firm it around the roots.
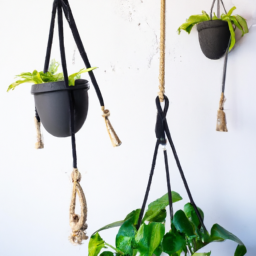
5. Hanging Mechanism: Depending on your chosen location, you will need to select a suitable hanging mechanism. This can be hooks, brackets, or even a DIY rope system. Ensure that the mechanism is secure and can support the weight of your hanging garden.
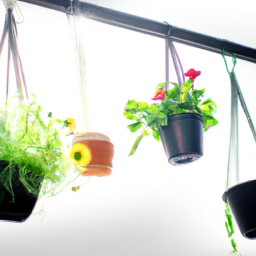
6. Arrangement: Once your hanging containers are ready, it’s time to arrange them in your chosen location. Consider the height, spacing, and overall visual appeal. Experiment with different arrangements until you find the perfect setup.
7. Maintenance: Regularly check your hanging garden for watering needs, pruning, and any signs of pests or diseases. Each plant may have different care requirements, so it’s important to stay informed and provide the necessary care.
With these steps, you are well on your way to creating a stunning DIY hanging garden that will transform your space into a botanical paradise.
Remember to get creative and experiment with different plant combinations, container styles, and hanging arrangements. The beauty of DIY hanging gardens is that they can be customized to suit your personal taste and space limitations.
So, go ahead and elevate your space with a DIY hanging garden. It’s a rewarding and enjoyable project that will bring nature closer to your daily life.
Choosing the Right Plants for Your DIY Hanging Garden: Tips and Recommendations
Introduction
Welcome to our guide on choosing the right plants for your DIY hanging garden. Whether you have a small balcony or a spacious backyard, a hanging garden can elevate your space and bring life to any area. In this article, we will provide you with tips and recommendations to help you make the best plant selections for your hanging garden project.
Understanding Your Environment
Before diving into plant selection, it’s essential to understand the environment in which your hanging garden will thrive. Assess the amount of sunlight your garden receives throughout the day. Is it a full sun, partial shade, or full shade area? Different plants have varying light requirements, so this information will help you choose the right plants that can thrive in your specific conditions.
In addition to sunlight, consider the temperature and humidity levels of your area. Some plants are more tolerant of heat and dry conditions, while others prefer cooler and more humid environments. By understanding your environment, you can select plants that will not only survive but also thrive in your hanging garden.
Lastly, evaluate the available space and the weight-bearing capacity of your hanging garden structure. Some plants can become quite heavy when fully grown, so it’s important to choose plants that are suitable for your setup. Hanging baskets and planters should be able to support the weight of the plants without any risk of collapsing.
Choosing the Right Plants
Now that you have a good understanding of your environment, it’s time to choose the right plants for your DIY hanging garden. Here are some tips and recommendations to help you make the best selections:
1. Consider Plant Size and Growth Habit
When selecting plants, consider their size and growth habit. Hanging gardens typically have limited space, so choosing plants that stay compact or have a trailing habit works best. Look for plants that naturally cascade or have long, flowing stems. This will create a stunning visual effect as they grow and drape over the edges of your hanging baskets or planters.
Some popular choices for hanging gardens include trailing petunias, ivy, pothos, ferns, and succulents. These plants are known for their ability to grow and trail gracefully, making them perfect for hanging displays.
2. Choose Plants with Similar Light and Water Requirements
Grouping plants with similar light and water requirements together will make it easier for you to care for them. It ensures that all plants in your hanging garden receive the right amount of light and water, promoting their overall health and growth.
For example, if you have a sunny spot, you can choose plants that thrive in full sun, such as geraniums, marigolds, or portulaca. On the other hand, if your hanging garden is in a shady area, consider plants like impatiens, begonias, or ferns that prefer partial shade.
Similarly, some plants require more water than others. Grouping plants with similar water needs will prevent overwatering or underwatering, ensuring the longevity of your hanging garden.
3. Explore Different Colors and Textures
Don’t be afraid to experiment with different colors and textures to create an eye-catching hanging garden. Mixing plants with vibrant flowers, variegated foliage, and varying textures will add visual interest and depth to your display.
Consider using a combination of flowering plants, foliage plants, and even herbs for a diverse and visually appealing hanging garden. For instance, you can pair colorful geraniums with trailing silver falls or combine herbs like thyme and mint with flowering petunias.
Remember to choose plants that complement each other and create a harmonious composition. This will enhance the overall aesthetic appeal of your hanging garden.
Conclusion
Creating your own DIY hanging garden can be a rewarding and enjoyable experience. By understanding your environment, choosing plants that suit your space, and considering their light and water requirements, you can create a stunning hanging garden that elevates your space.
Remember to regularly monitor and care for your plants, providing them with the necessary light, water, and nutrients they need to thrive. With proper care and attention, your hanging garden will become a beautiful and vibrant addition to your home or outdoor area.
Essential Points
Are you tired of your plain and boring space? Looking for a creative way to liven up your home or office? Look no further than the hanging garden DIY trend! Elevate your space and bring the outdoors in with this simple and fun project.
Hanging gardens are a fantastic way to add a touch of greenery to any room. Whether you have a small apartment or a spacious office, this DIY project can transform your space into a lush oasis. Plus, it’s super easy to do! All you need are a few basic materials like pots, hooks, and plants, and you’re ready to get started. Hang them from the ceiling or mount them on the wall – the choice is yours! Not only will your hanging garden add a pop of color to your space, but it will also improve air quality and create a calming atmosphere. So why wait? Elevate your space with a hanging garden DIY project today!
Top FAQs:
Q1: What is a hanging garden DIY?
A1: A hanging garden DIY refers to a do-it-yourself project that involves creating a garden or growing plants in a suspended or elevated manner. It allows you to utilize vertical space by hanging planters or containers, adding a unique and decorative touch to your living space.
Q2: Why should I consider a hanging garden DIY?
A2: There are several reasons why a hanging garden DIY can be a fantastic addition to your space. Firstly, it allows you to maximize limited space, making it perfect for small apartments, balconies, or even indoor areas. Secondly, hanging gardens add a touch of greenery and natural beauty to your surroundings, creating a calming and refreshing atmosphere. Lastly, they offer a creative and customizable way to showcase your favorite plants and flowers, adding a personal touch to your decor.
Q3: What materials do I need for a hanging garden DIY?
A3: The materials needed for a hanging garden DIY will depend on your specific design and preferences. However, some common materials include hanging planters or baskets, sturdy hooks or brackets, potting soil, plants or seeds, water drainage trays, and appropriate tools for installation, such as a drill or screwdriver. You may also consider adding decorative elements like ropes, macrame hangers, or colorful ribbons to enhance the visual appeal.
Q4: How do I choose the right plants for a hanging garden DIY?
A4: When selecting plants for your hanging garden DIY, there are a few factors to consider. Firstly, assess the amount of sunlight your space receives. Some plants thrive in direct sunlight, while others prefer shade or partial shade. Secondly, consider the size and weight of the plants. Choose plants that are suitable for hanging, such as trailing or cascading varieties. Lastly, think about the maintenance requirements of the plants, ensuring they align with your gardening skills and available time for care.
Q5: How do I care for a hanging garden DIY?
A5: Caring for a hanging garden DIY involves regular maintenance to ensure the health and vitality of your plants. Here are a few essential care tips:
– Water your plants regularly, ensuring the soil is moist but not waterlogged.
– Provide adequate sunlight or shade based on the plant’s requirements.
– Fertilize your plants as needed, following the instructions on the fertilizer package.
– Prune and trim your plants to maintain their shape and prevent overgrowth.
– Check for pests or diseases regularly and take appropriate measures to control them.
– Lastly, monitor the weight-bearing capacity of the hanging structure and make any necessary adjustments to ensure safety.

Lisa Chen is a seasoned indoor gardening expert and the author of several bestselling books on the topic. With a background in horticulture and urban farming, Lisa is dedicated to helping urban dwellers embrace the joys of cultivating green spaces indoors. Her detailed guides and hands-on tips empower readers to transform their living spaces into thriving plant sanctuaries.