Have you ever found yourself wandering through a garden, mesmerized by the beauty of nature? There’s something truly magical about the colors, scents, and textures that can be found in a well-tended garden. And if you’re like me, you might have a habit of collecting fallen leaves, dried flowers, or interesting twigs during your strolls. But what do you do with these plant finds once you bring them home? That’s where garden-inspired crafts come in. In this blog post, we’ll explore the world of transforming plant finds into beautiful and unique creations. From pressed flower art to DIY potpourri, there are countless ways to incorporate the beauty of nature into your everyday life. So, let’s dive in and discover the endless possibilities of garden-inspired crafts: transforming plant finds into something truly extraordinary.

DIY Terrariums: Creating Miniature Gardens with Found Plants
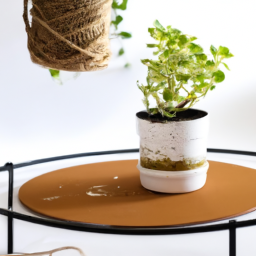
Gardens are not limited to just outdoor spaces. With a little creativity and some found plants, you can create your own miniature garden indoors with DIY terrariums. These beautiful glass containers allow you to bring the beauty of nature into your home while adding a touch of green to any space. In this guide, we will walk you through the step-by-step process of creating your own DIY terrarium using found plants.
Gather Your Materials
The first step in creating your DIY terrarium is to gather all the necessary materials. Here’s what you’ll need:
- Glass container: Look for a clear glass container with a lid. It can be a fish tank, a mason jar, or even a repurposed glass container.
- Gravel or pebbles: These will act as a drainage layer at the bottom of your terrarium.
- Activated charcoal: This helps in keeping the terrarium free from odors and prevents the growth of mold and bacteria.
- Potting soil: Choose a well-draining potting soil suitable for the plants you’ll be using.
- Moss: Moss will help retain moisture in your terrarium.
- Found plants: Look for small plants or cuttings that thrive in humid environments, such as ferns, succulents, or mosses. You can even use small flowers or herbs.
- Decorative elements: Optional decorative elements like small figurines, rocks, or seashells can add a personal touch to your terrarium.
- Spray bottle: This will be used to mist the terrarium and provide moisture to the plants.
Assemble Your Terrarium
Now that you have all your materials ready, it’s time to assemble your terrarium:
- Start by adding a layer of gravel or pebbles at the bottom of your glass container. This will act as a drainage layer, preventing water from pooling at the roots of your plants.
- Next, add a thin layer of activated charcoal on top of the gravel. This will help keep the terrarium fresh and prevent any unpleasant odors.
- Add a layer of potting soil on top of the charcoal. Make sure to leave enough space for your plants to fit comfortably.
- Now, it’s time to arrange your found plants. Start with the largest plants first, placing them towards the back of the terrarium. Then, add the smaller plants towards the front. Play around with different heights and textures to create an aesthetically pleasing arrangement.
- Once your plants are in place, add some moss around them to help retain moisture. You can also add any decorative elements you have chosen at this stage.
- Finally, mist your terrarium with water using a spray bottle. Be careful not to overwater, as this can lead to root rot. The goal is to create a humid environment for your plants without saturating the soil.
Maintenance and Care
Now that your DIY terrarium is complete, it’s important to know how to properly care for it:
1. Place your terrarium in a location with indirect sunlight. Avoid placing it in direct sunlight, as the glass container can act as a magnifying glass and burn your plants.
2. Monitor the moisture levels in your terrarium. If you notice condensation building up on the walls, it means the terrarium is too humid. Remove the lid for a while to allow excess moisture to evaporate. On the other hand, if the soil appears dry, mist it with water using a spray bottle.
3. Trim and prune your plants as needed. Over time, some plants may outgrow the terrarium or become leggy. Regular maintenance will help keep your terrarium looking its best.
4. Keep an eye out for any signs of pests or disease. If you notice any issues, take appropriate measures to treat them and prevent further damage to your plants.
Creating your own DIY terrarium is not only a fun and creative project but also a great way to bring a piece of the garden indoors. By following these steps and giving your terrarium the care it needs, you can enjoy a beautiful miniature garden that will thrive for years to come.
Upcycling Plant Materials: Crafting Unique Decorative Pieces from Garden Finds
Welcome to the world of garden-inspired crafts! In this guide, we will explore the art of upcycling plant materials to create unique and eye-catching decorative pieces for your home. Whether you have a green thumb or simply enjoy spending time in your garden, this step-by-step guide will help you unleash your creativity and transform your plant finds into stunning works of art.
Exploring the Garden for Materials
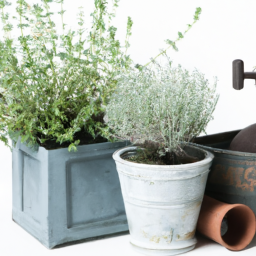
The first step in upcycling plant materials is to venture into your garden and explore the abundance of natural resources available. Take a leisurely stroll and keep an eye out for fallen branches, dried leaves, flowers, and even weeds that catch your attention. Remember, beauty can be found in unexpected places, so be open to the possibilities.
Once you have gathered your plant finds, it’s time to assess their potential for crafting. Look for materials that are sturdy, have interesting textures, or possess unique shapes. For example, a twisted branch can be transformed into a rustic wall hanging, while dried flowers can be used to create intricate pressed flower art.
Before you start crafting, ensure that the plant materials you have collected are free from pests, diseases, or any harmful substances. It’s important to prioritize the health and safety of both yourself and your finished creations.
Preparing and Preserving Plant Materials
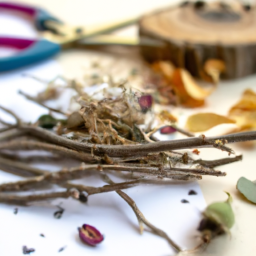
Once you have selected the perfect plant materials for your project, it’s essential to prepare and preserve them to ensure their longevity. Different materials require different treatment methods, so let’s explore a few popular options:
Drying: Many plant materials, such as flowers, leaves, and herbs, can be preserved by air-drying. Bundle them together and hang them upside down in a cool, dry place. This method retains their natural colors and textures, making them ideal for various crafts.
Pressing: Pressing plant materials is ideal for creating delicate and flat decorations like bookmarks, cards, or framed art. Place the plants between layers of absorbent paper, such as newspaper or blotting paper, and press them under a heavy object for a few weeks. This technique preserves the plants’ shapes and colors while flattening them.
Sealing: Some plant materials, like pinecones or seed pods, may benefit from sealing to protect them from moisture and decay. Apply a clear sealant spray or brush on a layer of clear varnish to enhance their natural beauty and durability.
Transforming Plant Finds into Decorative Pieces
Now that you have prepared and preserved your plant materials, it’s time to unleash your creativity and transform them into unique decorative pieces. Here are a few ideas to get you started:
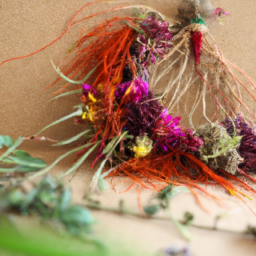
Nature-inspired wreaths: Gather a variety of dried branches, leaves, and flowers to create a stunning wreath for your front door or as a centerpiece. Arrange the materials in a circular shape and secure them with floral wire or hot glue. Add a bow or a few embellishments for a personal touch.
Pressed flower art: Take your pressed flowers and create beautiful artwork by arranging them on a blank canvas or a piece of cardstock. Use a clear adhesive, such as Mod Podge, to secure the flowers in place. You can also experiment with different compositions and combine pressed flowers with other artistic techniques, like painting or drawing.
Plant-inspired jewelry: If you have delicate plant materials like small leaves or seed pods, consider turning them into unique pieces of jewelry. Use jewelry-making supplies like wire, jump rings, and chains to create earrings, necklaces, or bracelets. Seal the plant materials with clear resin to protect them and give them a glossy finish.
Remember, these are just a few examples to spark your creativity. Feel free to experiment, mix and match different plant materials, and let your imagination run wild. The possibilities are endless!
Displaying and Caring for Your Garden-inspired Crafts
Once you have completed your garden-inspired crafts, it’s time to showcase them in your home or garden. Consider the following tips for displaying and caring for your creations:
Indoor display: Place your decorative pieces in well-lit areas where they can be admired. Consider using shelves, mantels, or even hanging them on walls as unique wall art.
Outdoor display: If your crafts are suitable for outdoor use, find a spot in your garden where they can add a touch of natural beauty. Ensure they are protected from harsh weather conditions to prolong their lifespan.
Caring for your crafts: Regularly dust or clean your crafts to keep them looking their best. Avoid exposing them to direct sunlight or excessive moisture, as this can cause fading or damage.
With these tips in mind, you are now ready to embark on your journey of upcycling plant materials and crafting unique decorative pieces. Remember to enjoy the process, embrace imperfections, and let nature be your guide. Happy crafting!
Garden-Inspired Crafts: Transforming Plant Finds
Botanical Printmaking: Using Plants as Inspiration for Artistic Crafts
When it comes to unleashing your creativity, there’s nothing quite like incorporating elements from nature into your artistic endeavors. Botanical printmaking is a fantastic way to combine the beauty of plants with the art of crafting. By using plants as inspiration, you can create unique and captivating pieces that showcase the wonders of the natural world. In this guide, we will explore the step-by-step process of botanical printmaking and provide you with the knowledge you need to embark on your own plant-inspired artistic journey.
Step 1: Gathering Materials
Before diving into the world of botanical printmaking, it’s essential to gather all the necessary materials. Here’s what you’ll need:
- Various plants and leaves
- Watercolor paper or fabric
- Acrylic paints or fabric paints
- Paintbrushes
- Roller or brayer
- Palette or plastic plate
- Scissors
- Protective apron or old clothes
Once you have all your materials ready, you’re well-prepared to embark on your botanical printmaking adventure.
Step 2: Selecting and Preparing Plants
The first crucial step in botanical printmaking is selecting the plants that will serve as your inspiration. Look for leaves and flowers with interesting shapes and textures. Ferns, eucalyptus, and daisies are great options to start with. Once you’ve chosen your plants, gently clean them to remove any dirt or debris. Pat them dry using a clean cloth or paper towel, ensuring they are in their best condition for printing.
It’s important to note that some plants may not be suitable for direct printing due to their delicate nature. In such cases, you can create impressions by applying paint to the plant and transferring it onto the paper or fabric.
Step 3: Creating Botanical Prints
Now that you have your materials and prepared plants, it’s time to start creating your botanical prints. Follow these steps:
Step 3.1: Applying Paint
Squeeze a small amount of acrylic or fabric paint onto your palette or plastic plate. Use a paintbrush to apply an even layer of paint onto the plant’s surface. Ensure that the paint covers the entire area you wish to print.
Step 3.2: Transferring the Print
Place the painted side of the plant onto your watercolor paper or fabric. Gently press down on the plant, ensuring even contact with the surface. You can use a roller or brayer to apply gentle pressure, helping the paint transfer onto the paper or fabric. Carefully lift the plant to reveal your botanical print.
Step 3.3: Experimenting with Colors and Compositions
Don’t be afraid to get creative with your botanical prints. Explore different color combinations by using multiple paints or layering different plants. Experiment with various compositions by arranging the plants in different patterns or orientations. The possibilities are endless, so let your imagination run wild.
Step 4: Drying and Preserving Your Prints
After creating your botanical prints, allow them to dry completely. This may take a few hours or even overnight, depending on the type of paint and paper or fabric you used. Once dry, you can preserve your prints by framing them or using them in various craft projects. Consider creating greeting cards, bookmarks, or even incorporating them into home decor items.
Botanical printmaking is a delightful way to merge the beauty of nature with your artistic expression. By following these steps and allowing your creativity to flourish, you can transform plant finds into stunning works of art. So, grab your materials, head out into the garden, and let the plant-inspired crafting begin!
Let’s wrap up what we learned
Are you a nature lover who enjoys spending time in your garden? If so, you’ll be thrilled to discover the wonderful world of garden-inspired crafts! Transforming plant finds into beautiful and unique creations is a fantastic way to bring the beauty of the outdoors into your home. From simple and elegant floral arrangements to intricate leaf prints, there are endless possibilities for crafting with items found in your garden.
One delightful craft idea is creating pressed flower art. Start by collecting a variety of flowers from your garden, making sure to choose ones that will press well. Once you have your flowers, place them between two sheets of parchment paper and press them inside a heavy book for a few weeks. After they are fully pressed, you can use these delicate flowers to create stunning artwork, such as framed collages or personalized greeting cards. The possibilities are endless, and you’ll be amazed at how your garden can become a source of inspiration for your creative endeavors.
Another fun craft idea is using leaves to make beautiful prints. Gather a selection of leaves with interesting shapes and sizes, and make sure they are clean and dry. Apply a thin layer of paint to the backside of the leaf, then press it firmly onto a piece of paper or fabric. Carefully lift the leaf to reveal a stunning leaf print! You can experiment with different colors and types of paint, as well as different surfaces to create unique designs. These leaf prints can be framed, used to decorate homemade cards, or even turned into wearable art by transferring them onto fabric. With just a few simple steps, you’ll be able to create beautiful and personalized crafts using the treasures from your garden.
So, the next time you’re in your garden, take a closer look at the plants around you. You might just find the perfect materials for your next crafting adventure. Whether you choose to press flowers or create leaf prints, these garden-inspired crafts will bring a touch of nature’s beauty into your home and allow you to showcase your creativity. Get ready to transform your plant finds into stunning works of art!
Let me leave you with some FAQs:
Q1: What are garden-inspired crafts?
A1: Garden-inspired crafts are creative projects that incorporate elements from nature, particularly plants and flowers, into various handmade items. These crafts often involve transforming plant finds, such as leaves, flowers, branches, and even seeds, into beautiful and decorative pieces.
Q2: How can I transform plant finds into crafts?
A2: Transforming plant finds into crafts can be a fun and rewarding process. You can press flowers and leaves to create botanical art, make wreaths or garlands using dried flowers and branches, create natural dyes from plants to color fabrics or papers, or even make jewelry using seeds and small plant parts. The possibilities are endless, and you can let your creativity guide you in transforming these natural materials into unique and personalized crafts.
Q3: What materials do I need for garden-inspired crafts?
A3: The materials needed for garden-inspired crafts depend on the specific project you choose. However, some common materials include plant finds like flowers, leaves, branches, and seeds, as well as basic craft supplies such as glue, scissors, twine, ribbons, paints, brushes, and various decorative elements. You may also need specific tools or equipment depending on the complexity of the craft you wish to create.
Q4: Are garden-inspired crafts suitable for beginners?
A4: Absolutely! Garden-inspired crafts can be enjoyed by crafters of all skill levels, including beginners. Many projects are simple and require minimal supplies and techniques, making them perfect for those who are just starting their crafting journey. There are plenty of beginner-friendly tutorials and step-by-step guides available online to help you get started and build your confidence in creating beautiful garden-inspired crafts.
Q5: Where can I find inspiration for garden-inspired crafts?
A5: Finding inspiration for garden-inspired crafts is easy and enjoyable. You can start by exploring your own garden or local parks, observing the different plants, flowers, and natural elements around you. Look for shapes, colors, and textures that catch your eye. You can also browse through gardening magazines, visit botanical gardens, or search for ideas and tutorials online. Social media platforms like Pinterest and Instagram are excellent sources of inspiration, where you can find countless photos and projects shared by other crafters and nature enthusiasts.

Lisa Chen is a seasoned indoor gardening expert and the author of several bestselling books on the topic. With a background in horticulture and urban farming, Lisa is dedicated to helping urban dwellers embrace the joys of cultivating green spaces indoors. Her detailed guides and hands-on tips empower readers to transform their living spaces into thriving plant sanctuaries.