
1. Creative DIY Planters: Upcycling Everyday Items for Greenery
Are you looking for unique and affordable ways to add some greenery to your home or garden? Look no further! In this guide, we will explore creative DIY planters and plant stand projects that allow you to upcycle everyday items and transform them into beautiful homes for your plants. Not only will you be saving money, but you’ll also be reducing waste and giving new life to old objects. Let’s dive in!
1.1. Vintage Teacup Planters
Do you have a collection of vintage teacups gathering dust in your cupboard? Why not repurpose them into charming planters? Start by drilling a small hole in the bottom of each teacup for drainage. Fill them with potting soil and choose small plants that thrive in containers, such as succulents or herbs. Arrange your teacup planters on a windowsill or create a hanging display using a repurposed wooden ladder. These adorable planters will add a touch of nostalgia to any space!
If you don’t have any vintage teacups, don’t worry! You can easily find them at thrift stores, flea markets, or even online. Mix and match different patterns and colors to create a whimsical and eclectic look.
Remember to water your teacup planters regularly, but be careful not to overwater as the drainage holes are typically small. Keep an eye on your plants and adjust their care as needed.
1.2. Tire Planters
Have an old tire lying around? Give it a new purpose by turning it into a unique planter! Start by cleaning the tire thoroughly to remove any dirt or debris. Next, paint the tire with weather-resistant paint in a color of your choice. Once the paint has dried, flip the tire over and fill it with potting soil. Plant flowers, succulents, or even small shrubs inside the tire. You can stack multiple tires to create a cascading effect or attach them to a wooden frame to create a vertical planter.
Tire planters are not only a great way to upcycle, but they also add an industrial and modern touch to your garden. They are perfect for small spaces or urban gardens where traditional planting options may be limited.
Remember to choose plants that can thrive in the conditions of your garden or balcony. Consider the amount of sunlight and shade the area receives and select plants accordingly. Water your tire planter regularly and monitor the moisture levels to ensure your plants stay healthy.
1.3. Bookshelf Plant Stand
Do you have an old bookshelf that is no longer in use? Repurpose it into a stylish plant stand! Start by giving the bookshelf a fresh coat of paint or stain to match your interior or outdoor decor. Once the paint has dried, arrange your potted plants on the shelves. You can mix and match different plant sizes and varieties to create a visually appealing display.
Consider the lighting conditions of the area where you’ll place the bookshelf plant stand. If it’s indoors, choose plants that thrive in low light or indirect sunlight. If it’s outdoors, select plants that can withstand the sun’s intensity. Remember to water your plants according to their individual needs and monitor their growth regularly.
The bookshelf plant stand not only adds greenery to your space but also serves as a decorative element. It’s a great way to showcase your plant collection and create a focal point in any room or garden.
Now that you have discovered these creative DIY planters and plant stand projects, it’s time to unleash your creativity and start transforming everyday items into beautiful homes for your plants. Remember to have fun, experiment with different materials, and enjoy the process of upcycling!
Building Stylish Plant Stands: DIY Projects for Displaying Your Plants
Plants not only bring life and freshness to our homes but also add a touch of elegance to any space. If you’re looking for creative ways to display your beloved plants, building stylish plant stands through DIY projects is a fantastic option. Not only will you have the opportunity to showcase your plants in a unique and personalized way, but you’ll also have the satisfaction of creating something beautiful with your own hands. In this guide, we will explore various DIY plant stand projects that will surely enhance the beauty of your indoor or outdoor garden.
Materials You’ll Need
Before diving into the step-by-step process, let’s gather the materials you’ll need for these DIY plant stand projects:
- Wooden boards (preferably weather-resistant)
- Screws and screwdriver
- Wood glue
- Drill
- Saw
- Sandpaper
- Paint or wood stain (optional)
- Measuring tape
- Pencil
Project 1: Wooden Ladder Plant Stand
If you’re aiming for a rustic and charming look, a wooden ladder plant stand is an excellent choice. Here’s how you can build one:
Start by measuring and cutting the wooden boards according to the desired height and width of your ladder. You’ll need two longer boards for the sides and several shorter ones for the steps.
Next, sand all the cut pieces to ensure a smooth surface. This step is crucial for both the appearance and safety of your plant stand.
Now, assemble the ladder by attaching the shorter boards horizontally between the two longer boards. Use wood glue and screws to secure them in place. Make sure to evenly space the steps to accommodate your plants.
Once the glue has dried, you can leave the ladder as is for a natural look or paint it in a color that complements your interior or outdoor space. Apply a few coats of paint or wood stain, allowing each coat to dry completely before moving on to the next.
Finally, place your potted plants on each step of the ladder, starting from the bottom and working your way up. This DIY wooden ladder plant stand will add a touch of rustic elegance to your garden or living area.
Project 2: Hanging Macrame Plant Stand
If you’re looking to add a bohemian touch to your space, a hanging macrame plant stand is the way to go. Follow these steps to create your own:
Begin by cutting four equal lengths of macrame cord, ensuring they are long enough to reach your desired hanging height. Fold each cord in half and tie a knot at the folded end, creating a loop for hanging.
Now, take eight smaller cords and attach them to the main cords using a lark’s head knot. Repeat this process until you have the desired number of hanging cords.
Next, gather all the cords together and tie a large knot at the top, leaving a small loop for hanging. This will serve as the base of your macrame plant stand.
Proceed by separating the cords into four groups of four. Take one cord from each group and tie a square knot a few inches below the base knot. Repeat this step until you’ve created several square knots, leaving enough space between each for your plant pots.
Continue tying square knots until you reach the desired length for your macrame plant stand. Make sure to leave enough cord at the bottom for a tassel or additional knots for decoration.
Finally, place your plant pots within the designated spaces, and adjust the knots as needed to ensure your plants are securely supported. Hang your macrame plant stand in a well-lit area, and enjoy the boho vibe it brings to your space.
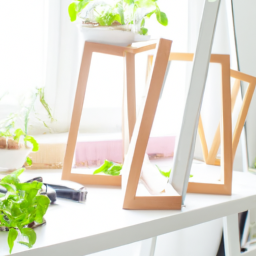
Project 3: Geometric Wooden Plant Stand
If you prefer a modern and minimalist look, a geometric wooden plant stand will be the perfect addition to your home. Follow these steps to create your own:
Begin by measuring and cutting the wooden boards into equal lengths, depending on the desired height and width of your plant stand. You’ll need four longer boards for the vertical sides and four shorter boards for the horizontal shelves.
Next, sand all the cut pieces to ensure a smooth surface. This step is crucial for both the appearance and safety of your plant stand.
Now, assemble the geometric structure by attaching the shorter boards between the longer boards at right angles. Use wood glue and screws to secure them in place. Make sure to evenly space the shelves to accommodate your plants.
Once the glue has dried, you can leave the wooden plant stand as is for a natural and minimalist look or paint it in a color that complements your interior decor. Apply a few coats of paint or wood stain, allowing each coat to dry completely before moving on to the next.
Finally, place your potted plants on each shelf of the wooden plant stand, arranging them in a visually pleasing way. This geometric plant stand will add a modern touch to your living room, balcony, or patio.
Building your own stylish plant stands through these DIY projects not only adds a personal touch to your space but also provides a sense of accomplishment. Whether you prefer a rustic ladder, a bohemian macrame hanger, or a modern geometric stand, these projects will help you showcase your plants in a unique and eye-catching way. So, gather your materials, unleash your creativity, and embark on this fulfilling journey of creating beautiful plant displays!
Easy-to-Make Hanging Planters: DIY Ideas for Vertical Greenery
Are you looking to add some greenery to your space but don’t have much floor or counter space? Hanging planters are a fantastic solution! They not only add a touch of nature to your home or garden but also create a visually stunning display. In this guide, we will explore three easy-to-make hanging planter projects that will elevate your space with vertical greenery. Let’s get started!
1. Macrame Hanging Planters
Macrame hanging planters are a trendy and stylish addition to any space. They are easy to make and require minimal supplies. Here’s how you can create your own:
Materials:
- Macrame cord or rope
- Scissors
- Plant pot
- Hook or ceiling anchor
Instructions:
1. Cut six equal lengths of macrame cord, approximately four times the desired length of your planter.
2. Fold the cords in half and create a loop at the top, securing it with a knot.
3. Divide the cords into three groups of four cords each.
4. Starting about six inches below the top knot, create a series of square knots by taking two cords from one group and tying them with two cords from the adjacent group. Repeat this process until you have created several rows of square knots.
5. Once you have reached the desired length, gather all the cords together and tie a knot at the bottom to secure the planter.
6. Place your plant pot into the macrame hanger, adjusting the cords as necessary to ensure it is centered.
7. Hang your macrame planter from a hook or ceiling anchor, and enjoy your new vertical greenery!
Macrame hanging planters are not only functional but also add a touch of bohemian charm to any space. Experiment with different cord colors and patterns to create a unique and personalized look.
2. Upcycled Mason Jar Planters
If you have some old mason jars lying around, why not turn them into charming hanging planters? This eco-friendly project adds a rustic and vintage touch to your space. Here’s how you can repurpose your mason jars:
Materials:
- Mason jars
- Twine or jute rope
- Scissors
- Plant pot
- Hook or ceiling anchor
Instructions:
1. Measure and cut a length of twine or jute rope that is long enough to hang your mason jar at the desired height.
2. Tie the ends of the twine or rope together to form a loop.
3. Place the loop around the neck of the mason jar, ensuring it is secure.
4. Repeat this process with additional jars if desired.
5. Fill each mason jar with soil and plant your chosen greenery.
6. Hang the mason jar planters from hooks or a ceiling anchor, making sure they are evenly spaced.
7. Water your plants as needed and watch them thrive in their new hanging homes!
Upcycled mason jar planters are not only budget-friendly but also allow you to showcase a variety of plants in a unique way. Consider using different-sized jars and arranging them at different heights for an eye-catching display.
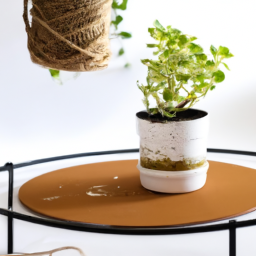
3. Wooden Hanging Plant Stand
If you prefer a more modern and minimalist look, a wooden hanging plant stand is the perfect choice. This project adds a touch of elegance to any space and allows you to create a stunning vertical garden. Here’s how you can make your own wooden hanging plant stand:
Materials:
- Wooden board
- Saw
- Sandpaper
- Drill
- Twine or rope
- Plant pots
- Hook or ceiling anchor
Instructions:
1. Measure and mark the desired length and width of your wooden board.
2. Use a saw to cut the board to the desired size.
3. Sand the edges of the board to ensure a smooth finish.
4. Measure and mark the locations where you want your plant pots to hang.
5. Use a drill to create holes at the marked locations.
6. Cut four equal lengths of twine or rope, ensuring they are long enough to hang your plant pots at the desired height.
7. Thread each piece of twine or rope through the holes in the board, tying knots underneath to secure them in place.
8. Hang the wooden plant stand from a hook or ceiling anchor.
9. Place your plant pots onto the twine or rope, adjusting the heights as desired.
10. Sit back and admire your beautiful wooden hanging plant stand!
A wooden hanging plant stand adds a touch of sophistication to any space. Consider staining or painting the wooden board to match your existing decor or leave it natural for a more organic look.
Now that you have learned three easy-to-make hanging planter projects, it’s time to unleash your creativity and bring some vertical greenery into your space. Whether you choose macrame, upcycled mason jars, or a wooden hanging plant stand, these DIY ideas will transform your home or garden into a lush oasis. Happy crafting!
Repurposing Materials for Unique Planters: DIY Projects for Eco-Friendly Gardening
Introduction
Welcome to the world of DIY planters and plant stand projects! In this article, we will explore the exciting realm of repurposing materials to create unique and eco-friendly planters for your garden. By using materials that are readily available, you can not only save money but also contribute to a sustainable lifestyle. So, let’s dive in and discover how you can unleash your creativity and create stunning planters that will make your garden truly stand out.
Choosing the Right Materials
When it comes to repurposing materials for DIY planters, the possibilities are endless. You can transform everyday objects into beautiful planters that not only add a touch of charm but also reflect your personal style. Here are a few ideas to get you started:
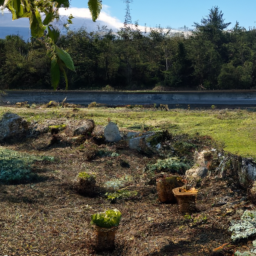
1. Old Tires
Don’t discard those worn-out tires just yet! With a little bit of creativity, you can turn them into unique planters that will add a quirky touch to your garden. Start by cleaning the tires thoroughly and painting them in vibrant colors. Then, fill them with soil and plant your favorite flowers or herbs. Stack them up to create a visually appealing vertical garden or arrange them in a row to create a border for your flower beds.
Remember to drill drainage holes in the bottom of the tires to prevent waterlogging and promote healthy plant growth. You can also experiment with different tire sizes and arrange them in various patterns to create a truly eye-catching display.
Pro tip: Consider using low-maintenance plants that are suitable for the climate in your area. This will ensure that your tire planters thrive with minimal effort.
2. Wooden Pallets
Wooden pallets are versatile and can be easily repurposed into stunning planters. Start by disassembling the pallet and removing any nails or staples. Then, cut the pallet boards to the desired length and assemble them into a box shape. Secure the boards using screws or nails, ensuring that the corners are sturdy.
Once you have your pallet planter ready, line it with landscape fabric to prevent soil from escaping through the gaps. Fill the planter with a nutrient-rich potting mix and plant your favorite flowers, herbs, or even vegetables. You can also attach hooks or brackets to the back of the pallet planter to hang it on a wall or fence.
Pro tip: To add an extra touch of creativity, consider painting the pallet planter in vibrant colors or staining it to enhance the natural beauty of the wood.
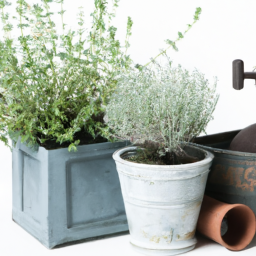
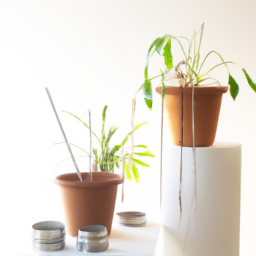
3. Mason Jars
Mason jars are not just for canning! They can be repurposed into adorable planters that add a rustic charm to any garden. Start by cleaning the jars thoroughly and ensuring they have proper drainage. You can achieve this by drilling a few small holes in the bottom of the jar or adding a layer of gravel before adding the soil.
Fill the jars with a well-draining potting mix and plant small succulents or herbs. Mason jar planters are perfect for small spaces like windowsills or can be hung using twine or wire to create a beautiful hanging garden.
Pro tip: Consider adding decorative elements such as ribbons, twine, or even painting the jars to match your garden’s color scheme.
Plant Stand Projects
Now that you have some unique ideas for repurposing materials into planters, let’s explore a few DIY plant stand projects to elevate your greenery to new heights:
1. Ladder Plant Stand
An old wooden ladder can be transformed into a charming plant stand that adds vertical interest to your garden. Start by sanding the ladder to remove any rough edges or splinters. Then, apply a coat of paint or stain to protect the wood from the elements.
Once the ladder is dry, position it in your desired location and start arranging your potted plants on the ladder steps. You can mix and match different plant sizes and types to create a visually appealing display. Consider adding hanging planters from the ladder rungs for an extra touch of elegance.
Pro tip: To ensure stability, secure the ladder to the ground using stakes or attach it to a wall or fence.
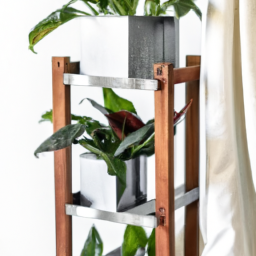
2. Tiered Plant Stand
A tiered plant stand is a great way to showcase a variety of plants in a compact space. You can repurpose old shelves, wooden crates, or even metal trays to create a multi-level plant stand. Start by cleaning and painting the materials to match your garden’s aesthetic.
Once the paint is dry, arrange the shelves or crates in a tiered formation, ensuring that each level is sturdy and stable. Place your potted plants on each level, starting with the tallest plants at the back and gradually decreasing the height towards the front.
Pro tip: Consider adding decorative elements such as fairy lights or small ornaments to enhance the overall look of your tiered plant stand.
3. Hanging Plant Stand
If you have limited floor space, a hanging plant stand is the perfect solution to add greenery to your garden. You can repurpose an old ladder, wooden dowels, or even metal pipes to create a unique hanging plant stand.
Start by cutting the materials to the desired length and securing them together using screws or strong twine. Attach hooks or brackets to the top of the structure and hang it from a sturdy support, such as a tree branch or pergola.
Hang your favorite potted plants from the different levels, ensuring that they are evenly spaced for a balanced look. You can also add trailing plants or hanging baskets for an extra touch of elegance.
Pro tip: Consider using lightweight pots or planters to prevent the structure from becoming too heavy and ensure it can support the weight of the plants.
Conclusion
Repurposing materials for DIY planters and plant stand projects not only allows you to unleash your creativity but also contributes to a sustainable and eco-friendly lifestyle. By giving new life to old objects, you can create unique and visually appealing planters that will transform your garden into a green oasis.
Remember to choose materials that are suitable for outdoor use, ensure proper drainage for your planters, and select plants that thrive in your climate. With these tips in mind, you are ready to embark on your DIY journey and create stunning planters and plant stands that will impress both you and your guests.
Indoor and Outdoor Plant Stand DIYs: Enhancing Your Space with Greenery
Welcome to the world of DIY planters and plant stand projects! Whether you are a seasoned gardener or a beginner looking to add some greenery to your space, creating your own plant stands can be a fun and rewarding experience. Not only do plant stands provide a practical solution for displaying your beloved plants, but they also add a touch of style and personality to any indoor or outdoor area.
1. Choosing the Right Materials
Before diving into the DIY process, it’s important to select the right materials for your plant stand project. The choice of materials will depend on your personal style, the location of the plant stand, and the type of plants you wish to display. Here are a few popular options:
a) Wood: Wood is a versatile and classic choice for plant stands. It adds warmth and a natural touch to any space. Cedar and redwood are great options for outdoor plant stands as they are naturally resistant to decay and insects. For indoor plant stands, you can opt for pine or oak.
b) Metal: If you prefer a more modern and sleek look, metal plant stands are a fantastic choice. Aluminum and wrought iron are commonly used due to their durability and resistance to rust. Metal stands are ideal for outdoor use as they can withstand various weather conditions.
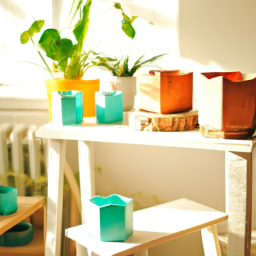
c) Concrete: For a contemporary and industrial feel, concrete plant stands are gaining popularity. They provide a sturdy base for larger plants and can be painted or stained to match your desired aesthetic.
2. Design and Construction
Once you have chosen your materials, it’s time to move on to the design and construction phase. Here are three DIY plant stand projects to inspire your creativity:
a) Tiered Plant Stand
A tiered plant stand is a great option if you have multiple plants to display or limited floor space. To create a tiered plant stand, follow these steps:
Step 1: Measure and cut your wooden boards according to the desired dimensions of your plant stand. Ensure that each board is slightly smaller than the one below to create a tiered effect.
Step 2: Sand the edges of the boards to create smooth surfaces.
Step 3: Assemble the stand by attaching the boards together using screws or nails. Make sure to secure each tier properly to ensure stability.
Step 4: Paint or stain the stand to match your preferred color scheme.
b) Hanging Plant Stand
A hanging plant stand is an excellent choice for small spaces or to add a touch of greenery to your walls. Here’s how you can create your own hanging plant stand:
Step 1: Choose a sturdy wooden or metal rod that can support the weight of your plants.
Step 2: Attach hooks or brackets to the rod at regular intervals, depending on the number of plants you wish to hang.
Step 3: Use sturdy ropes or chains to hang the rod from the ceiling or a wall-mounted bracket.
Step 4: Hang your potted plants from the hooks or brackets, ensuring they are evenly spaced.
c) Repurposed Furniture Plant Stand
If you love upcycling and adding a unique touch to your space, repurposing old furniture into a plant stand is a fantastic option. Here’s how you can transform an old ladder into a charming plant stand:
Step 1: Clean and sand the ladder to remove any dirt or rough edges.
Step 2: Paint or stain the ladder to match your desired aesthetic.
Step 3: Place the ladder in your desired location and secure it against a wall or fence for stability.
Step 4: Arrange your potted plants on the ladder steps, starting from the bottom and working your way up.
3. Maintenance and Care
Now that you have successfully created your DIY plant stand, it’s essential to ensure proper maintenance and care to keep your plants thriving. Here are a few tips:
a) Watering: Different plants have different watering needs. Be sure to research the watering requirements of each plant and water accordingly. Avoid overwatering, as it can lead to root rot.
b) Sunlight: Consider the lighting conditions of your space and choose plants that thrive in those conditions. Some plants require direct sunlight, while others prefer indirect or low-light environments.
c) Pruning: Regularly prune your plants to promote healthy growth and prevent overcrowding. Remove any dead or yellowing leaves and trim back overgrown branches.
d) Cleaning: Dust your plant stands regularly to remove any buildup that can hinder plant growth. Wipe down metal stands to prevent rust.
By following these maintenance tips, you can enjoy a thriving and visually appealing indoor or outdoor plant display.
Now that you are armed with the knowledge and inspiration to create your own DIY planters and plant stands, it’s time to get started. Remember to unleash your creativity and have fun throughout the process. Happy gardening!
Frequently Asked Questions (FAQ)
1. What are DIY planters and plant stand projects?
DIY planters and plant stand projects refer to various creative and handmade projects where individuals design, build, or repurpose materials to create unique planters or stands to display their plants.
2. Why should I consider DIY planters and plant stand projects?
DIY planters and plant stand projects offer several benefits. They allow you to personalize your plant display, save money by using recycled materials, and unleash your creativity while adding a personal touch to your indoor or outdoor space.
3. What materials can I use for DIY planters and plant stands?
You can use a wide range of materials for your DIY projects, including wood, metal, plastic, ceramic, glass, concrete, and even recycled objects like old containers, tires, or pallets.
4. Are DIY planters and plant stands suitable for all types of plants?
Yes, DIY planters and plant stands can be adapted to suit various types of plants. You can customize the size, shape, and design to accommodate different plant species, whether they are small succulents, medium-sized flowers, or large potted trees.
5. Do I need any special tools or skills to create DIY planters and plant stands?
While some projects may require specific tools or skills, many DIY planters and plant stand projects can be completed with basic tools like a saw, drill, hammer, and glue. Beginners can start with simpler designs and gradually learn new techniques as they gain experience.
6. Where can I find inspiration for DIY planters and plant stand projects?
You can find inspiration for DIY planters and plant stand projects from various sources. Online platforms like Pinterest, Instagram, and gardening websites often showcase a wide range of creative ideas. Additionally, gardening books, magazines, and local gardening communities can also provide inspiration.
7. How can I ensure the longevity of DIY planters and plant stands?
To ensure the longevity of your DIY planters and plant stands, consider using weather-resistant materials, applying appropriate finishes or sealants, and providing adequate drainage for your plants. Regular maintenance, such as cleaning and repainting, can also help prolong their lifespan.
8. Can I personalize DIY planters and plant stands to match my home decor?
Absolutely! DIY planters and plant stands offer endless opportunities for personalization. You can choose colors, patterns, and finishes that complement your home decor style, allowing your plant display to seamlessly blend with the overall aesthetic of your space.
9. Are there any safety precautions I should take when working on DIY planters and plant stands?
Yes, it’s important to prioritize safety when working on DIY projects. Always wear appropriate protective gear, such as gloves and safety glasses, when handling tools or materials. Follow instructions carefully, use tools correctly, and be cautious of sharp edges or potentially hazardous materials.
10. Can I sell or gift my DIY planters and plant stands?
Absolutely! Once you’ve created your DIY planters and plant stands, you can certainly sell them or gift them to friends and family. Many people appreciate handmade and unique items, making them great gifts or potential items for sale at craft fairs or online marketplaces.

Lisa Chen is a seasoned indoor gardening expert and the author of several bestselling books on the topic. With a background in horticulture and urban farming, Lisa is dedicated to helping urban dwellers embrace the joys of cultivating green spaces indoors. Her detailed guides and hands-on tips empower readers to transform their living spaces into thriving plant sanctuaries.