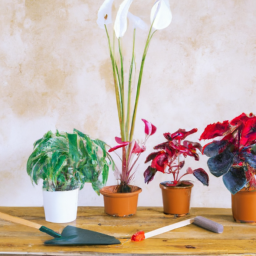
Spring Cleaning for Indoor Plants: Refreshing and Revitalizing
Ah, springtime! The season of blooming flowers, chirping birds, and rejuvenation. As we bid farewell to the cold winter months, it’s time to embrace the warmth and freshness that spring brings. And what better way to welcome this delightful season than by giving our indoor plants some much-needed attention? Yes, you heard it right – it’s time for spring cleaning for indoor plants, where we refresh and revitalize our leafy companions. Whether you’re a seasoned plant parent or just starting your green journey, this blog post is here to guide you through the process of rejuvenating your beloved indoor plants, so they can thrive and flourish in the months to come. So, grab your gardening gloves and let’s dive into the wonderful world of spring cleaning for indoor plants!
The Importance of Spring Cleaning for Indoor Plants
Spring is a time of renewal and rejuvenation, not only for us but also for our indoor plants. After months of being cooped up indoors, our green companions can benefit greatly from a thorough spring cleaning. This process not only refreshes and revitalizes the plants but also helps to maintain their health and longevity. In this guide, we will walk you through the step-by-step process of spring cleaning for indoor plants, ensuring that your leafy friends thrive in the upcoming seasons.
Assessing the Plant’s Needs
Before diving into the cleaning process, it is essential to assess the specific needs of your indoor plants. Different plants have different requirements, and understanding their individual needs will help you tailor the cleaning process accordingly.
Start by examining the overall health of your plants. Look for any signs of pests, diseases, or nutrient deficiencies. Check the leaves for discoloration, wilting, or unusual spots. Inspect the soil for any signs of mold or excessive moisture. Understanding the current state of your plants will guide you in determining the appropriate cleaning techniques and treatments.
Next, consider the type of plant you have. Is it a tropical plant that thrives in high humidity, or a desert plant that prefers drier conditions? Knowing the natural habitat of your plant will help you recreate the ideal environment during the cleaning process.
Lastly, take note of the size and accessibility of your plants. Larger plants may require more time and effort to clean, while smaller plants can be easily handled. Consider the location of your plants and whether you can move them outdoors temporarily for a more thorough cleaning.
Gentle Leaf Cleaning
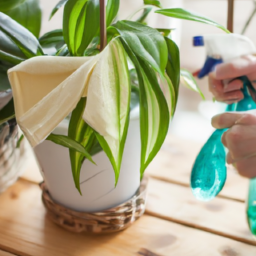
Now that you have assessed your plant’s needs, it’s time to start the actual cleaning process. Begin by gently dusting off the leaves using a soft, damp cloth. This will remove any accumulated dust and dirt, allowing the leaves to breathe and absorb light more efficiently.
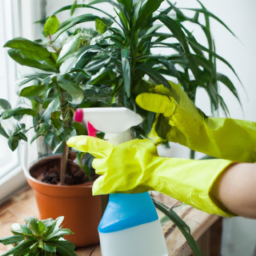
For plants with larger leaves, you can use a handheld sprayer filled with lukewarm water to rinse off any stubborn debris. Be careful not to use cold water, as it can shock the plants. Alternatively, you can place the plant in the shower and give it a gentle rinse under lukewarm water.
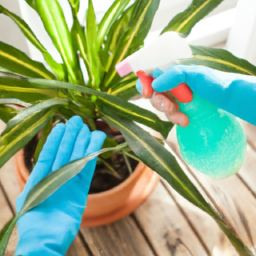
If you notice any pests, such as aphids or spider mites, on the leaves, you can use a mild insecticidal soap or a homemade solution of water and dish soap to eliminate them. Apply the solution to the affected areas using a soft brush or cloth, ensuring thorough coverage. Rinse off the soap after a few minutes to prevent any damage to the plant.
Refreshing the Soil
While cleaning the leaves is essential, it’s equally important to refresh the soil of your indoor plants. Over time, the soil can become compacted, leading to poor drainage and nutrient deficiencies. Spring is the perfect time to address these issues and ensure your plants have a healthy growing medium.
Start by gently loosening the top layer of soil using a small gardening tool or your fingers. This will improve aeration and allow water to penetrate more effectively. If the soil appears compacted, consider repotting the plant into a slightly larger container with fresh, well-draining potting mix.
If you notice any signs of mold or excessive moisture in the soil, it’s crucial to address these issues promptly. Remove any affected soil and replace it with fresh soil. Adjust your watering routine to prevent future moisture-related problems.
Additionally, consider adding organic matter, such as compost or worm castings, to enrich the soil and provide essential nutrients for your plants. This will promote healthy growth and overall vitality.
Remember to water your plants thoroughly after refreshing the soil to ensure proper hydration and to settle the new soil in place.
By following these step-by-step guidelines for spring cleaning your indoor plants, you are setting them up for success in the upcoming seasons. Regular cleaning and maintenance will not only improve the aesthetic appeal of your plants but also contribute to their overall health and well-being. So grab your cleaning supplies, put on some music, and enjoy the process of refreshing and revitalizing your leafy companions!
Spring Cleaning for Indoor Plants: Refreshing and Revitalizing
Tips and Techniques for Refreshing Indoor Plants
Spring is the perfect time to refresh and revitalize your indoor plants. After a long winter, they may be in need of some extra care and attention. By following these tips and techniques, you can ensure that your indoor plants thrive and bring life to your home.
Assessing the Needs of Your Indoor Plants
The first step in refreshing your indoor plants is to assess their needs. Take a close look at each plant and determine if it needs repotting, pruning, or simply a change in its care routine. Look for signs of stress or poor health, such as yellowing leaves, wilting, or stunted growth. Understanding the specific needs of each plant will help you provide the necessary care.
When repotting, choose a pot that is slightly larger than the current one. Ensure that it has drainage holes to prevent waterlogging. Use a well-draining potting mix suitable for the specific type of plant. Gently remove the plant from its current pot, loosen the roots, and place it in the new pot. Fill the remaining space with fresh potting mix, firming it gently around the plant. Water thoroughly to settle the soil.
Pruning is another important aspect of refreshing indoor plants. Remove any dead or yellowing leaves, as well as any branches that are crossing or rubbing against each other. This will promote better air circulation and prevent the spread of diseases. Additionally, pruning can help shape the plant and encourage new growth.
Providing Adequate Light and Water
Light and water are essential for the health and vitality of indoor plants. Different plants have different light requirements, so it’s important to place them in appropriate locations within your home. Most indoor plants thrive in bright, indirect light. Avoid placing them in direct sunlight, as it can scorch the leaves. If your plants are not receiving enough light, consider supplementing with artificial grow lights.
Watering is a crucial aspect of plant care, but it’s important to strike the right balance. Overwatering can lead to root rot, while underwatering can cause wilting and stunted growth. The key is to water thoroughly but allow the soil to dry out slightly between waterings. Before watering, check the moisture level by sticking your finger about an inch into the soil. If it feels dry, it’s time to water. Use room temperature water and ensure that excess water drains out of the pot.
In addition to regular watering, indoor plants can benefit from occasional misting. Misting helps to increase humidity, especially during dry seasons or in homes with low humidity levels. Use a spray bottle filled with water to mist the leaves, but avoid misting fuzzy-leaved plants, as it can cause rot.
Fertilizing and Cleaning Indoor Plants
Fertilizing is an important step in refreshing indoor plants. During the growing season, which typically aligns with spring and summer, plants require additional nutrients to support their growth. Choose a balanced, water-soluble fertilizer and follow the instructions on the package for application rates. Avoid over-fertilizing, as it can lead to salt buildup and damage the roots. Remember to water the plant before fertilizing to prevent root burn.
Cleaning your indoor plants not only improves their appearance but also enhances their overall health. Dust and debris can accumulate on the leaves, hindering their ability to photosynthesize. Gently wipe the leaves with a damp cloth or sponge to remove any dirt or dust. For larger plants, you can also place them in the shower and give them a gentle rinse. Avoid using any cleaning products or chemicals, as they can be harmful to the plants.
Finally, don’t forget to rotate your indoor plants regularly. This will ensure that all sides of the plant receive adequate light and grow evenly. Rotating also helps prevent the plant from leaning towards the light source.
By following these tips and techniques, you can successfully refresh and revitalize your indoor plants. Remember to assess their needs, provide adequate light and water, fertilize appropriately, and keep them clean. With a little extra care, your indoor plants will thrive and bring beauty and freshness to your home throughout the year.
Revitalizing Indoor Plants: Common Issues and Solutions
Introduction
Indoor plants not only add beauty and freshness to our living spaces but also provide numerous health benefits. However, over time, these plants can start showing signs of distress and require some extra care to revitalize them. In this guide, we will explore some common issues that indoor plants face and provide effective solutions to refresh and revitalize them. So, let’s dive in and bring back the vibrancy to your indoor plant collection!
1. Lack of Proper Lighting
One of the most common issues indoor plants face is inadequate lighting. Insufficient light can lead to stunted growth, yellowing leaves, and overall poor health of your plants. To address this problem:
First, assess the lighting conditions in your home. Identify the areas with the most natural light and place your light-loving plants there. For plants that prefer lower light levels, choose spots away from direct sunlight.
If your plants are not receiving enough natural light, consider using artificial lighting. LED grow lights are a popular choice as they provide the necessary spectrum of light for plant growth. Position the lights 6-12 inches above the plants and adjust the duration based on their light requirements.
Regularly rotate your plants to ensure all sides receive equal light exposure. This will prevent them from leaning towards the light source and promote even growth.
2. Improper Watering Practices
Overwatering or underwatering are common mistakes that can harm indoor plants. Both can lead to root rot, yellowing leaves, and wilting. To establish a proper watering routine:
Check the moisture level of the soil before watering. Stick your finger about an inch deep into the soil – if it feels dry, it’s time to water. If it’s still moist, wait a few more days.
When watering, ensure that excess water drains out of the pot. Standing water can suffocate the roots. If your plant is in a decorative pot without drainage holes, consider using a plastic nursery pot and placing it inside the decorative one.
Remember, different plants have different water requirements. Research the specific needs of each plant and adjust your watering schedule accordingly. Factors such as humidity, temperature, and season also influence watering frequency.
3. Nutrient Deficiencies
Indoor plants rely on us to provide them with essential nutrients. Lack of proper nutrition can result in pale leaves, stunted growth, and reduced overall vigor. To address nutrient deficiencies:
Fertilize your plants regularly during the growing season. Choose a balanced fertilizer or one specifically formulated for indoor plants. Follow the instructions on the package for the correct dosage and frequency.
Consider using organic fertilizers or homemade compost to provide a slow-release source of nutrients. This helps nourish the plants over a longer period without the risk of over-fertilization.
Monitor your plants for signs of nutrient deficiencies and adjust your fertilization routine accordingly. For example, yellowing leaves may indicate a lack of nitrogen, while stunted growth could be a sign of potassium deficiency.
Conclusion
By addressing these common issues and implementing the solutions provided, you can effectively revitalize your indoor plants and bring back their natural beauty. Remember to regularly assess the lighting conditions, establish a proper watering routine, and provide the necessary nutrients. With a little care and attention, your indoor plants will thrive and continue to enhance your living space for years to come. Happy spring cleaning!
Key Takeaways of this article
Spring is finally here, and with it comes the perfect opportunity to give our indoor plants some much-needed love and attention. Just like we declutter and clean our homes during this season, our leafy companions also deserve a refreshing makeover. It’s time to roll up our sleeves, grab our gardening tools, and embark on a journey of revitalizing our indoor plants.
First things first, let’s start by assessing the overall health of our green friends. Inspect each plant for any signs of distress, such as yellowing leaves or wilting stems. If you notice any issues, it’s essential to address them promptly. Trim away dead or damaged leaves, and consider repotting if the plant has outgrown its current container. Next, it’s time to give those dusty leaves a spa treatment. Gently wipe them down with a damp cloth to remove any accumulated dirt or dust, allowing the plants to breathe and absorb sunlight more efficiently. Don’t forget to clean the pots too, as they can harbor pests or fungal spores.
Q&A Corner:
Q1: Why is spring cleaning important for indoor plants?
A1: Spring cleaning is essential for indoor plants because it helps remove dust, debris, and pests that may have accumulated during the winter months. By refreshing and revitalizing your plants, you create a healthier environment for them to thrive in.
Q2: How often should I clean my indoor plants?
A2: The frequency of cleaning your indoor plants depends on various factors such as the plant type, its location, and the level of dust or dirt accumulation. As a general rule, it’s recommended to clean your plants at least once every few months or whenever you notice a significant buildup of dust.
Q3: What is the best way to clean indoor plants?
A3: Cleaning indoor plants can be done in a few different ways. One method is to gently wipe the leaves with a damp cloth or sponge to remove dust and grime. Another option is to give your plants a shower by placing them under a gentle stream of lukewarm water in the sink or bathtub. Avoid using cold water or strong water pressure as it may damage the plants.
Q4: Should I prune my indoor plants during spring cleaning?
A4: Pruning can be a beneficial part of spring cleaning for indoor plants. It helps remove dead or damaged foliage, encourages new growth, and improves the overall shape and appearance of the plant. However, it’s important to research the specific pruning requirements for each type of plant, as some may have different pruning needs.
Q5: Are there any additional steps I should take to revitalize my indoor plants?
A5: Besides cleaning and pruning, there are a few extra steps you can take to revitalize your indoor plants. These include repotting if the plant has outgrown its current container, replenishing the soil with fresh nutrients, and providing adequate sunlight, water, and humidity based on the specific needs of each plant. Regularly inspecting for pests and diseases is also crucial for maintaining healthy and vibrant indoor plants.

James Wong is a renowned ethnobotanist, plant scientist, and local television presenter. With a passion for demystifying plant science, he is known for translating complex botanical concepts into practical advice for everyday plant enthusiasts. James’s expertise spans from traditional gardening to cutting-edge plant technologies, making his insights accessible and informative.

