Welcome to our blog post on the topic of Plant Propagation Calendar: When and How to Propagate Different Plants. Whether you are a seasoned gardener or just starting out, understanding the right time and methods for propagating plants is essential for a successful and thriving garden. In this post, we will dive into the world of plant propagation, exploring the best times to propagate various plants and the techniques that yield the best results. So, grab your gardening gloves and let’s get started on this journey of discovering when and how to propagate different plants.

Importance of a Plant Propagation Calendar: Maximizing Success in Plant Propagation
Plant propagation is an essential skill for any avid gardener or plant enthusiast. It allows you to create new plants from existing ones, whether through seeds, cuttings, or other methods. However, successful plant propagation requires careful timing and proper techniques. This is where a plant propagation calendar becomes invaluable.
A plant propagation calendar is a tool that helps you determine the best time to propagate different plants based on their specific needs and growth patterns. It takes into account factors such as temperature, daylight hours, and seasonal changes to ensure optimal conditions for successful propagation.
By following a plant propagation calendar, you can maximize your chances of success and avoid common pitfalls. Here are some key reasons why a plant propagation calendar is important:
1. Timing is Everything
Timing plays a crucial role in plant propagation. Different plants have different growth cycles and requirements. Some plants are best propagated in spring when they are actively growing, while others thrive when propagated in fall or winter when they are dormant.
A plant propagation calendar helps you identify the ideal time to propagate each plant species. It provides a clear timeline, indicating when to sow seeds, take cuttings, or divide plants. By following these guidelines, you can ensure that your plants have the best chance of success.
For example, if you want to propagate roses, a plant propagation calendar will tell you that late winter or early spring is the ideal time to take hardwood cuttings. This is when the plants are dormant, and the cuttings have a higher chance of rooting successfully.
2. Climate Considerations
Climate plays a significant role in plant propagation. Certain plants thrive in specific climatic conditions, and their propagation requirements may vary accordingly. A plant propagation calendar takes into account regional climate variations and provides tailored recommendations for different areas.
For instance, if you live in a region with a short growing season, a plant propagation calendar will guide you on when to start seeds indoors or use techniques like layering or air layering to propagate plants. It helps you adapt to your specific climate and maximize your chances of success.
3. Understanding Plant Growth Patterns
Every plant species has its unique growth patterns and requirements. Some plants naturally produce offsets or suckers that can be easily divided and propagated. Others may require specific techniques such as grafting or layering.
A plant propagation calendar provides valuable insights into the growth patterns of different plants. It helps you understand which propagation methods are most suitable for each plant species and when to employ them. This knowledge allows you to choose the right techniques and increase your success rate.
For example, if you want to propagate herbs like mint or thyme, a plant propagation calendar will inform you that these plants are best propagated through division. You can divide the clumps of the parent plant and replant them in separate pots or areas of your garden.
In conclusion, a plant propagation calendar is an indispensable tool for any gardener or plant enthusiast. It helps you make informed decisions about when and how to propagate different plants, maximizing your chances of success. By understanding the importance of timing, considering climate variations, and recognizing plant growth patterns, you can create a thriving garden filled with your favorite plants.
Understanding the Best Time to Propagate Different Plants: A Comprehensive Calendar Guide
Plant propagation is an essential skill for any gardener or plant enthusiast. By understanding the best time to propagate different plants, you can increase your chances of success and enjoy a thriving garden all year round. In this comprehensive calendar guide, we will explore the various methods and timings for propagating different types of plants.
1. Spring Propagation
Spring is a fantastic time to start propagating a wide range of plants. As the weather warms up and daylight hours increase, plants become more active and ready to grow. Here are some popular plants that can be propagated in spring:
A. Herbaceous Plants:
Herbaceous plants, such as lavender, thyme, and mint, can be easily propagated through stem cuttings. Choose healthy, non-flowering stems and remove the lower leaves. Dip the cut end in a rooting hormone and plant it in a well-draining potting mix. Keep the soil moist and place the cutting in a warm, bright location. Within a few weeks, roots will develop, and you can transplant the cutting into a larger pot or directly into the garden.
B. Perennials:
Perennials like hostas, daylilies, and peonies can be propagated through division. Dig up the mature plant and carefully separate the clumps into smaller sections, ensuring that each section has roots and shoots. Replant the divisions in prepared soil and water thoroughly. Dividing perennials not only helps propagate new plants but also rejuvenates the existing ones.
C. Trees and Shrubs:
Spring is also an ideal time to propagate trees and shrubs using hardwood cuttings. Select healthy, dormant branches and cut them into 6-8 inch lengths. Remove any buds or leaves from the lower portion of the cutting and dip it in a rooting hormone. Plant the cuttings in a well-draining medium, leaving at least two buds above the soil. Place them in a sheltered area with indirect sunlight and keep the soil consistently moist. Over time, these cuttings will develop roots and can be transplanted into larger containers or directly into the ground.
2. Summer Propagation
Summer is a great season for propagating many plants due to the warm temperatures and longer days. Here are some plants that thrive when propagated during summer:
A. Succulents:
Succulents, such as jade plants, aloe vera, and sedums, can be propagated through leaf or stem cuttings. Remove a healthy leaf or stem from the parent plant, let it dry for a few days to form a callus, and then plant it in a well-draining potting mix. Water sparingly to avoid rotting and place the cutting in a bright, indirect sunlight location. Within a few weeks, roots will develop, and a new plant will start to grow.
B. Annuals:
Annual plants like petunias, marigolds, and zinnias can be propagated through seeds or stem cuttings. Collect the seeds from mature plants and sow them directly into prepared soil. Keep the soil consistently moist until the seeds germinate. Alternatively, take stem cuttings from healthy plants, remove the lower leaves, dip the cut end in rooting hormone, and plant them in a well-draining potting mix. Place the cuttings in a warm, bright location and keep the soil moist. In a few weeks, roots will develop, and you can transplant them into larger containers or directly into the garden.
C. Vines:
Summer is also an ideal time to propagate vines like jasmine, passionflower, and honeysuckle. Take softwood cuttings from healthy vines, ensuring they are around 6-8 inches long. Remove any lower leaves and dip the cut end in rooting hormone. Plant the cuttings in a well-draining potting mix and place them in a warm, bright location. Mist the leaves regularly to maintain humidity and keep the soil consistently moist. After a few weeks, roots will develop, and you can transfer the cuttings to larger pots or directly into the ground.
3. Fall and Winter Propagation
Fall and winter may seem challenging for plant propagation, but there are still several plants that can be successfully propagated during these seasons:
A. Bulbs:
Many bulbs, such as tulips, daffodils, and hyacinths, can be propagated during fall. Carefully dig up the mature bulbs and separate the offsets or bulblets that have formed around the main bulb. Plant the offsets in well-draining soil, ensuring they are at the appropriate depth. Water thoroughly and provide a layer of mulch for protection during winter. By spring, the offsets will develop into new bulbs and produce beautiful flowers.
B. Hardwood Cuttings:
Hardwood cuttings are an excellent method for propagating deciduous plants during winter. Select healthy, dormant branches and cut them into 8-12 inch lengths. Remove any buds or leaves from the lower portion of the cutting and dip it in a rooting hormone. Plant the cuttings in a well-draining medium, leaving at least two buds above the soil. Place them in a sheltered area with indirect sunlight and ensure the soil remains slightly moist. Over time, these cuttings will develop roots and can be transplanted in spring.
C. Evergreens:
Evergreen plants like holly, juniper, and boxwood can be propagated through semi-hardwood cuttings during winter. Take 4-6 inch cuttings from the current season’s growth, remove the lower leaves, and dip the cut end in rooting hormone. Plant the cuttings in a well-draining potting mix and place them in a cool, bright location. Mist the leaves occasionally to maintain humidity and keep the soil slightly moist. After a few weeks, roots will develop, and you can transplant the cuttings into larger containers or directly into the garden.
By following this comprehensive calendar guide, you can successfully propagate a wide variety of plants throughout the year. Remember to provide the necessary care and attention to your propagations, such as proper watering, lighting, and temperature conditions. Happy propagating!
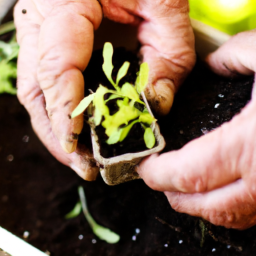
Step-by-Step Guide: How to Propagate Succulents for Successful Plant Propagation
Introduction
Succulents have gained immense popularity among plant enthusiasts due to their unique and captivating appearance. One of the fascinating aspects of succulents is their ability to propagate easily, making them an excellent choice for beginners and experienced gardeners alike. In this step-by-step guide, we will explore the art of succulent propagation, including when and how to propagate different types of succulents successfully.
1. Choosing the Right Time for Propagation
Propagation success greatly depends on selecting the appropriate time to propagate succulents. While some succulents can be propagated throughout the year, others have specific seasons that are more favorable for propagation. Here are some general guidelines:
Spring and Summer
During the warmer months, many succulents enter their active growth phase, making it an ideal time for propagation. The increased sunlight and longer days promote faster root development and overall plant growth. Succulents like Echeveria, Sedum, and Graptopetalum thrive when propagated during this period.
Fall
Fall is another suitable time for succulent propagation. The temperatures are milder, and the soil retains some warmth from the summer, providing an optimal environment for root establishment. Succulents such as Kalanchoe, Crassula, and Aloe vera can be propagated successfully during the fall season.
Winter
Propagation during winter can be challenging due to lower light levels and colder temperatures. However, certain succulents, like some varieties of Haworthia and Gasteria, are well-suited for winter propagation. It is crucial to provide them with sufficient light and warmth to ensure successful growth.
2. Selecting the Propagation Method
Succulents can be propagated through various methods, including leaf cuttings, stem cuttings, offsets, and seed propagation. Each method has its own advantages and requirements. Here are the most common propagation techniques:
Leaf Cuttings
Leaf cuttings are a popular method for propagating succulents with fleshy leaves, such as Echeveria and Sedum. To propagate using leaf cuttings, follow these steps:
1. Gently remove a healthy leaf from the parent plant, ensuring it is intact and undamaged.
2. Allow the leaf cutting to dry and callus for a few days, which helps prevent rotting.
3. Prepare a well-draining potting mix suitable for succulents.
4. Place the calloused end of the leaf cutting into the soil, burying it slightly.
5. Water the soil lightly and place the pot in a bright, indirect light location.
6. After a few weeks, roots will start to develop, followed by the growth of a new succulent plant.
Stem Cuttings
Stem cuttings are an effective method for propagating succulents with thick stems, such as Crassula and Aloe vera. To propagate using stem cuttings, follow these steps:
1. Select a healthy stem and cut it carefully just below a leaf node.
2. Allow the stem cutting to dry and callus for a few days.
3. Prepare a well-draining potting mix suitable for succulents.
4. Insert the calloused end of the stem cutting into the soil, ensuring it is planted deep enough to provide stability.
5. Water the soil lightly and place the pot in a bright location with indirect sunlight.
6. Over time, roots will develop from the leaf node, and a new succulent plant will emerge.
Offsets
Offsets, also known as “pups,” are small plantlets that grow alongside the parent plant. Many succulents, such as Haworthia and Agave, produce offsets that can be easily separated and propagated. To propagate using offsets, follow these steps:
1. Carefully remove the offset from the parent plant, ensuring it has its own roots or a solid base.
2. Allow the offset to dry for a day or two to prevent rotting.
3. Prepare a well-draining potting mix suitable for succulents.
4. Plant the offset in the soil, burying the roots or base slightly.
5. Water the soil lightly and place the pot in a bright location with indirect sunlight.
6. With proper care, the offset will establish roots and grow into a mature succulent plant.
3. Providing Optimal Care for Propagated Succulents
Once you have successfully propagated your succulents, it is essential to provide them with the right care to ensure their healthy growth. Here are some key care tips:
Light
Most succulents thrive in bright, indirect sunlight. Place your propagated succulents in a location where they receive at least 4-6 hours of sunlight per day. Avoid exposing them to intense, direct sunlight, as it can cause sunburn.
Watering
Succulents have unique water requirements, and overwatering is a common cause of failure. Allow the soil to dry out completely between waterings, and always use a well-draining potting mix to prevent waterlogged roots. Water sparingly, especially during the dormant winter months.
Temperature and Humidity
Succulents prefer warm temperatures ranging from 60°F to 80°F (15°C to 27°C). They can tolerate lower temperatures, but it is crucial to protect them from frost. Most succulents thrive in low humidity environments, making them suitable for indoor cultivation.
Soil and Fertilizer
Use a well-draining potting mix specifically formulated for succulents. Avoid heavy garden soil, as it retains moisture and can lead to root rot. Fertilize your propagated succulents sparingly, using a balanced, diluted fertilizer during the active growing season.
Conclusion
Propagating succulents can be a rewarding and enjoyable experience for any plant lover. By understanding the right time for propagation, selecting the appropriate method, and providing optimal care, you can successfully propagate a wide variety of succulents. Whether you choose leaf cuttings, stem cuttings, offsets, or seeds, the art of succulent propagation allows you to expand your collection and share the beauty of these remarkable plants with others. So, roll up your sleeves, follow this step-by-step guide, and embark on your journey of succulent propagation success!

Propagating Herbs: Timing and Techniques for Growing a Thriving Herb Garden
Herbs are a wonderful addition to any garden. They not only add beauty and fragrance but also provide a fresh supply of culinary delights and medicinal benefits. If you want to grow your own thriving herb garden, propagating herbs is an excellent way to expand your collection without breaking the bank. In this guide, we will explore the timing and techniques for successful herb propagation.
1. Choosing the Right Time for Herb Propagation
Timing is crucial when it comes to propagating herbs. Most herbs can be propagated either by seeds or cuttings, and the optimal time for each method may vary. Here are some guidelines to follow:
a) Propagating Herbs from Seeds:
Seeds are a cost-effective way to propagate herbs, but they require patience and a longer time to establish. Some herbs, like basil and dill, are best propagated from seeds directly sown in the garden or containers in early spring when the soil temperature reaches around 60°F (15°C). Other herbs, such as parsley and cilantro, prefer cooler temperatures and can be sown in late summer for a fall harvest.
b) Propagating Herbs from Cuttings:
Cuttings are a quicker way to propagate herbs, as they allow you to clone the desirable traits of the parent plant. Most herbs can be propagated from stem cuttings, which should be taken during the active growing season. Spring and early summer are generally the best times to take cuttings, as the plants are actively growing and have plenty of energy to root. However, some herbs, like rosemary and lavender, can be propagated from semi-hardwood cuttings in late summer or early fall.
c) Propagating Herbs from Division:
Division is another method commonly used for propagating herbs such as chives and mint. It involves separating the plants into smaller clumps, each with their own roots and shoots. This is typically done in early spring or early fall when the plants are dormant or just starting to grow.
2. Techniques for Propagating Herbs
Now that we have covered the optimal timing for herb propagation, let’s explore the techniques involved:
a) Propagating Herbs from Seeds:
1. Prepare the soil: Choose a well-draining potting mix or garden soil and make sure it is moist before sowing the seeds.
2. Sow the seeds: Follow the seed packet instructions for the recommended depth and spacing. Gently press the seeds into the soil and cover them lightly with a thin layer of soil or vermiculite.
3. Provide proper care: Keep the soil consistently moist but not waterlogged. Place the container or garden bed in a sunny location, and protect the seedlings from extreme weather conditions.
b) Propagating Herbs from Cuttings:
1. Select healthy stems: Choose non-flowering stems that are free from diseases or pests. Cut a 4-6 inch (10-15 cm) section of the stem just below a leaf node.
2. Remove lower leaves: Strip off the lower leaves, leaving only a few at the top. This will prevent excessive moisture loss and encourage root development.
3. Dip in rooting hormone (optional): Some gardeners prefer to dip the cut end of the stem in a rooting hormone powder or gel to promote faster rooting.
4. Plant the cutting: Insert the cutting into a well-draining potting mix or a mixture of perlite and vermiculite. Ensure that at least one node is below the soil surface.
5. Provide proper care: Place the cuttings in a warm and humid environment, ideally under a plastic dome or a clear plastic bag. Mist the leaves regularly to maintain high humidity and keep the soil moist but not waterlogged.
c) Propagating Herbs from Division:
1. Dig up the plant: Gently lift the herb plant from the ground, taking care not to damage the roots.
2. Separate the clumps: Use your hands or a sharp knife to divide the plant into smaller clumps. Each clump should have its own set of roots and shoots.
3. Replant the divisions: Dig holes in the desired location and place each clump at the same depth it was previously growing. Backfill the soil and firm it gently around the roots.
4. Provide proper care: Water the divisions thoroughly after planting and keep the soil consistently moist until they establish.
By following these techniques and timing guidelines, you can successfully propagate a wide range of herbs and create a thriving herb garden. Remember to provide the necessary care and attention to your propagated plants, and soon you’ll be enjoying the aromatic flavors and medicinal benefits of your very own herb collection.
Propagating Houseplants: Tips and Tricks for Successfully Multiplying Your Indoor Greenery
Houseplants not only enhance the aesthetic appeal of our homes but also provide numerous health benefits. Propagating houseplants is a rewarding experience that allows us to expand our indoor garden without spending a fortune. Whether you are a seasoned plant parent or just starting your green journey, this comprehensive guide will provide you with step-by-step instructions on when and how to propagate different types of houseplants.
Understanding Plant Propagation
Before diving into the specifics of propagating houseplants, it is essential to understand the concept of plant propagation. Plant propagation refers to the process of creating new plants from existing ones. There are several methods of plant propagation, including stem cuttings, leaf cuttings, division, layering, and seed propagation. Each method has its own requirements and is suitable for different plant species.
Propagation through stem cuttings is the most common and successful method for many houseplants. This method involves taking a healthy stem cutting from the parent plant and encouraging it to develop roots and grow into a new plant. Leaf cuttings, on the other hand, involve taking a leaf or a portion of a leaf and rooting it to form a new plant.
Division is another popular method for plants that naturally produce offsets or have multiple stems. It involves separating the plant into smaller sections, each with its own root system, which can then be potted individually. Layering is a technique that encourages roots to form on a stem while it is still attached to the parent plant. Once the roots have developed, the stem can be cut and potted as a new plant. Lastly, seed propagation is the process of growing plants from seeds, which requires more time and patience compared to other methods.
Choosing the Right Time for Propagation
Timing is crucial when it comes to propagating houseplants. Most houseplants prefer to be propagated during their active growth period, which is typically in spring or early summer. During this time, plants have higher hormone levels that promote root development and growth. However, certain plants can be propagated successfully at other times of the year as well.
It is important to consider the specific requirements of each plant species. Some plants, such as succulents and cacti, prefer to be propagated during the warmer months when their growth is most active. Others, like African violets and begonias, can be propagated year-round. Researching the specific needs of your houseplants will ensure successful propagation.
Step-by-Step Guide to Propagating Houseplants
Now that you have a basic understanding of plant propagation and the importance of timing, let’s dive into a step-by-step guide on how to propagate houseplants:
Step 1: Select the Parent Plant
Choose a healthy and mature parent plant that you want to propagate. It is important to select a plant that is free from diseases and pests to ensure the success of the propagation process.
Step 2: Prepare the Propagation Medium
Depending on the method of propagation, prepare the appropriate propagation medium. For stem cuttings, a well-draining soil mix or a mixture of perlite and peat moss is ideal. Leaf cuttings may require a moist soil mix or a shallow dish of water to encourage root development.
Step 3: Take the Cuttings
Using clean and sharp scissors or pruning shears, take stem cuttings from the parent plant. Make sure the cuttings are around 4-6 inches long and have several nodes. For leaf cuttings, gently remove a leaf or a portion of a leaf from the parent plant.
Step 4: Remove Excess Leaves
For stem cuttings, remove the lower leaves, leaving only a few at the top. This helps to reduce moisture loss and promotes root development. For leaf cuttings, remove the lower portion of the leaf, leaving a small stem-like structure.
Step 5: Apply Rooting Hormone (Optional)
To enhance the success rate of root development, you may choose to apply a rooting hormone to the cut ends of the stem or leaf. Rooting hormones contain growth-promoting substances that stimulate root formation.
Step 6: Plant the Cuttings
Insert the stem cuttings into the prepared propagation medium, ensuring that at least one node is submerged in the soil. For leaf cuttings, gently press the cut end into the soil or place it on top of the moist soil mix.
Step 7: Provide Adequate Care
Place the newly planted cuttings in a warm and humid environment with indirect sunlight. Mist the cuttings regularly to maintain humidity and prevent them from drying out. Avoid overwatering, as it can lead to rotting. Depending on the plant species, roots should start to develop within a few weeks to a couple of months.
Step 8: Transplanting
Once the cuttings have developed a healthy root system, they can be transplanted into individual pots with well-draining soil. Gradually acclimate the new plants to their new environment by exposing them to slightly brighter light and reducing humidity.
Remember, not all cuttings will successfully root and grow into new plants. It is normal to have some failures along the way, so don’t get discouraged. With practice and patience, you will become an expert at propagating houseplants and enjoy the satisfaction of growing your indoor jungle.
By following this step-by-step guide and understanding the specific needs of your houseplants, you can successfully propagate a wide variety of indoor greenery. Happy propagating!
Crisp Recap
Are you looking to expand your garden but unsure of when and how to propagate different plants? Look no further! In this blog post, we will provide you with a plant propagation calendar that outlines the ideal times to propagate various plants and the best methods to do so.
To start, let’s discuss the importance of timing. Different plants have different growth patterns and respond to propagation methods differently. For instance, some plants thrive when propagated in the spring, while others prefer the fall. Our calendar will help you identify the optimal times for each plant, ensuring the best chance of success.
Next, we will delve into the various propagation methods. From stem cuttings and division to layering and seed sowing, there are numerous techniques to choose from. We will guide you through each method, providing step-by-step instructions and essential tips to ensure you achieve the best results.
Whether you’re a seasoned gardener or just starting out, this plant propagation calendar will be an invaluable resource. By understanding when and how to propagate different plants, you can expand your garden with ease and enjoy the satisfaction of growing new plants from scratch. So, grab your gardening gloves and get ready to propagate like a pro!
Your Questions Answered. Comprehensive FAQ:
Q1: What is plant propagation?
A1: Plant propagation is the process of creating new plants from existing ones. It involves various methods such as seed sowing, stem cuttings, division, layering, and grafting.
Q2: Why is a plant propagation calendar important?
A2: A plant propagation calendar helps gardeners determine the ideal time and methods to propagate different plants. It ensures better success rates and healthier plants by considering factors like climate, plant growth stages, and specific requirements.
Q3: How can I determine the best time to propagate a plant?
A3: The best time to propagate a plant depends on its specific needs and characteristics. It’s essential to research each plant’s ideal propagation period, which can vary based on factors like the plant’s growth cycle, climate, and local conditions.
Q4: What are some common methods of plant propagation?
A4: Common methods of plant propagation include seed sowing, stem cuttings, division, layering, and grafting. Each method suits different types of plants and offers varying success rates.
Q5: How do I propagate plants from seeds?
A5: To propagate plants from seeds, you need to collect mature seeds, prepare a suitable growing medium, sow the seeds at the correct depth, and provide appropriate moisture and light conditions. Each plant species may have specific requirements.
Q6: Can I propagate plants from stem cuttings?
A6: Yes, stem cuttings are a popular method of plant propagation. You can take a cutting from a healthy plant, remove lower leaves, dip the cut end in rooting hormone (if needed), and place it in a suitable growing medium. Regular watering and proper care are crucial for successful root development.
Q7: What is division in plant propagation?
A7: Division involves separating a mature plant into multiple sections, each with its own roots and shoots. This method is commonly used for perennials like hostas or ornamental grasses. Dividing plants helps maintain their health, control growth, and create new plants.
Q8: What is layering in plant propagation?
A8: Layering is a method where a stem of a plant is bent and buried in the soil while still attached to the parent plant. Over time, the buried portion develops roots, and a new plant is formed. This technique is often used for plants with flexible stems, such as certain shrubs or vines.
Q9: Can I propagate plants through grafting?
A9: Yes, grafting is a technique where a part of one plant (the scion) is joined with another plant (the rootstock) to create a new plant. This method is commonly used for fruit trees, roses, and other plants where specific characteristics or disease resistance are desired.
Q10: Where can I find a plant propagation calendar?
A10: You can find plant propagation calendars online, on gardening websites, or in gardening books. Many gardening organizations or agricultural extension offices also provide region-specific calendars. These resources can guide you on when and how to propagate different plants based on your location and climate.
Dr. Olivia Green is a botanist with over two decades of experience in indoor plant cultivation. She holds a Ph.D. in Plant Biology and has dedicated her career to researching plant behavior in controlled environments. Dr. Green is passionate about helping plant enthusiasts master the art of indoor gardening through her extensive knowledge and practical insights.